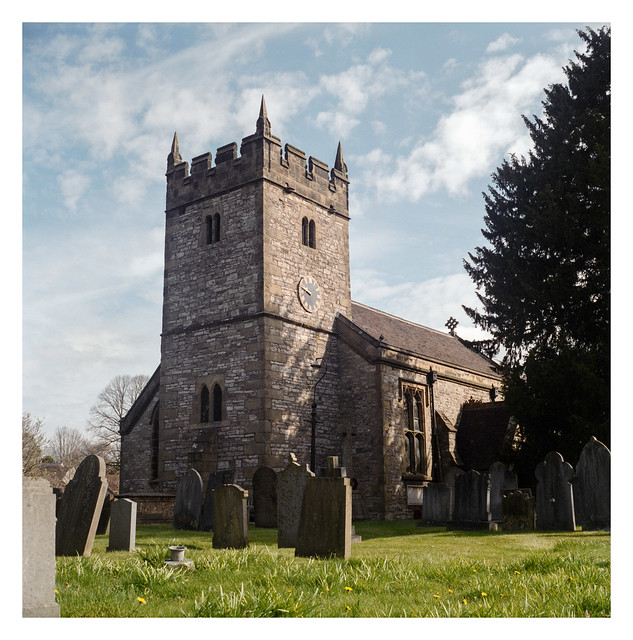
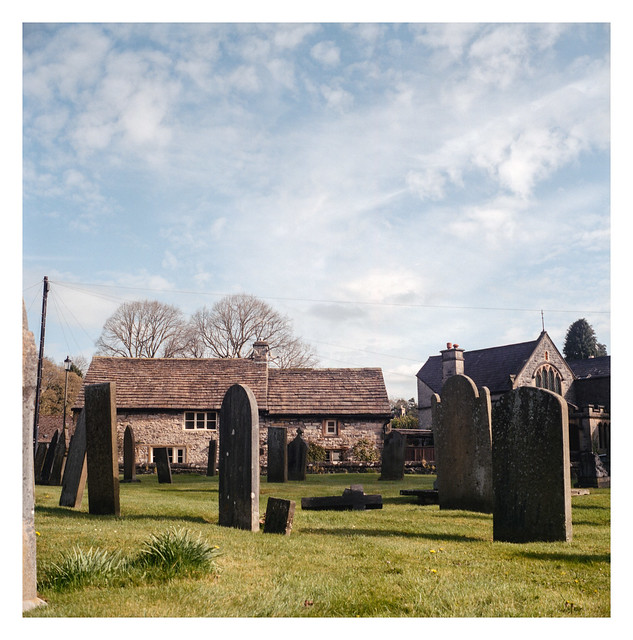
Just a quick post today with a couple of photos showing Holy Trinity Church in Ashford-in-the-Water, and a view across its graveyard. The church dates back to the 12th century but was apparently re-modelled extensively in the 19th century.
Yashicamat 124G & Fujifilm Pro 400H. Lab developed. Home scanned and converted with Negative Lab Pro.
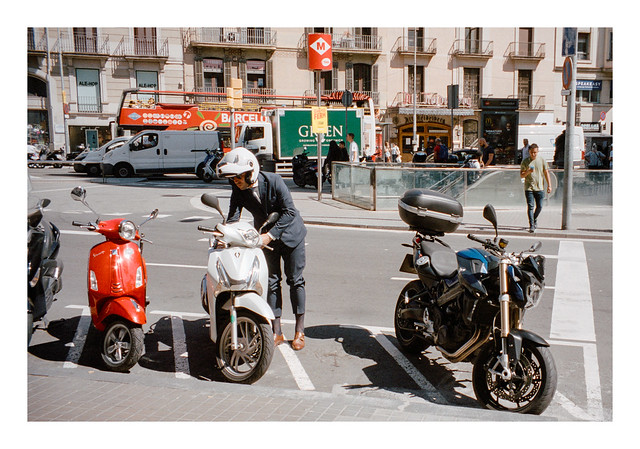
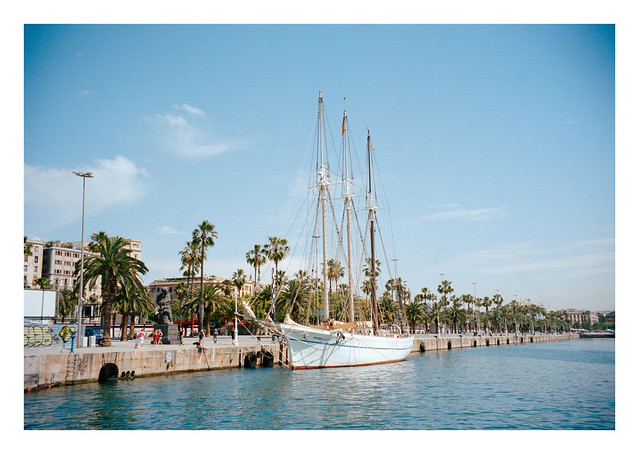
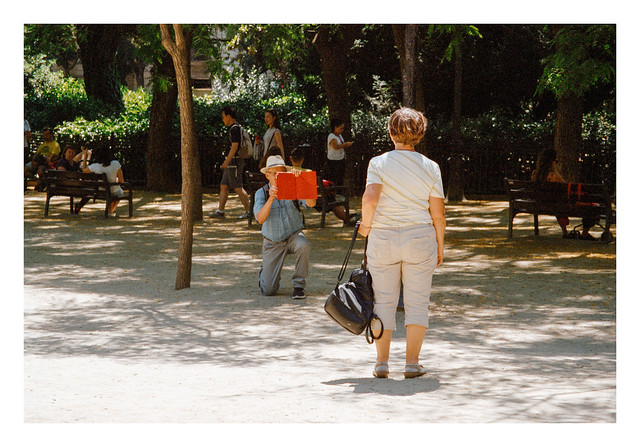
Another mini-batch of photographs shot during a trip to Barcelona almost three years ago now. Again, these are all recent re-scans, converted with Negative Lab Pro.
The photo in today’s post is a few years old – it was taken on a cold, but bright, February day back in 2018 on the edge of the moorland near Surprise View in the Peak District national park. I don’t think I’ve published this picture online anywhere before now.
I re-scanned it, and the rest of the photos on the roll, yesterday, using Vuescan to make a linear RAW DNG file and then Negative Lab Pro for the conversion in Lightroom.
Now I understand how to use NLP properly (or at least much better – there are still a bunch of controls and sliders that I stay away from!), I’m very pleased with the ease of getting colours that I’m happy with almost straight out of the box. I still tweak things a little, first using NLPs controls, and then maybe some minor tweaks in Lightroom itself (usually adding a little clarity and sharpness), but there has been none of the annoying mental gymnastics where I can’t decide if the colours are “off” in some hard to define way.
Obviously, colours are subjective, whether it be someone sat at home trying to get what they think Portra or whatever film stock they’ve used to look “right”, or a technician in a photo-lab making adjustments in the Noritsu software (or whatever it is they use) on the behalf of the photographer. So far, Negative Lab Pro has given me colours that feel correct with very little faff on my part, and for this I am thankful. I love black and white photography, but this new found ability to get results I’m happy with from C41 film is making me want to shoot more of the stuff (and re-scan some of the photos where I had less than satisfactory results in the past). It’s just a shame I need to sell a kidney to afford colour film these days!
Zeiss Mess-Ikonta 524/16 & Kodak Portra 400. Lab developed. Home scanned and converted with Negative Lab Pro.
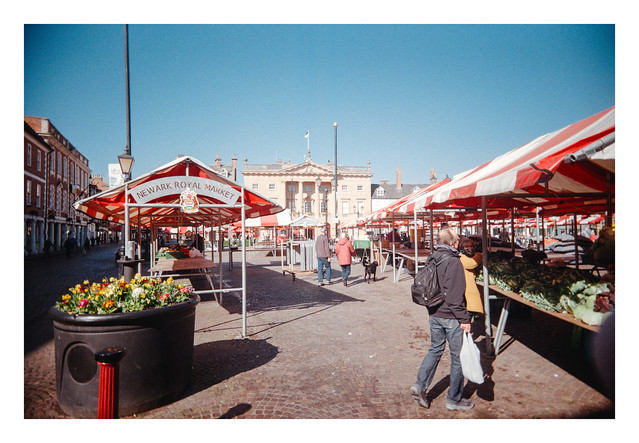
Two different apsect of Newark market here today. A couple of pictures from outside in the market square where the red and white striped awnings on the stalls glowed vibrantly in the bright sunshine. The third shot taken inside the market hall in a shady, but nicely lit arcade. I’m quite pleased with the interior shot given the somewhat basic (and un-changeable) settings of the camera used – fixed f/11 aperture and 1/100sec shutter speed. The shadows are a little muddy but, on the whole, it’s an appealing photograph, I think.
As is seemingly the RETO UWS’s remit, one of the shots has been photobombed by my fingertip.
Reto Ultrawide & Slim & Kodak Gold. Lab developed. Home scanned and converted with Negative Lab Pro.
Away from pictures of Flamborough now and, for a few days to come, on to some photos from a trip to Newark I took with my wife last month. Newark is a market town in Nottinghamshire, about thirty or forty miles from home. It sits on the River Trent and has the ruined remains of a castle. They have an English Civil War museum there which I would quite like to take a look around, but that will have to wait for a future trip.
The town centre hasn’t yet been fully homogenised by all the same chain stores that you find everywhere else, although they are certainly making inroads. As a result it’s quite a nice place to wander around for a few hours. I’m not a big fan of shopping unless I either have something specific I want to buy, or it’s a shop full of stuff I find particularly interesting, so a lot of the day was spent with my wife browsing inside the shops while I stayed outside and took photographs of whatever I found interesting. This suited me just fine. 🙂
The only film camera I had with me on the day was the RETO Ultrawide and Slim, in which I’d loaded a roll of Kodak Gold. I was chancing things a bit by using a 36exp roll – I’ve heard the slightly flimsy film advance on the camera can struggle with rolls longer than 24exp, but I’d decided to risk it. The film advance definately seemed to be getting harder to turn as I approached the end of the roll, but there were no catastrophic failures thankfully. I do wish I’d taken a different camera though. While the RETO UWS is fun to use, having seen the results, I can’t help but wish I’d used something with a bit more fidelity for a trip like this. I also managed to get my fingers (and even the camera strap) into the frame on several shots, a much worse ratio than my first roll through the camera where I think it only happened once.
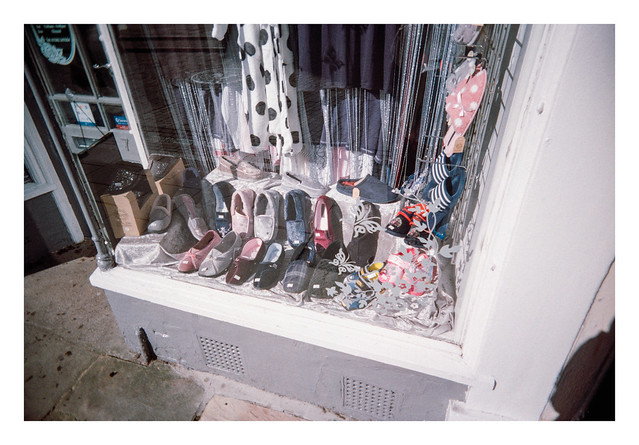
Today’s picture is kinda random, but I liked the arrangement of these colourful slippers in this shop window. While my finger didn’t get into the frame on this occasion, my shadow has crept in at bottom right.
Reto Ultrawide & Slim & Kodak Gold. Lab developed. Home scanned and converted with Negative Lab Pro.
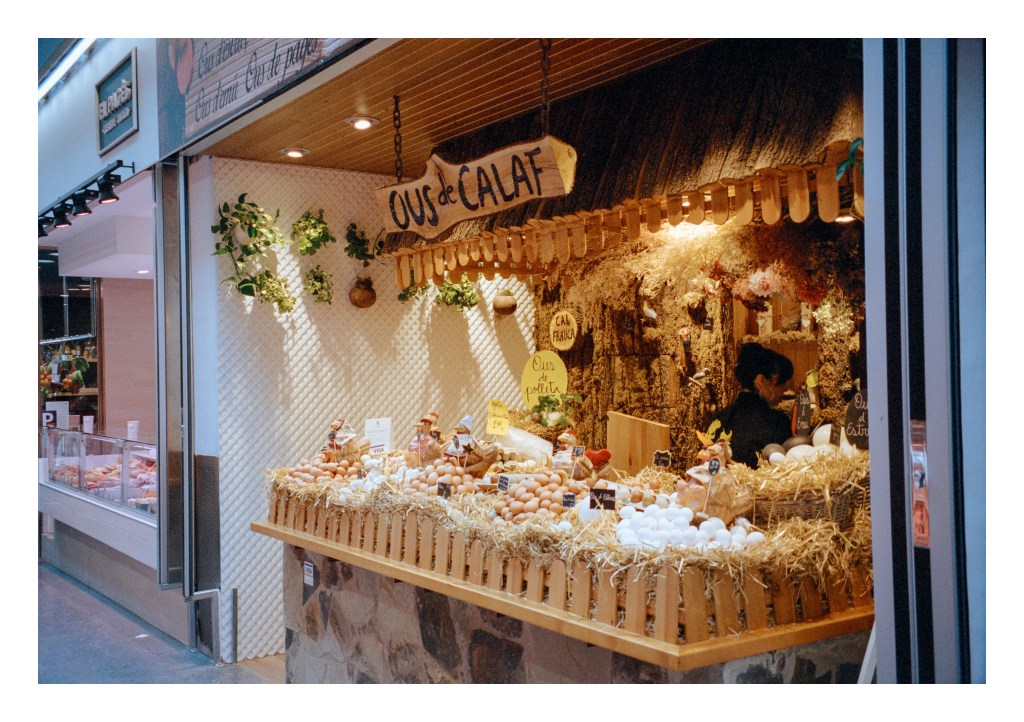
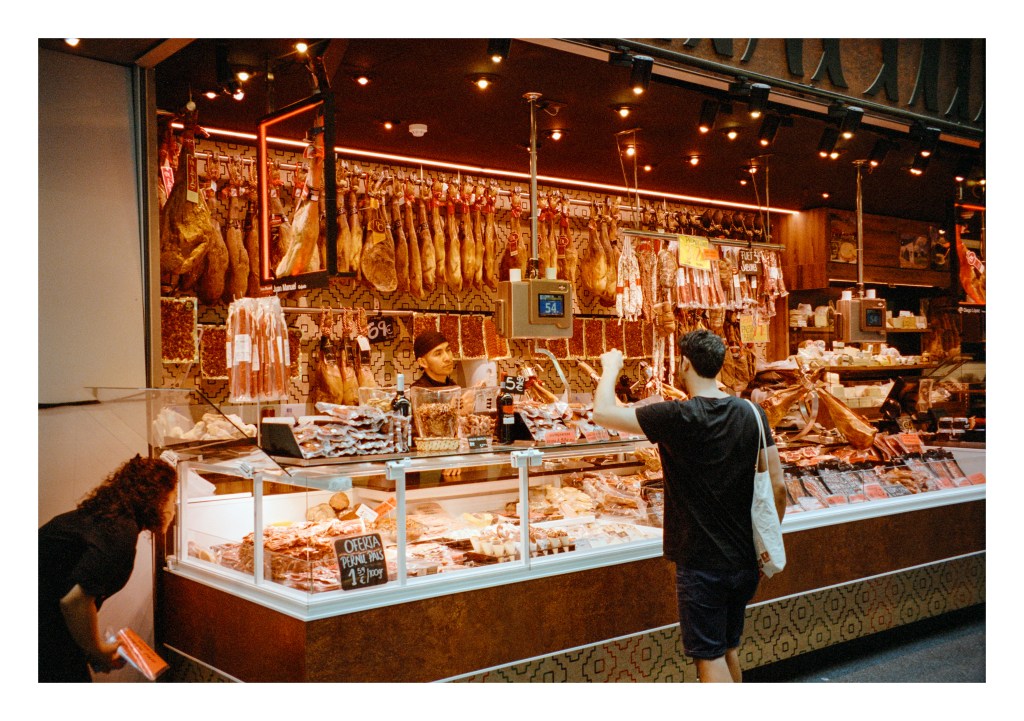
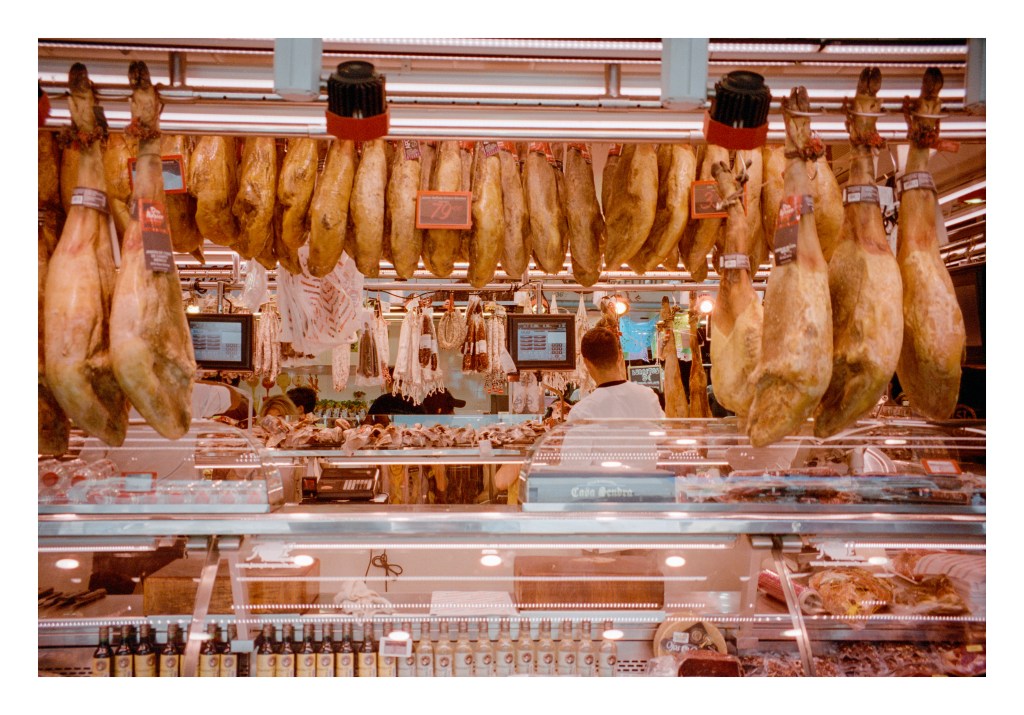
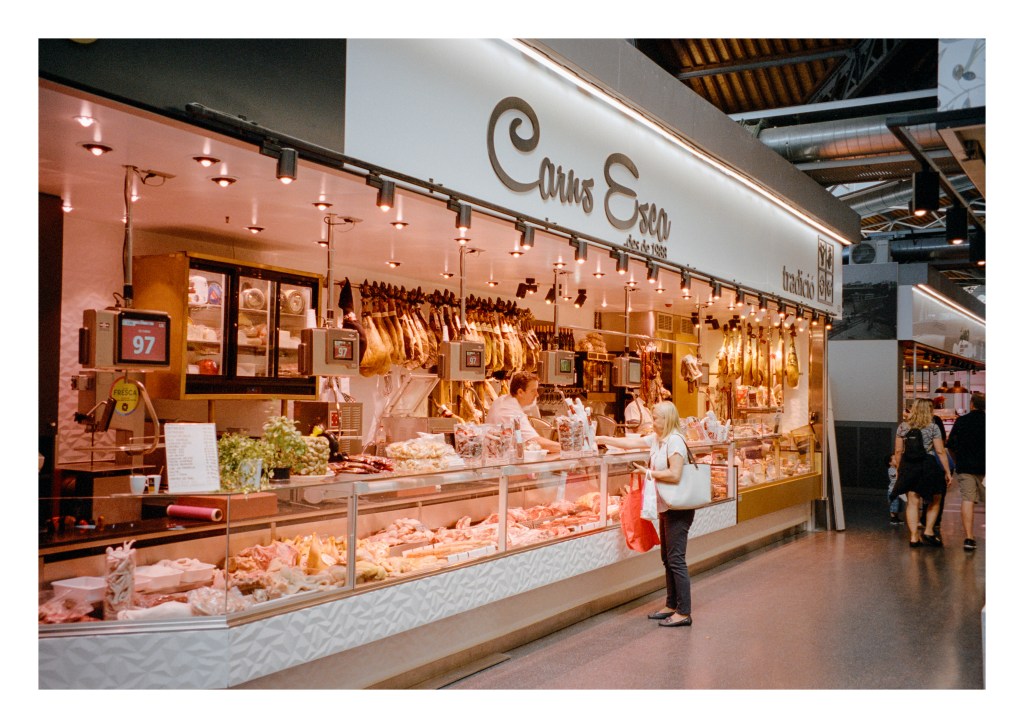
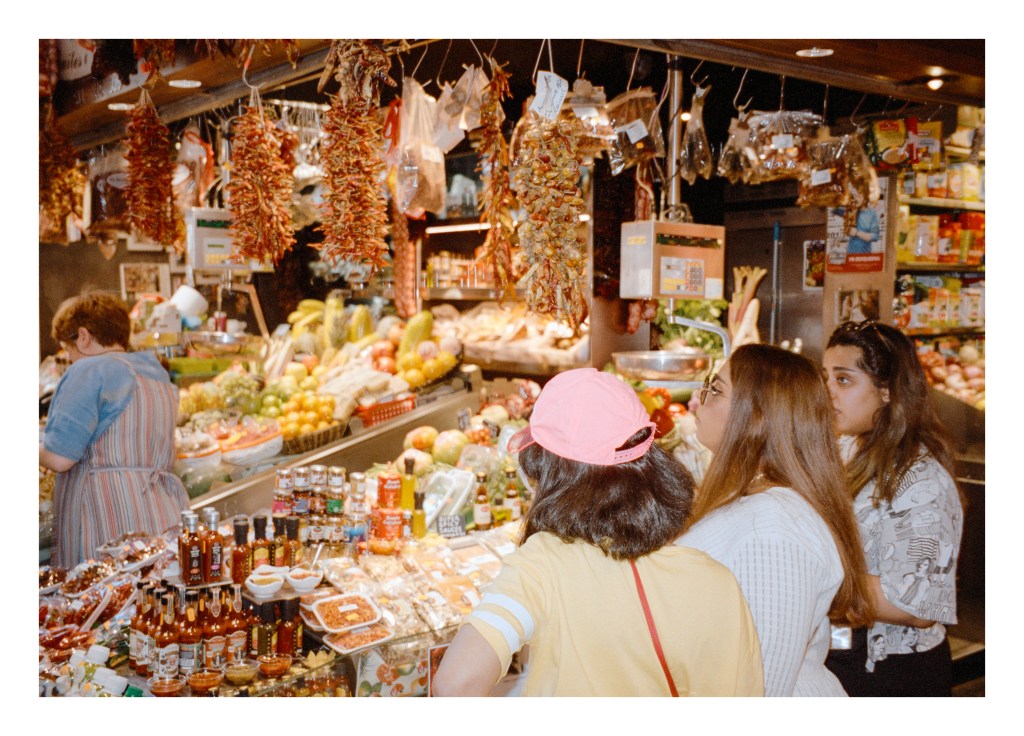
I’ve been re-scanning some older negatives over the past couple of days – some Portra 400 shots made during a trip to Barcelona with my wife back in 2019. The main reason for the re-scanning (actually not re-scans really, as the originals were lab scans) is to see what they look like when converted with Negative Lab Pro. The answer is… much better than any previous attempts I’ve made.
The original lab scans were fine but I know I can get much more resolution and detail out of my Plustek than the scan sizes the lab provides can offer – even their large scans – with the bonus of it not costing me anything to do so. And I’m finding that Negative Lab Pro is giving me colours that I’m actually happy with!
So today, here are several photos I took inside one of the markets in Barcelona – the Mercat de Sant Antoni, I believe. I guess that British market stalls are just as interesting to look at really, but there’s a definite draw in seeing the different wares on offer in other countries. Some markets in the UK might provide delicatessens akin to the ones here, but they are not commonplace, so it’s always interesting to see the mundane through the eyes of a visitor.
I suspect, like many people, I was pleasantly surprised when Kodak recently revealed the re-introduction of it’s Kodak Gold emulsion in 120 format. I’d long wished that Kodak or Fuji might relaese one of their consumer emulsions in this format, so was glad to hear of its imminent release. I was also pleased to see that it would retail for less than it’s other colour films although, given the skyrocketing cost of C41 at present, it still sells for more than Ektar did not so long ago. Nevertheless, I decided to treat myself to a pack of five rolls.
My pack of film arrived in the mail at the start of the month and, last weekend, on a sunny spring morning, I decided to go out and see what I might photograph on a roll of it. I didn’t want to go on a big day out, so decided to head to the botanical gardens in Sheffield with the intent of maybe getting some pictures of the plants in the glasshouse.
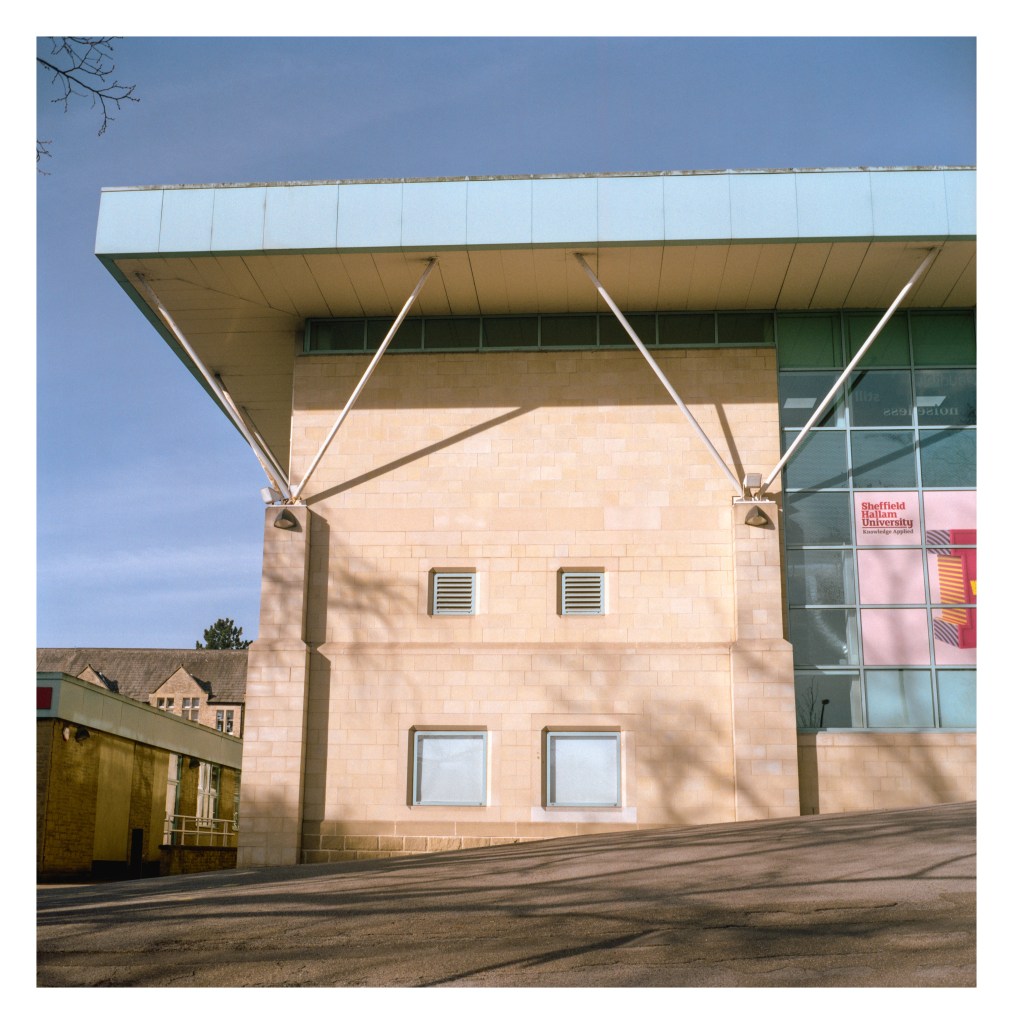
After arriving I took a picture of one of the university buildings on the street where I parked my car. It’s not the best picture, but the colours caught my eye.
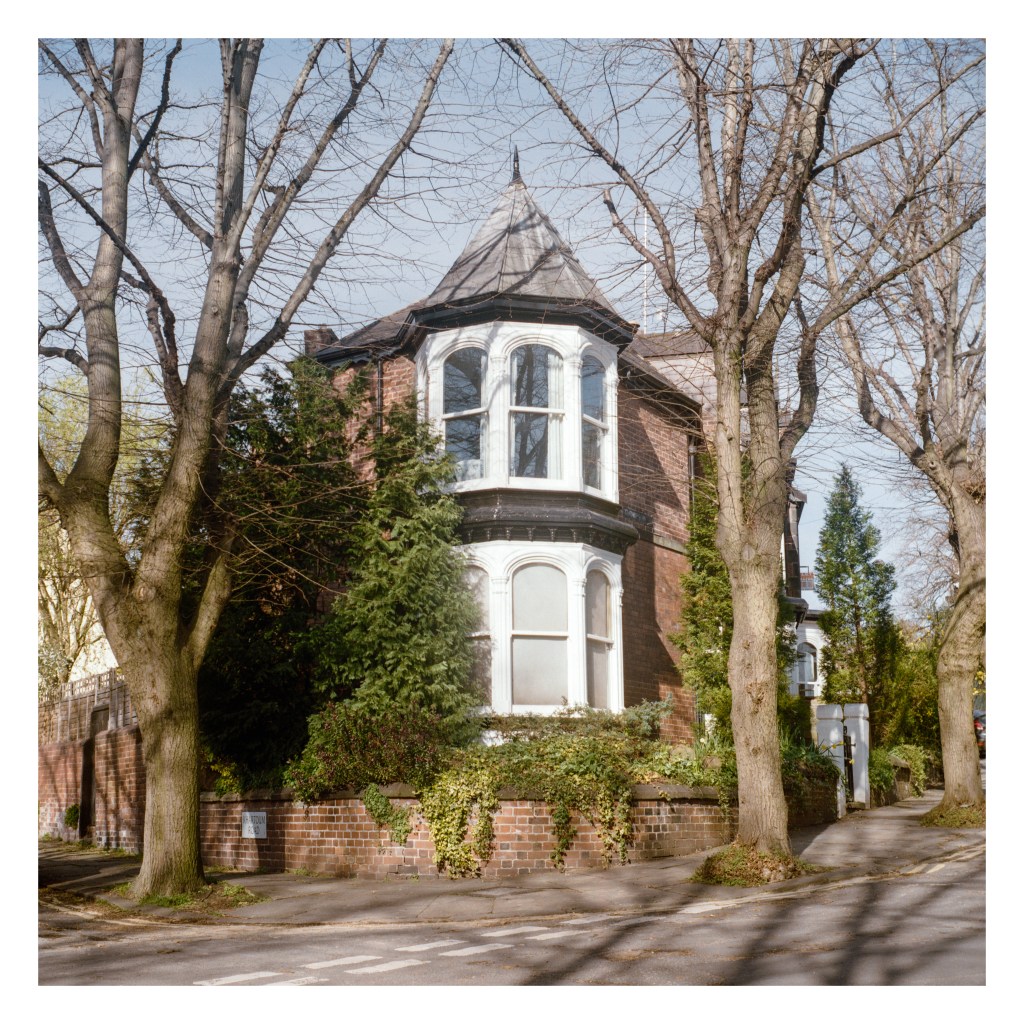
The next image was of a house with a cuppola near the entrance to the botanical gardens. This shot I’m really happy with. I like how the cuppola is framed nicely with the tree branches, and also the conifer is similarly framed on the right of the image. Plus the light was great.
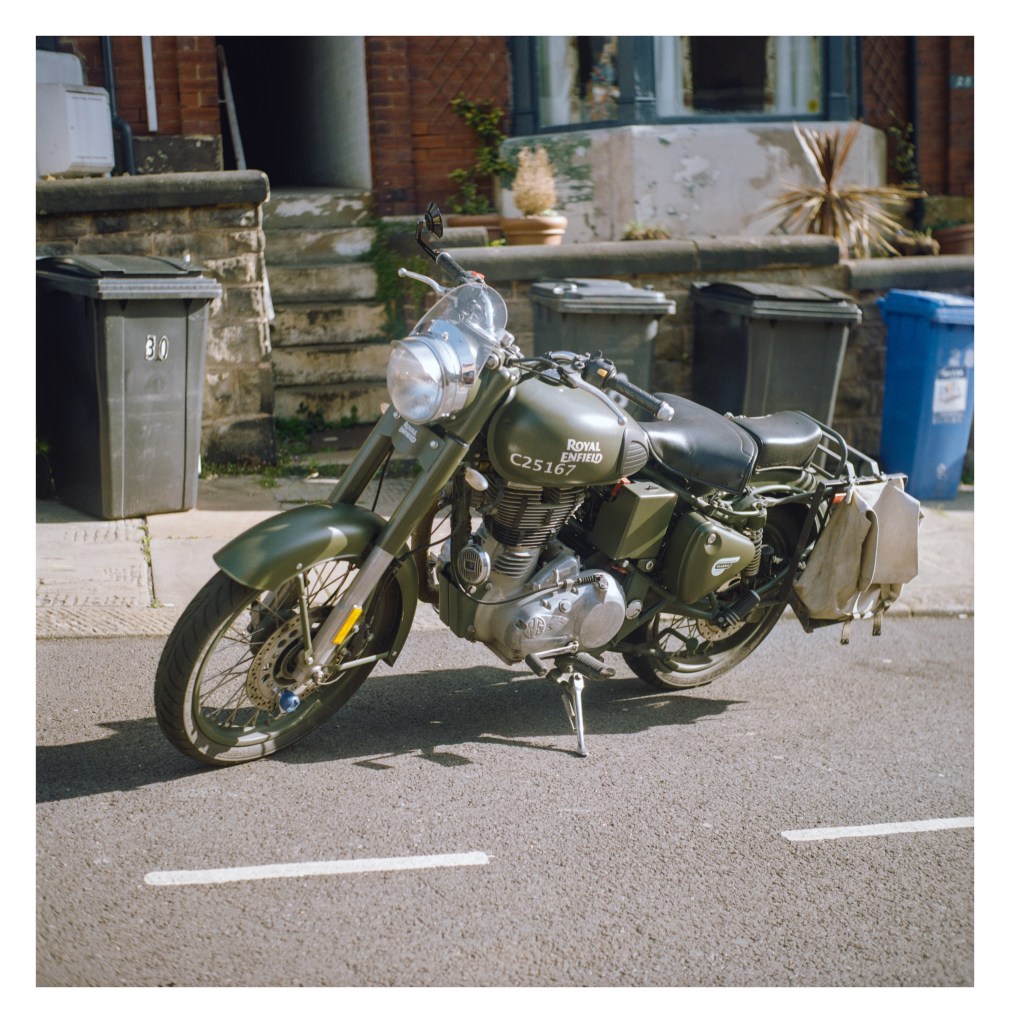
It was at this point that I discovered that the gardens don’t open until 10am, so I had some time to kill (it was only around 9:20am when I got there). So I decided to walk up the street beside the park and then head over towards Endcliffe Park instead. On this street I noticed a vintage motorcycle and got another photo. I’d have liked to open up the aperture to get more separation of the bike from the background but, even with relatively slow 200asa film, the light was too bright and as the Yashicamat has a maximum shutter speed of 1/500sec, I had to stop it down further to avoid overexposure. It’s a pity about the bins, but what can you do?
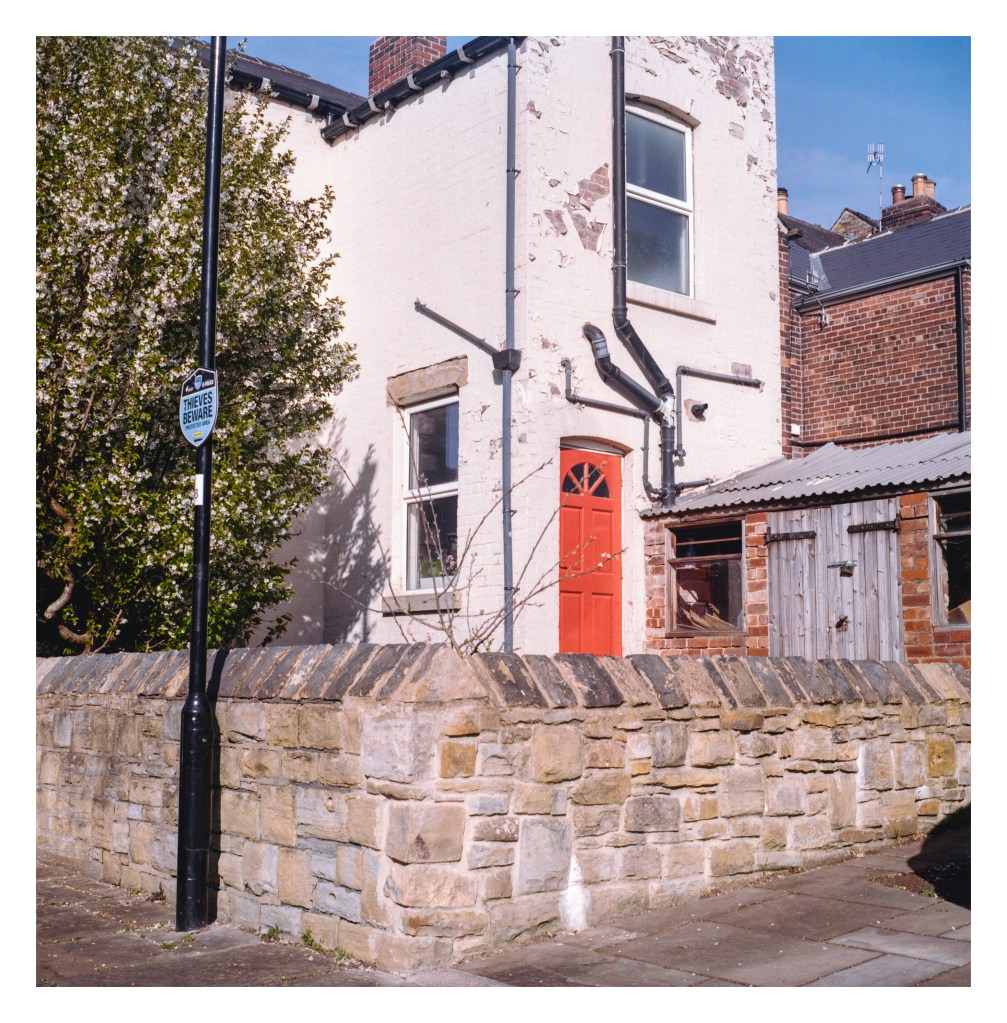
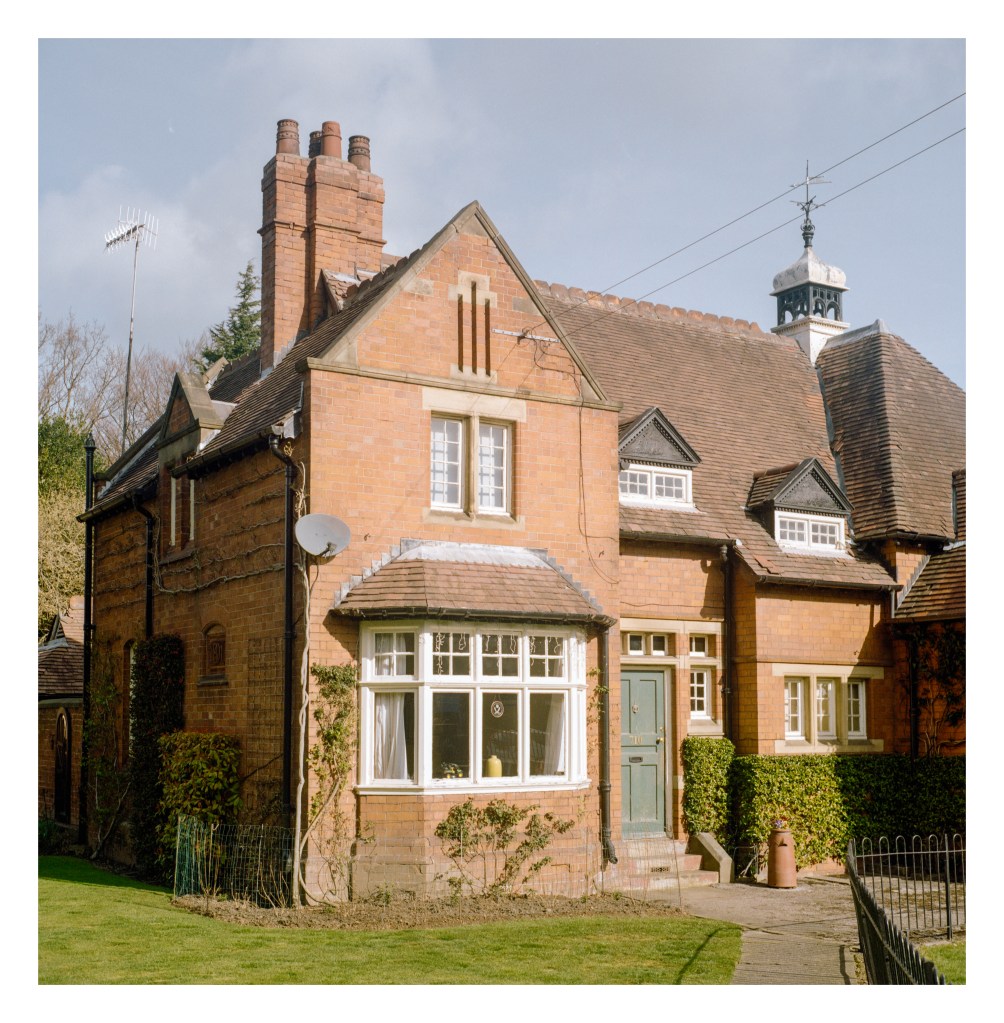
Just up the road from the bike was this house with a brightly painted door that I liked the look of.
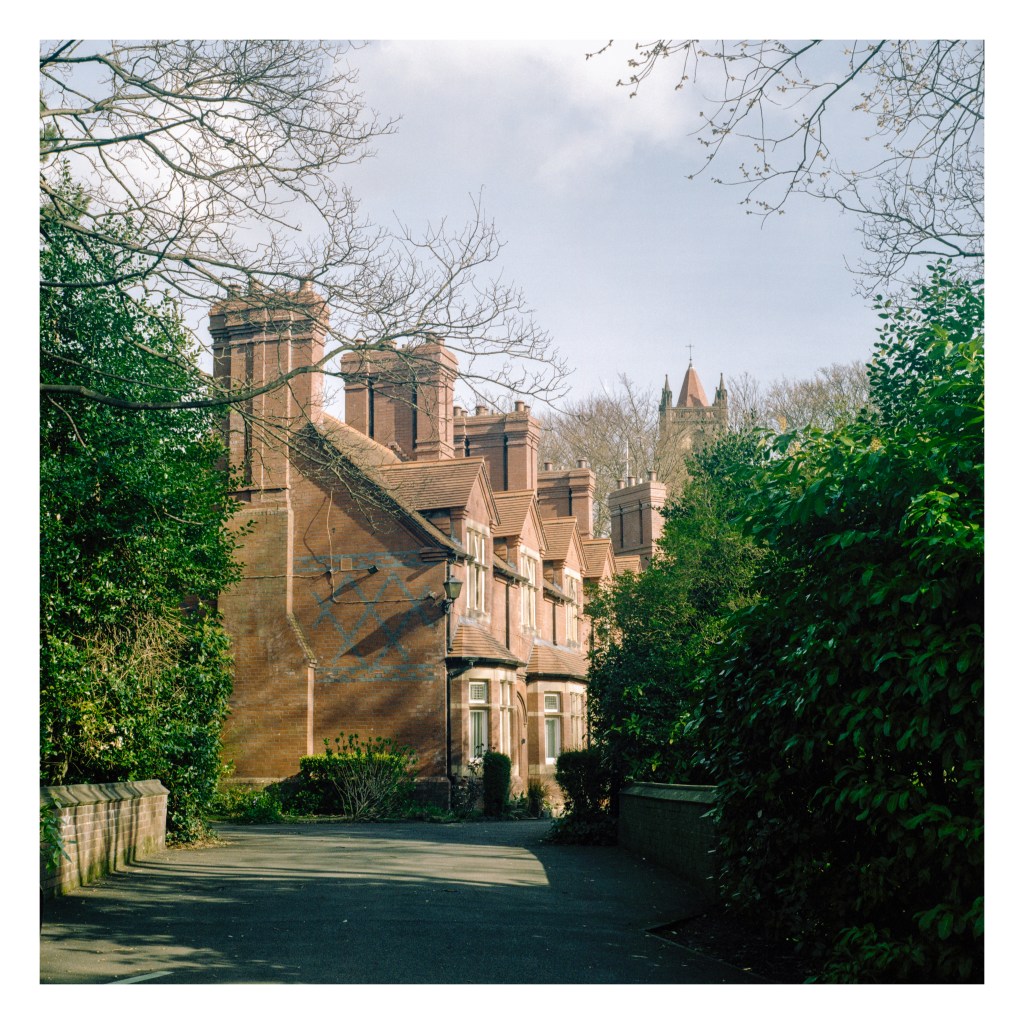
Close to Hunter’s Bar roundabout, just below Endcliffe Park, is a row of attractive old houses largely hidden from view by large shrubs, but I was able to get a nice angle on them. Again, the light was lovely, and I like the church tower that peeks up behind them in the background.
Just inside the park is this lovely house. It’s the arts-and-crafts style park pavilion and lodge building, dating to 1891. The building has Grade II listing status.
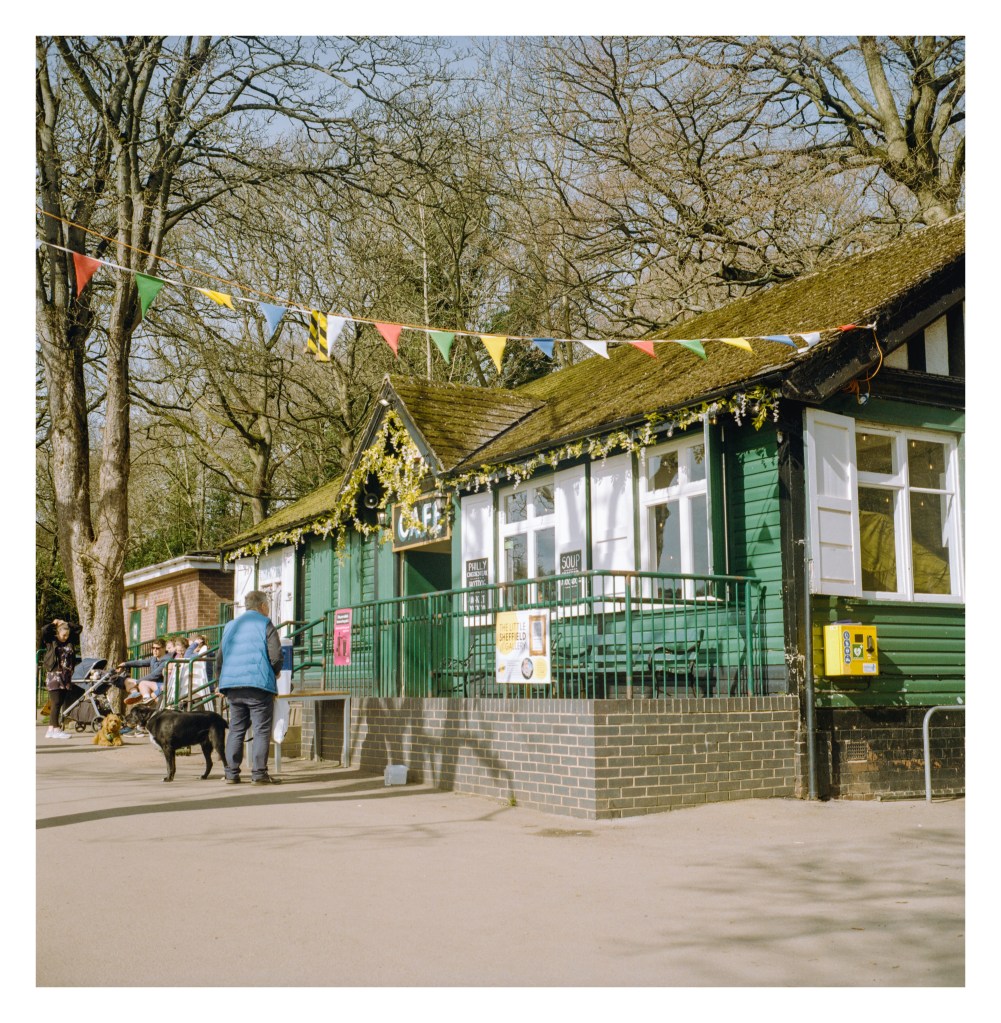
I took a walk up Rustlings Road which runs beside the park – making several photos along the way with my XA3 that I had tucked away in my jacket pocket – before then wandering back through the park itself along the footpath. There are a couple of millponds here – evidence of the area’s industrial past – where I remember catching small fish in a net on a day out with my nan back when I was little. The ponds are filled with water from Porter Brook which runs down the valley before joining the River Sheaf in the city centre close to the railway station. Near the bottom of the park, where the large playing field is, sits a cafe. It was very busy on this sunny morning with many people sitting outside in the seating area across the path.
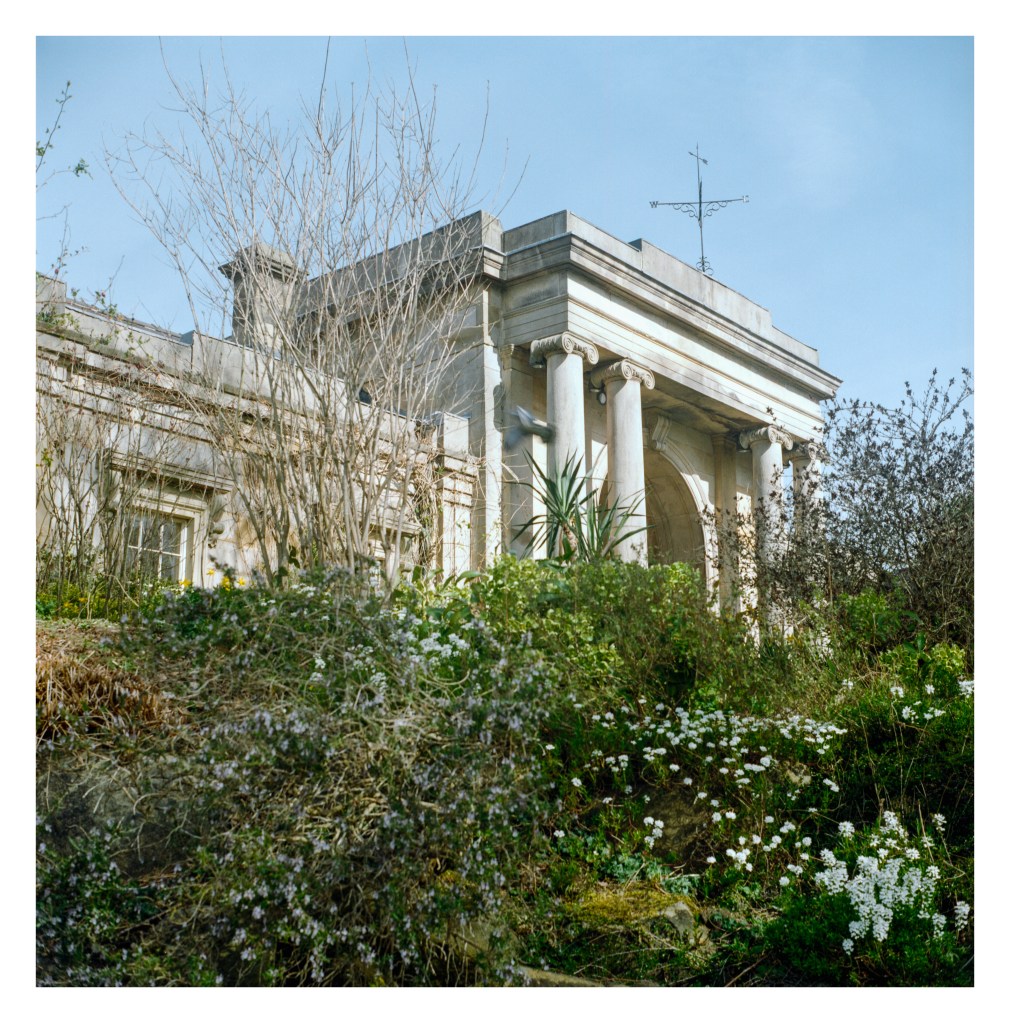
And finally, after leaving the park and walking up Brocco Bank, I finally arrived at my original intended destination – the botanical gardens. By this time I only had a single frame of the Kodak Gold remaining to be shot, and I made this picture of the gatehouse.
All the pictures were scanned on my Epson V550 flatbed using Vuescan to create RAW DNG files. These were then converted to positives with Negative Lab Pro. I’m still getting the hang of NLP, but I’ve got a group of settings that seem to be producing quite nice results for Kodak Gold (although I do still tweak them further in Lightroom afterwards).
I’m happy with the results I got from this first roll of Gold in 120 format and look forward to shooting more of it.
Yashicamat 124G & Kodak Gold 200. Lab developed. Home scanned and converted with Negative Lab Pro.
There are two lighthouses at Flamborough Head. The original lighthouse was completed in 1674 but never lit. It stands at the edge of a golf course now with a Grade II listing.
The new lighthouse was first lit in December 1806 and remains in use today, although the last keepers left when the light was automated in the 1990s. As with its older sibling, it also has a Grade II listing.
Standing atop the promontory, the light can be seen from numerous places along the coast as well as, obviously, from the sea. Whenever I’ve visited places like Scarborough or, when I was younger, Filey, I would look for the light in the south as evening arrived. There is something evocative and even a little magical about catching that distant flash of illumination as the beam sweeps your position.
I took a number of pictures of the lighthouse on this trip, so don’t be surprised if they turn up here in the coming days. 🙂
Bronica ETRSi, Zenzanon 75mm f/2.8 PE & Lomography Color Negative 100 .
One of my biggest issues with colour film is, well… the colour. Getting the darned stuff to look “right” is a test for my patience and also my sanity it can seem. Even when I get it looking right, a later glance reveals that I was completely incorrect and it looks terrible. How much of this is down to the actual results of my efforts (or the lab’s) and how much is down to the obsessive perfectionism that my brain likes to lay on me from time to time is up for debate.
I’ve gone through a number of iterations when it comes to scanning colour film negatives over the past five or six years. When I first began scanning my own film, my only option was my Epson V550 and the Espsonscan software that came with it. This gave passable results but not ones I was ever truly happy with. Colours would look “off” sometimes, with odd colour casts which would differ from film to film. I tried using ColorPerfect as a Photoshop plugin, which addmitedly helped (a bit) but also seemed to render shadow areas full of horrible looking noise.
Later, when I got my Plustek 35mm scanner, it came with a copy of Silverfast, so I tried that with it’s built-in film profiles. While I was able to get better results – and in some cases ones I was quite happy with – they still didn’t look right, no matter how I played with the settings.
So then I tried Vuescan. Again, never quite right (although it does a great job on 35mm slides).
I then decided to start getting my colour film developed by a lab that provided scans at a reasonable price. There was an additional cost for posting my film off, and a delay while I waited for the results, but on the whole the scans were nice, if perhaps a little warm looking (the lab would have changed that had I asked though). For a while I was happy, but the thing that put me off in the end was the resolution of the scans. While 35mm was acceptable, they used the same “x pixels on the short side” ratio whether it was a 35mm or medium format negative, leading to the frustrating situation where a 6×6 120 film negative would come back with a smaller scan than a 35mm image. So I went back to using my local lab and scanning them myself again. This decision was made mostly when I discovered Grain2Pixel.
Grain2Pixel – a free Photoshop Plugin – converts linear scans to positives. Here, at last, I thought I had found THE solution. It gave me the best results I’d seen so far… most of the time anyway. Some films, unfortunately, it struggled with (for me at least), particularly Kodak Portra, always giving the images a blue cast that was difficult for me to remove satisfactorily. With a lot of faffing about in Lightroom I could get them close to where I wanted, but I was still unsatisfied, and there would always be a few problem negatives that seemed to actively reject giving anything close to accurate colours.
Negative Lab Pro (NLP) has probably been the go-to solution for scanning colour film negatives for a few years now. I’d played with the trial vesion before but not been any more satisfied with the results than from Grain2Pixel, so never paid for the license. Last week though, I decided to have another go. This time I spent much more time understanding how it worked and, lo-and-behold, after RTFM’ing I got much better results. After playing with the 12 free conversions that you get with the trial version, I decided to bite the bullet and put my hand in my pocket for the full version.
This week I’ve been scanning a variety of negatives, using Vuescan to create a RAW DNG file of the images, and then converting them in Negative Lab Pro. I’ve mostly been happy with the results – particularly some Portra 400 negatives that I’m very pleased with (see examples below).
This is a Noritsu lab scan of a 35mm Portra 400 negative.And this is my Plustek 8100 scan, converted in Negative Lab Pro (with a few minor lightroom tweaks to add a touch more contrast). It has considerably higher resolution than the lab scan.And, for the sake of completeness, this is the unedited scan straight from Negative Lab Pro (althougth I obviously made tweaks during the actual conversion process).
However, I’ve spent most of my time playing with a set of Portra 160 negatives that were exposed about a year ago and which I had been unable to get results that I was truly convinced by. Grain2Pixel didn’t give me the results I wanted, nor did Vuescan, and it was my old friend EpsonScan that had given me the best result (although still not good results). So. I’ve re-scanned the negs, got the RAW DNGs, and been messing with them in NLP. The good thing about NLP is that it’s non-destructive. I can un-convert the original file back to a negative and re-convert it using different settings. This gives a lot of scope for experimentation to get a look I’m happy with. I’m still not sure I’m there with this roll of film yet, but I’m happier than I was before.
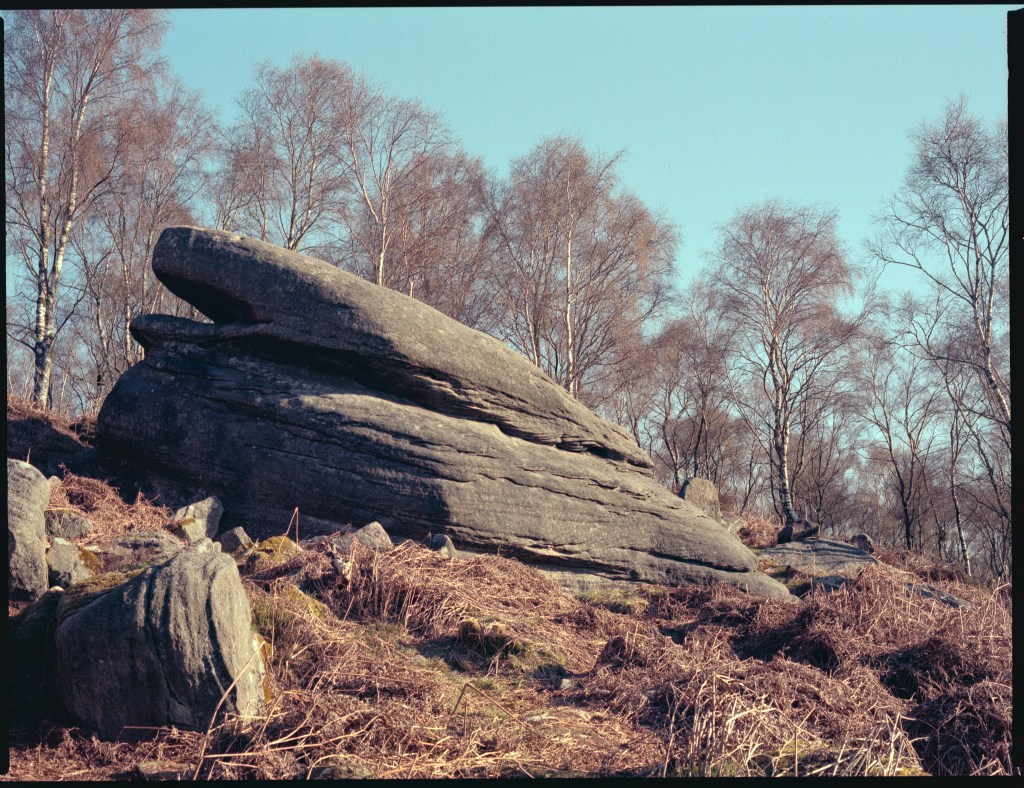
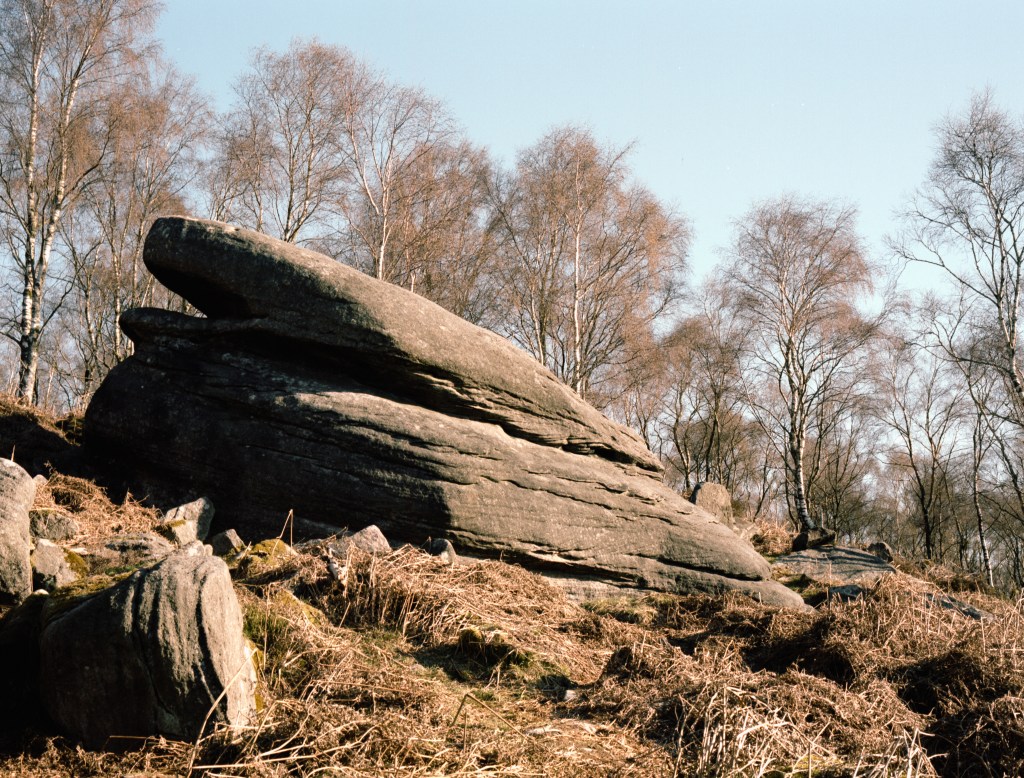
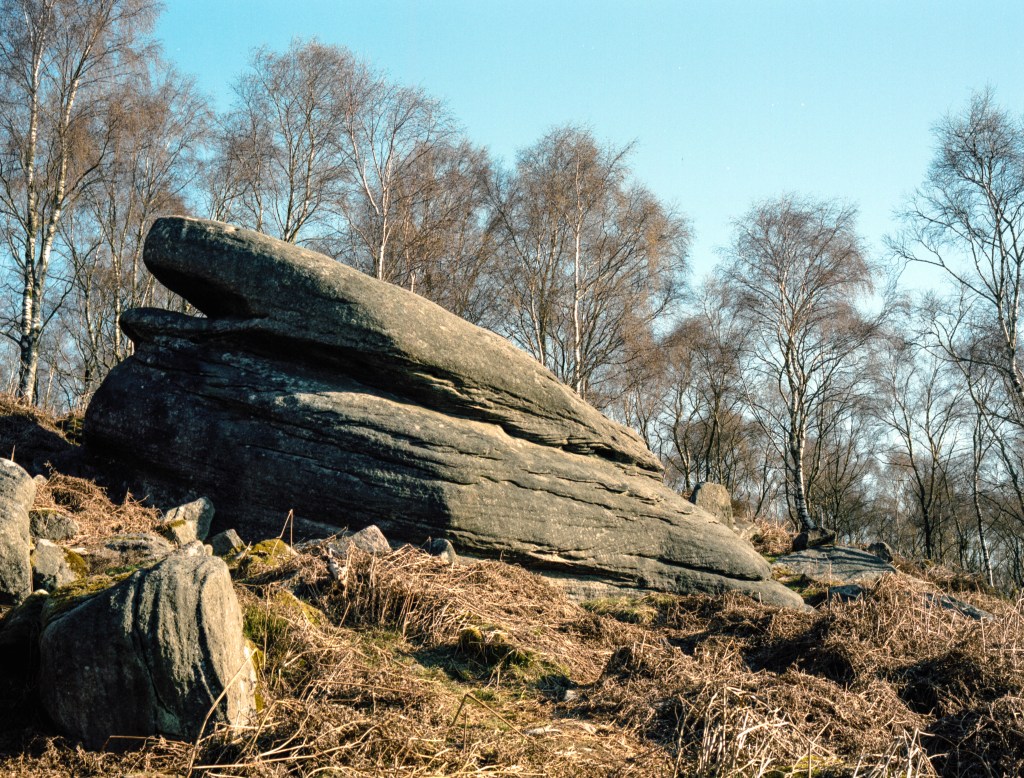
The first shot on the roll was the one that gave me the most headaches – a photograph of a large gritstone boulder in front of some silver birch trees, lit my bright early morning light. The Epsonscan result looked wrong – all cyan and brown, but not in a subtle way. The first NLP version looked better intitially, although maybe still not right. My second attempt with NLP using a different scanner profile and different tweaks was much better though. Here are the three versions (so far!):
My initial Epsonscan attempt. It looks off. Admitedly, more tweaking in Epsonscan might fix this, but it was beyond my talents and patience.The first Negative Lab Pro attempt. Better, but still not right.My latest Negative Lab Pro attempt. I’m not saying it’s perfect, but this one feels much more natural to me.
I think, at the end of the day, I’m never going to get a “perfect” set of colours. There are too many variables at stake. What I need to do is nail a workflow that allows me to get colours that I like on a consistent basis. I think that this is the most difficult part of all, but the journey continues. Now I plan on re-scanning a bunch of different film stocks to see how NLP compares with my earlier scans. Maybe another post at some point…