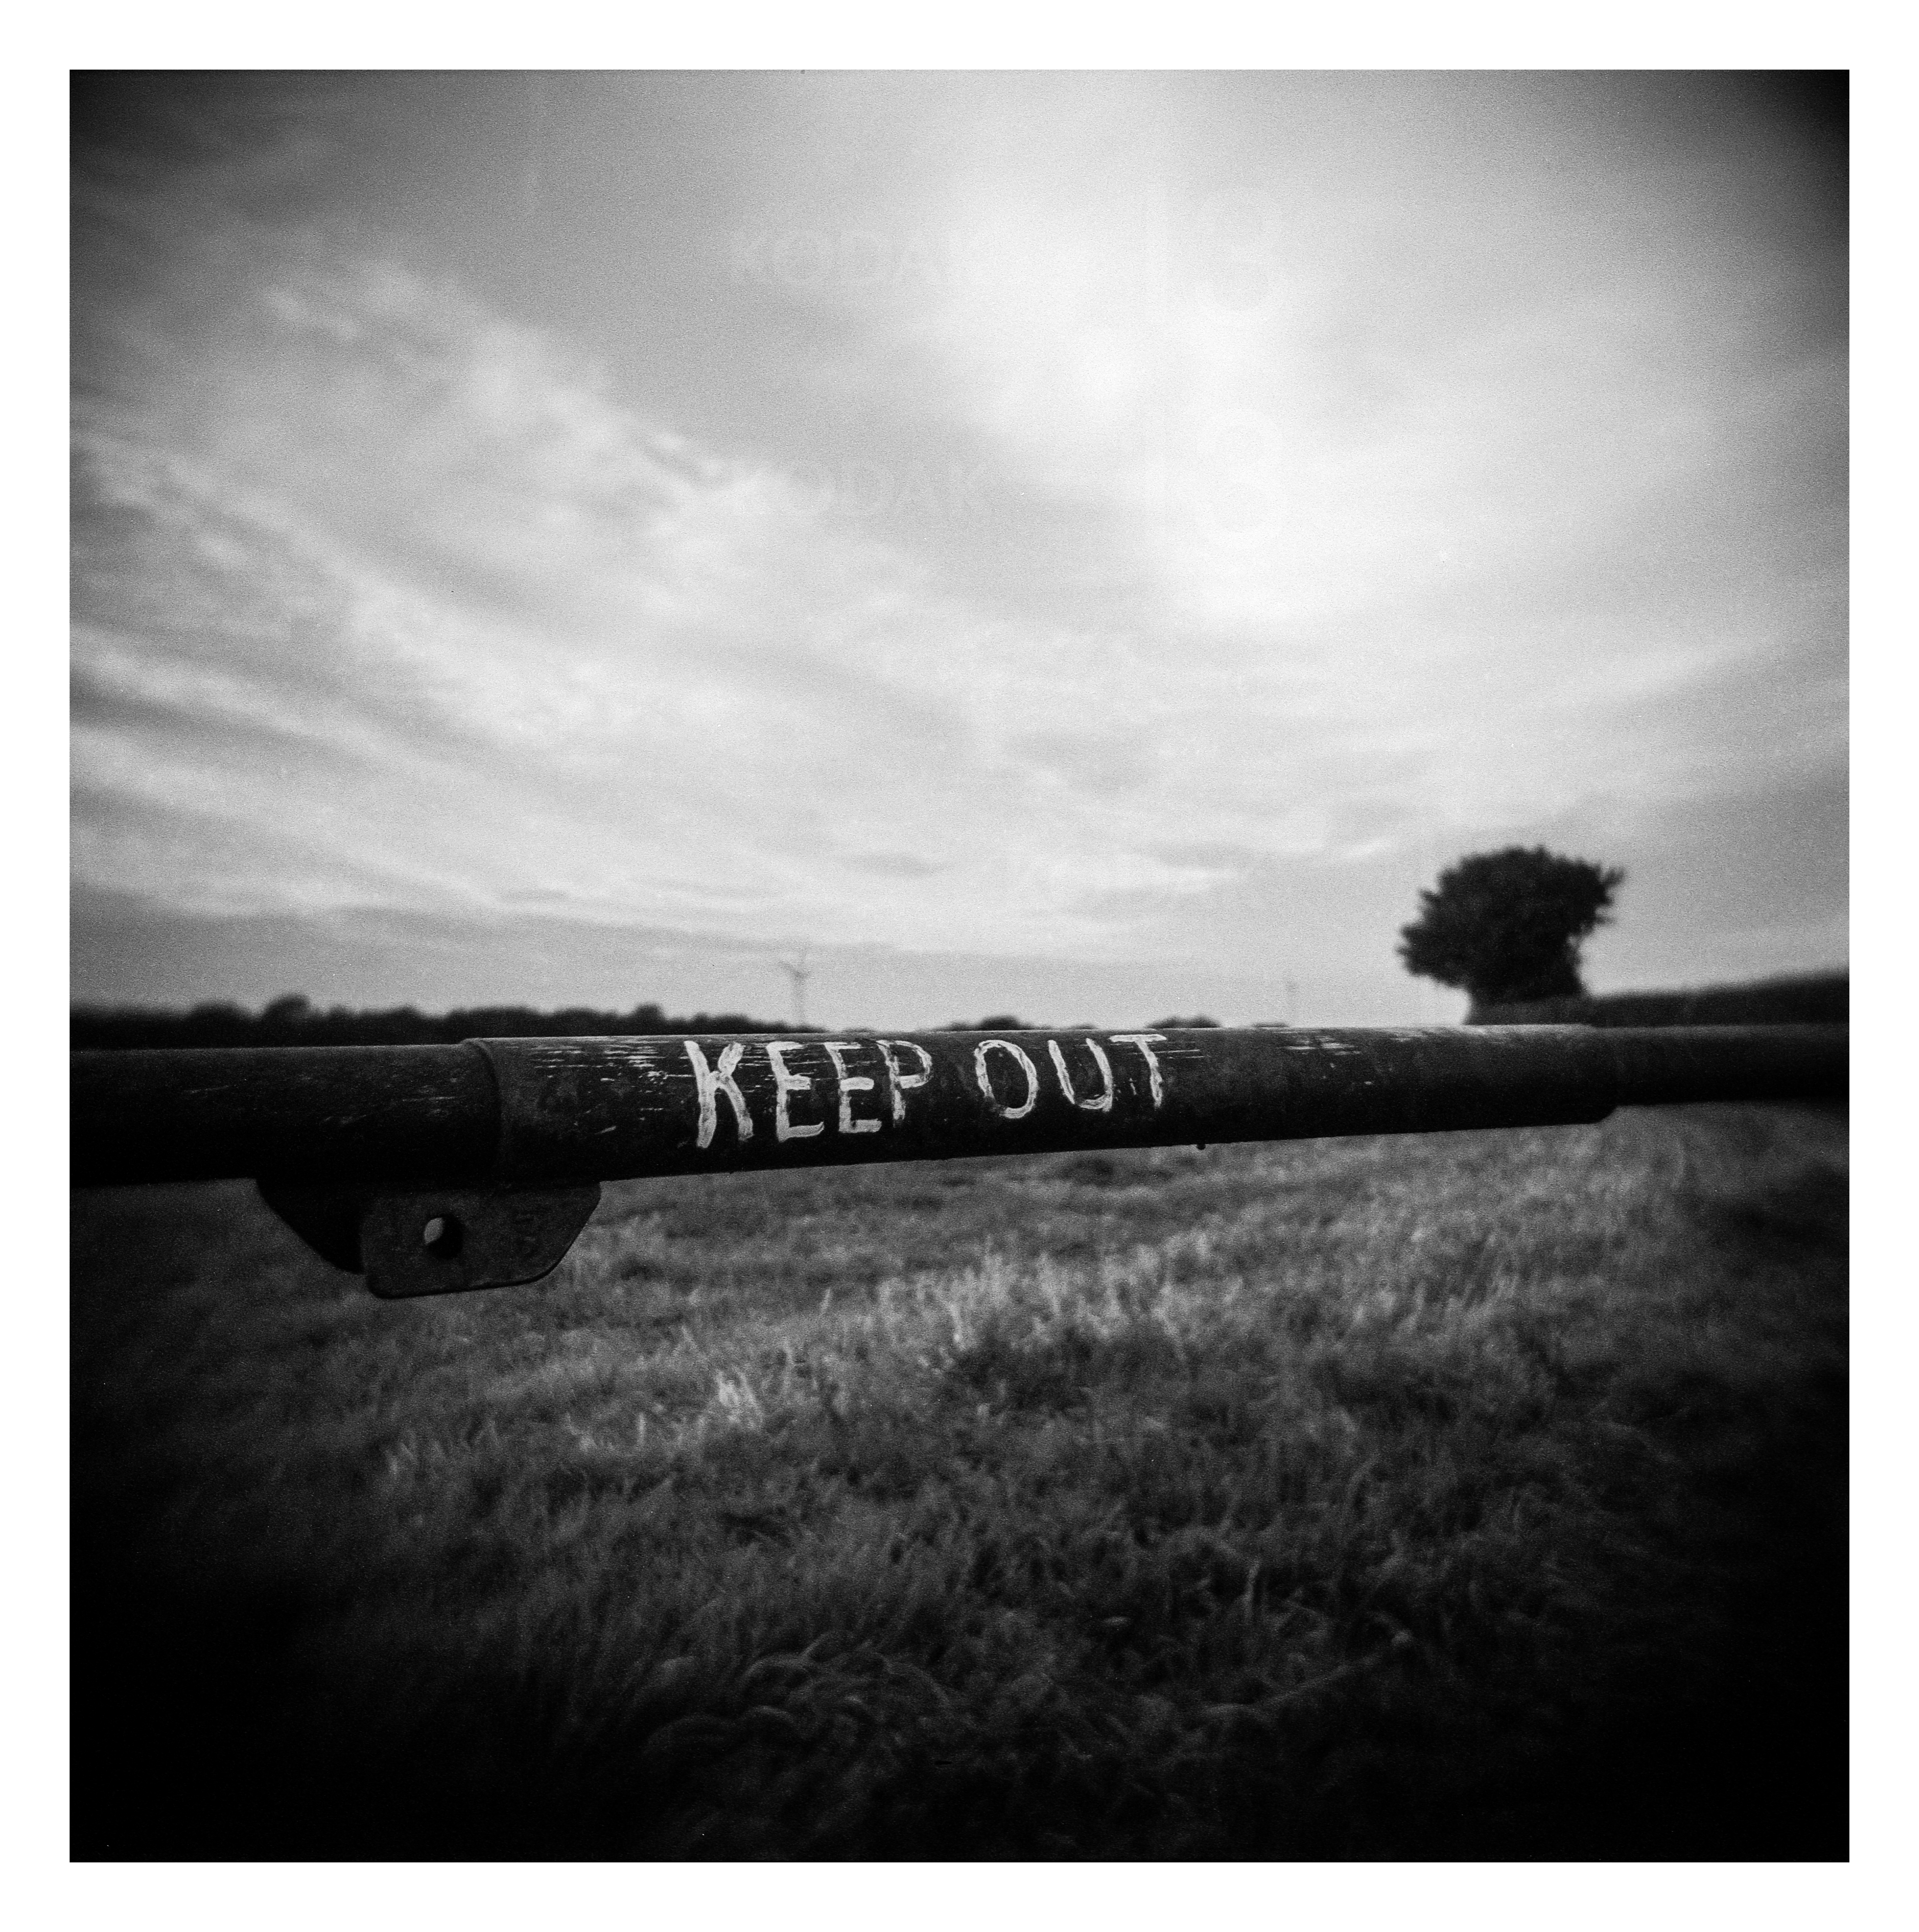
The final set of pictures from the roll of Kodak Gold I put through my Kodak H35N half-frame camera.


Kodak H35N & Kodak Gold. Lab developed. Home scanned and converted with Negative Lab Pro.
Taken on 25 January 2025

Steel City Snapper photography
35mm, medium format and large format film photography (with the odd bit of digital every now and then…)
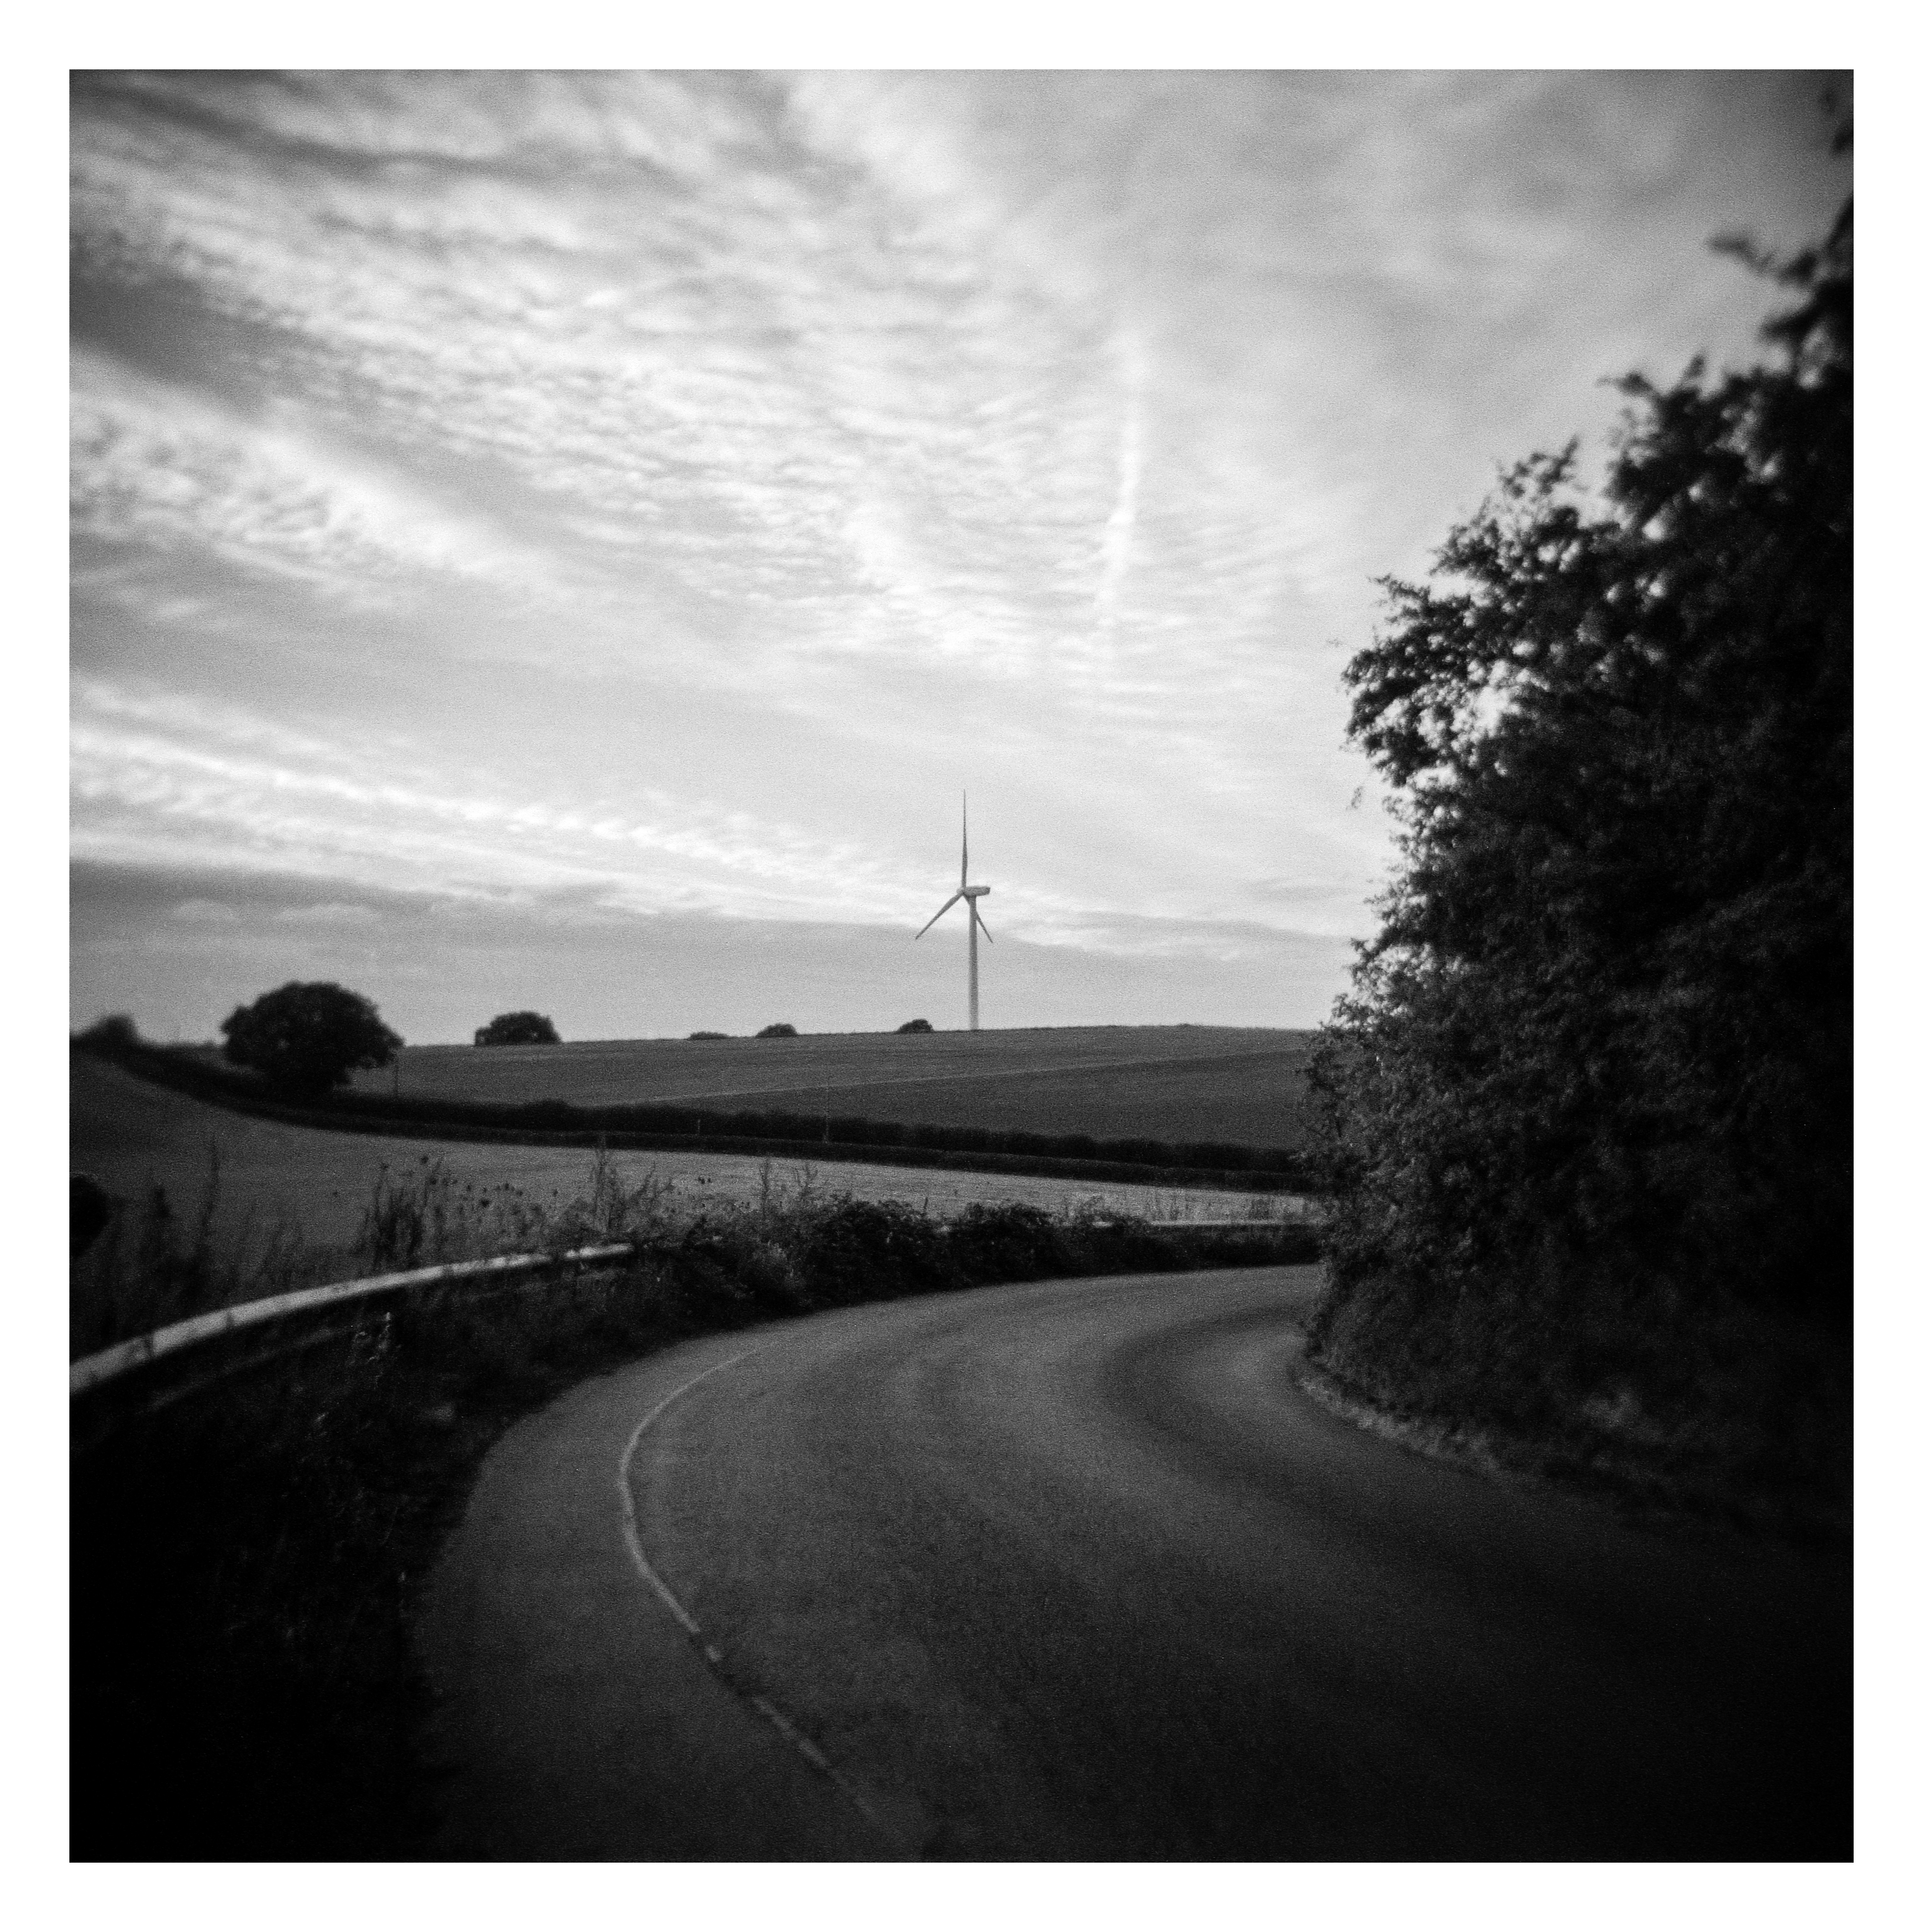
The final set of pictures from the roll of Kodak Gold I put through my Kodak H35N half-frame camera.
Kodak H35N & Kodak Gold. Lab developed. Home scanned and converted with Negative Lab Pro.
Taken on 25 January 2025
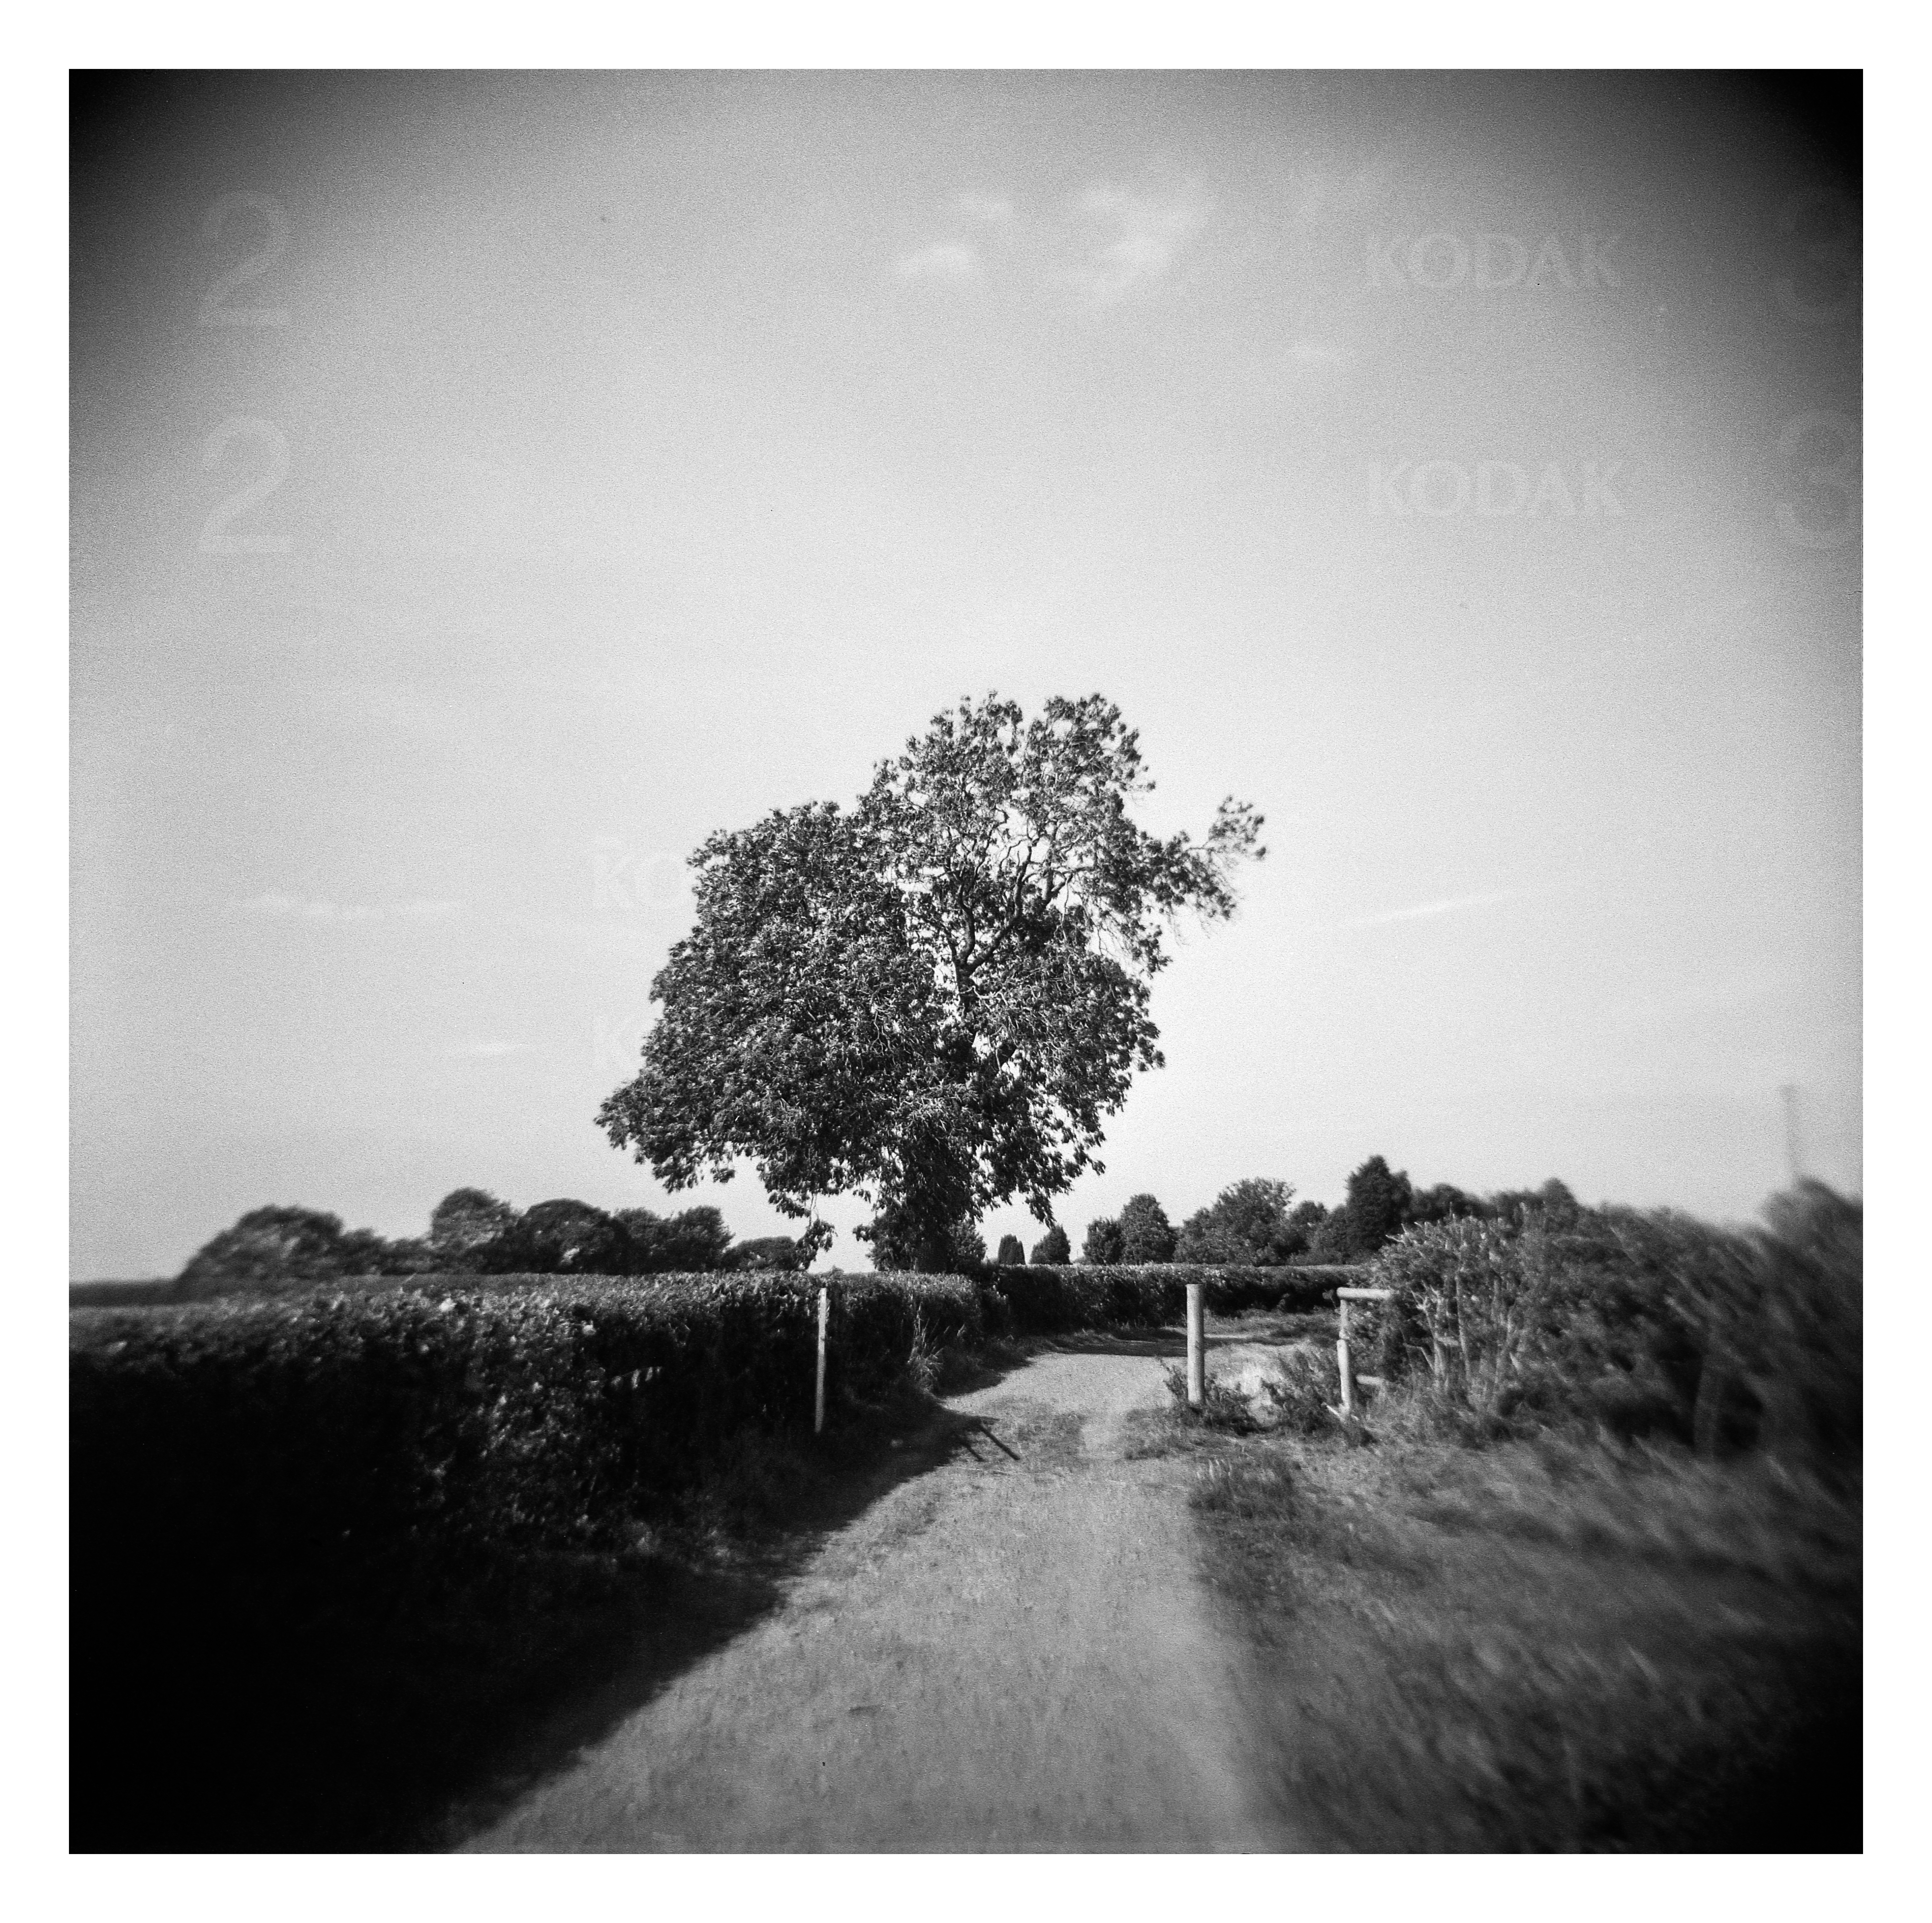
A further batch of pictures from the roll of Kodak Gold I put through my Kodak H35N half-frame camera. The remaining shots to come tomorrow.


Kodak H35N & Kodak Gold. Lab developed. Home scanned and converted with Negative Lab Pro.
Taken on 25 January 2025
Another batch of pictures from the roll of Kodak Gold I put through my Kodak H35N half-frame camera.


Kodak H35N & Kodak Gold. Lab developed. Home scanned and converted with Negative Lab Pro.
Taken on 25 January 2025
I received my invitation to take part in this year’s Emulsive Secret Santa last week. I was wondering if it would still be going ahead as Emulsive.org, the site from whence it originally sprang now seems to be defunct, having not been updated for quite some time.
So I was glad to get an email inviting me to this year’s gift exchange although, due to the current tariff situation in the US, the swap has been split into US and rest of the world sections this time around. Registration closes tomorrow, after which people will be provided with the details of their recipients and the task of finding a suitable gift begun (timescales are quite tight this time, so it’s likely that some folks will be receiving a late Christmas gift, but that’s not so bad – January can be quite glum, so a nice present arriving in the mail will cheer things up somewhat).
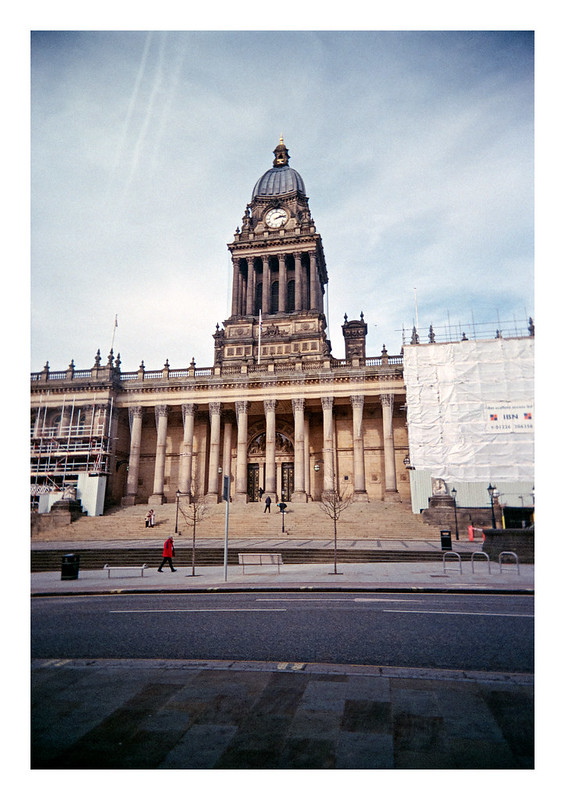
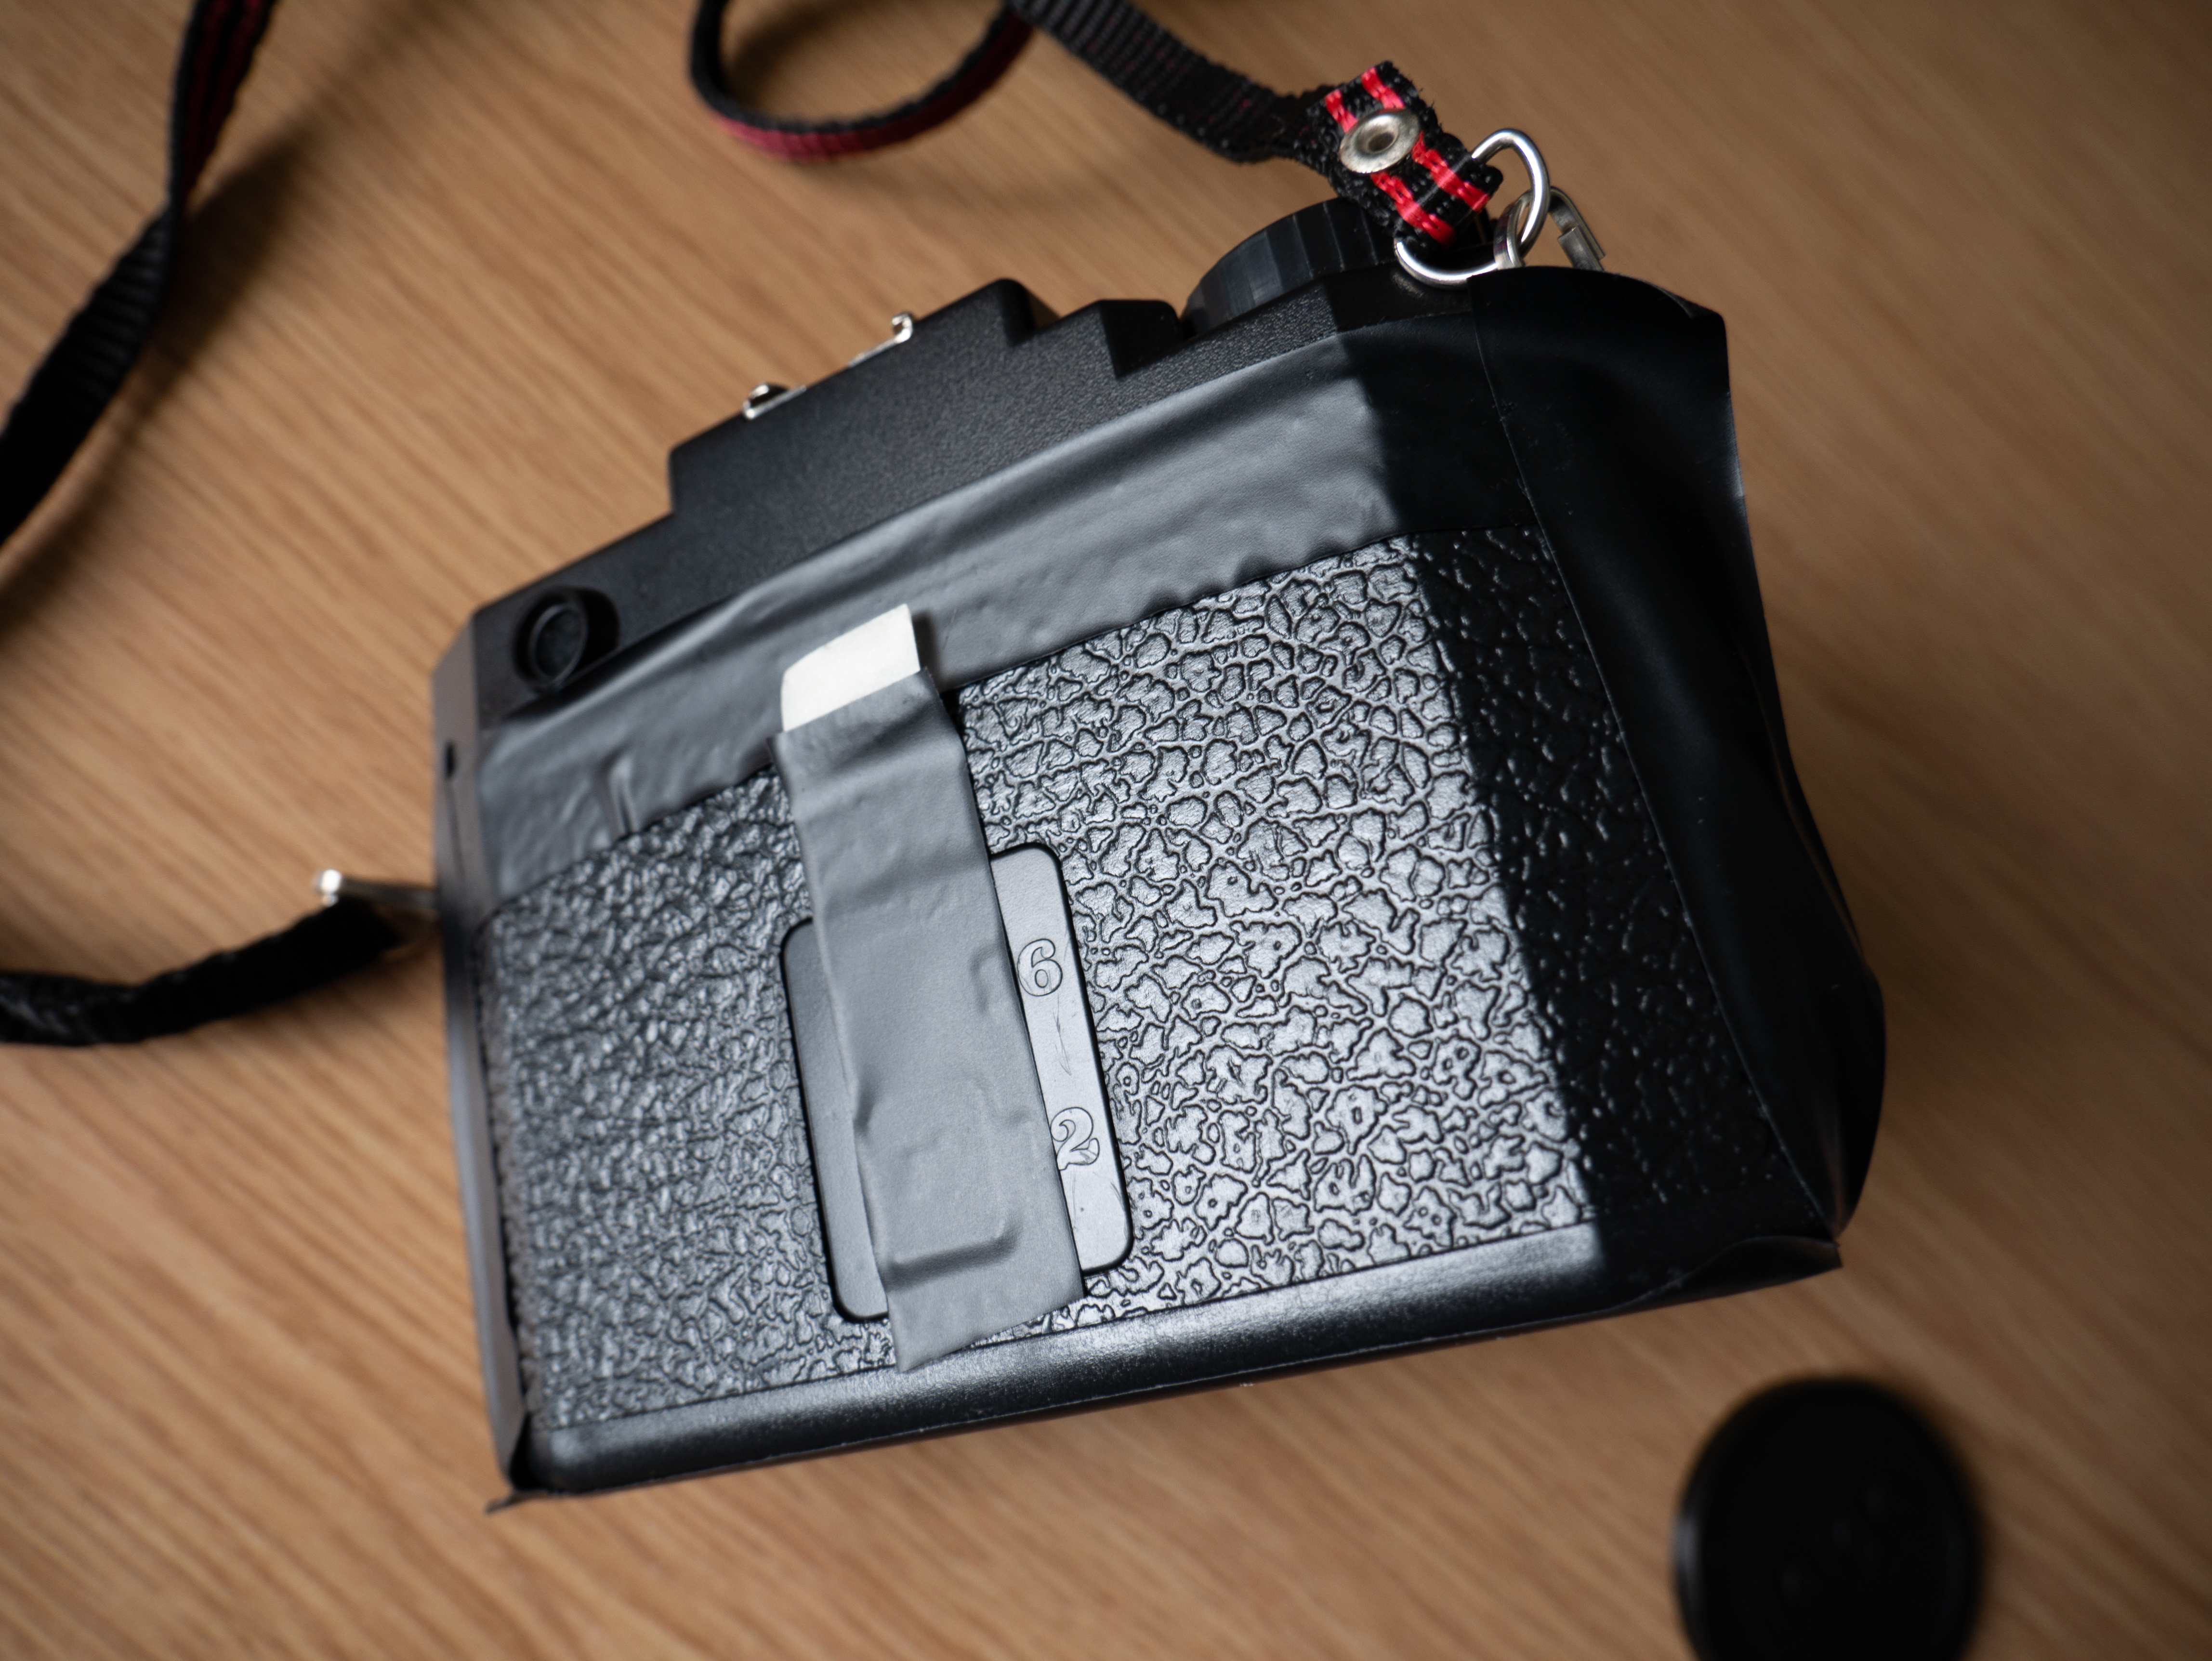
I was very fortunate last year to receive not only a bunch of 35mm film a lovely notebook, and other goodies, but also a Kodak H35N half-frame camera, and it was with this that I shot the pictures in today’s post (although I already posted a few others about six weeks ago).
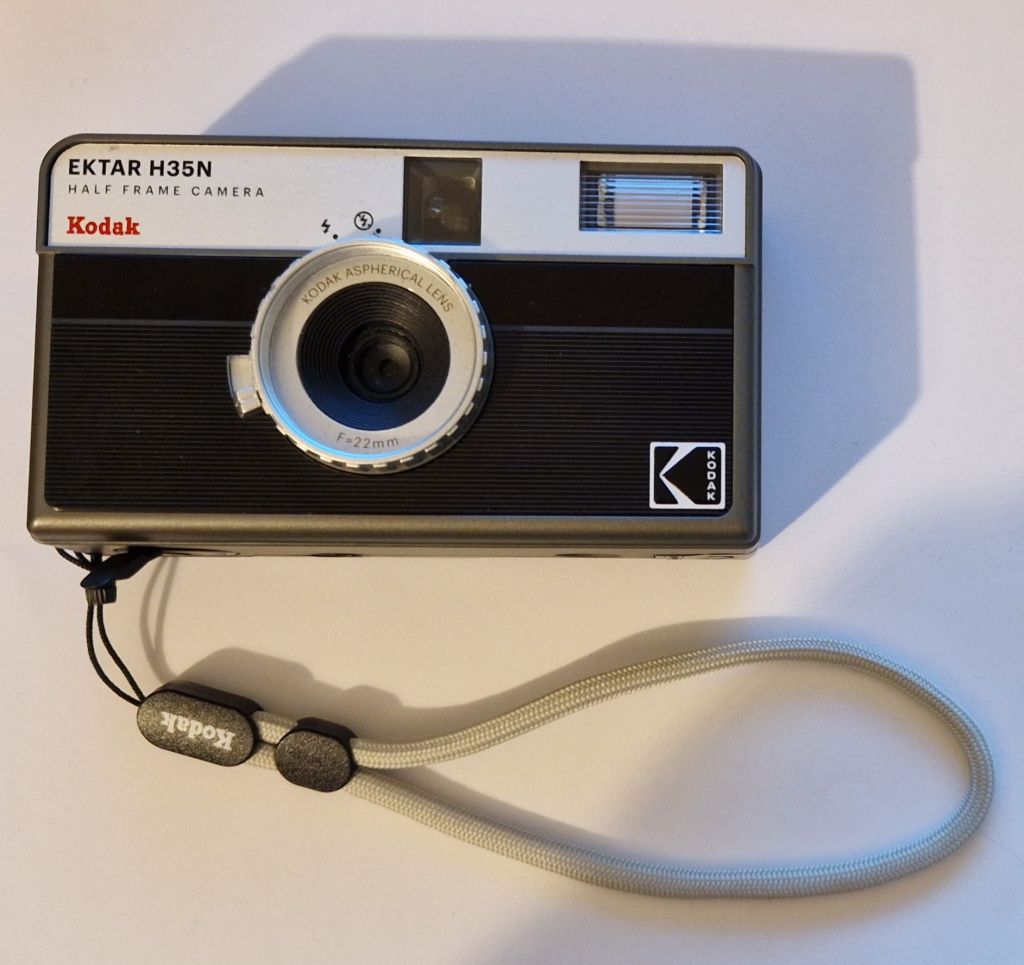
The camera itself (branded Kodak, but actually made by RETO) is a relatively simple affair with a 2 element 22mm f/8 coated lens (part glass, part acrylic), a 1/100sec shutter speed, a built-in flash, and a built-in star filter. For it’s basic spec, the camera produces reasonable pictures if you don’t mind noticeable softness at the narrow ends of the frame. I didn’t feel any need to scan them at high resolution because the detail simply isn’t there, but at smaller size they look nice and, as is the case with any camera, it’s what you do with it that counts.
The camera design has a clear lineage to the old Kodak Instamatic models. It’s very lightweight and doesn’t feel like it will take much rough handling (but for the price, that is to be expected), but it works perfectly well in use and I didn’t have any sense that it would break – something my other RETO-made camera, an Ultrawide and Slim, does suffer from in regard to advancing the film. The film advance on the H35N was fine, as was the film rewind crank, which is located on the base of the camera along with a plastic tripod socket.
The top of the camera features the shutter button, frame counter and, because there is a bulb-mode, a cable release socket, which is nice to have and opens the camera up to additional creative possibilities. Apart from bulb, because of the otherwise fixed shutter speed and aperture settings, there is no ISO setting control, and certainly no DX-coding mechanism is required.
I didn’t have a need to use the flash at any point (and didn’t have a battery in the camera anyway – the battery is only needed for the flash), and the star filter feels somewhat gimmicky and not something I would want to use anyway. So I didn’t.
Although I like the pictures I got when using the H35N, I can’t help thinking that I would probably have liked them more if I’d taken them with a different camera – even if it would have meant using twice as much film. However, despite these reservations, I still had fun using the camera, got pictures I like, and it’s made me think about maybe getting a better specced half-frame camera somewhere down the line – maybe an older model like an Olympus PEN, or perhaps a Pentax 17 if I can find one for a decent price.
I’ll post some more pictures from the H35N tomorrow – half-frame gives you a LOT of photos!


Kodak H35N & Kodak Gold. Lab developed. Home scanned and converted with Negative Lab Pro.
Taken on 25 January 2025
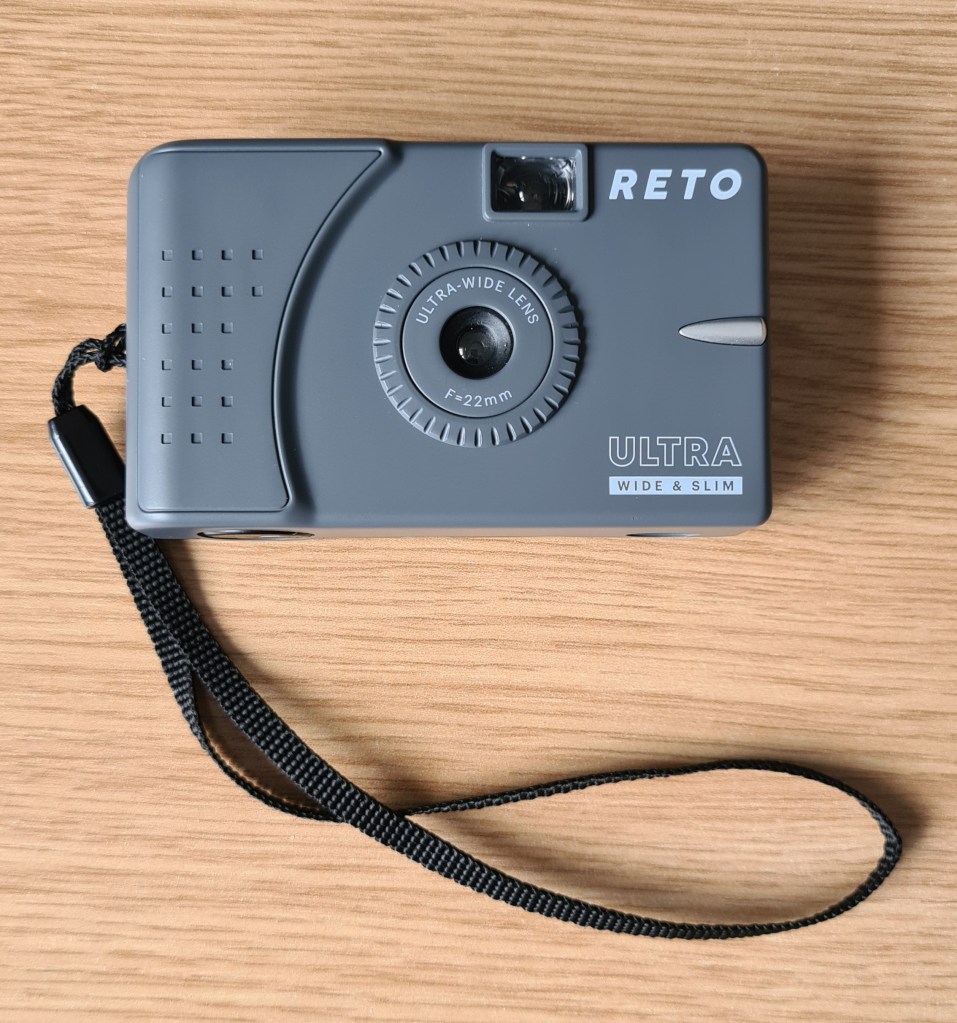
A month or two ago I became aware that a new film camera was about to launch. As with most new film cameras these days, this was not to be an SLR, rangefinder, or fully-featured compact point and shoot, but something rather more basic in the shape of the Reto Ultrawide & Slim.
There have been a number of other back-to-basics cameras launched in the last year or two, but these have mostly been in the form of re-useable disposable cameras (if that makes sense – basically the same features as a standard disposable film camera, but with the facility to re-load with normal rolls of 35mm film. More cost effective and flexible in the long term, and also better for the environment.).
In terms of build, the Reto Ultrawide & Slim (UWS) is probably no more advanced than the aforementioned cameras. It’s almost completely made of plastic, including its lens. But in this case, it’s the lens that matters because, while most other cameras of this ilk use 35-40mm focal lengths, the Reto UWS packs a very wide by comparison 22mm lens, making it something of a stand-out amongst it’s competitors.
The camera itself is not a new design. It’s a clone of the Vivitar Ultrawide & Slim which was released back in the 1990s, manufactured by Chinese company Sunpet and marketed under the Vivitar brand. The Reto version isn’t even the first clone and another version produced under the Superheadz brand was also available for a while. Despite the different variants, all the cameras appear to be identical in terms of functionality, with the only differences being cosmetic.
In terms of specs, the camera uses the aforementioned 22mm lens – this is an uncoated 2-element design fixed at f/11 and constructed of resin. The shutter is likewise fixed to a single speed of 1/125 sec. The focus is fixed and reaches from 1m to infinity. Controls on the camera consist of a shutter button, a film-advance wheel, a film-release button, the rewind crank, and a switch to open the camera back for loading and unloading the film.
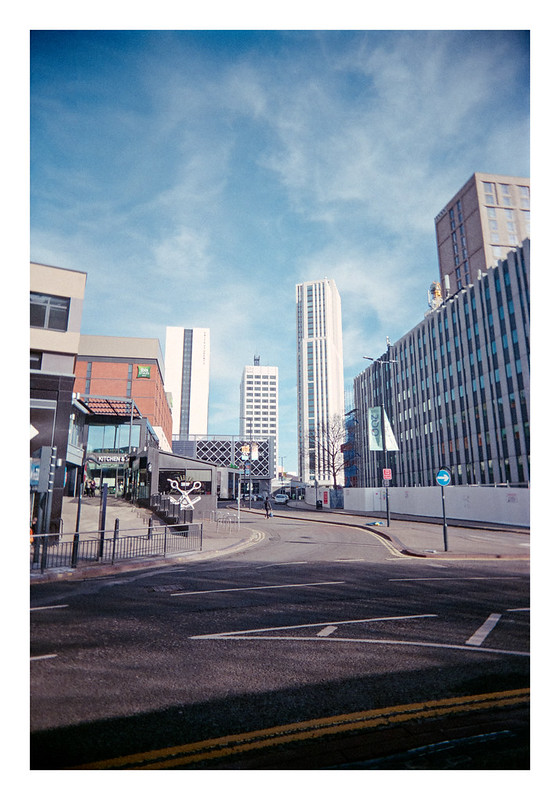
The fixed aperture and shutter speed are likely to dictate the film you choose to shoot. On bright days then a 200 or even 100asa film is probably fine (all the shots here are on 200asa colour negative film), but faster film will be a necessity when the light isn’t as good, probably going beyond 400asa in the conditions we often find here in the UK.

The build quality of the camera isn’t something that inspires confidence. The almost fully plastic build is very lightweight (the camera feels like it would blow away in a light breeze) and I’ve seen a number of places advising that it’s best to limit film to 24exp rolls as longer lengths can put unwanted strain on the advance mechanism (which I presume is also mostly plastic). I guess that time will tell as to how well it’s construction fares – so far I’ve put two rolls through mine, a 24exp roll and then, being the daredevil that I am, a high-risk 36exp roll. Neither posed any problems, although I could feel the tension (literally!) when winding on the final few frames from the longer film.
In terms of use, there’s not a lot to say. Loading film is easy – the rewind ratchet is a very simple design and is basically held in the camera by a plastic lug, but it works well enough. The shutter button is responsive and the shutter itself makes a quiet but satisfying click when fired. The advance wheel also works well, with the caveat that it did feel much tighter towards the end of the 36exp roll of film I shot, and I expect this might be a potential point of failure. Rewinding the film is likewise straightforward. The door release switch works fine, but I find that it doesn’t spring the door open and I have to pick at it with a fingernail to get inside.

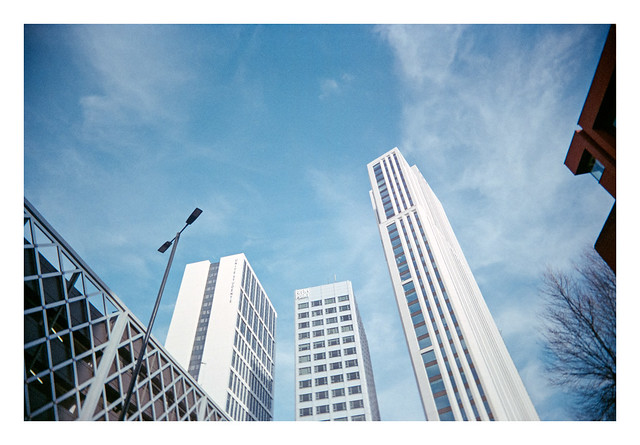
So, most importantly, what are the photographs like? Well, that will always be a subjective opinion, but in my case I’m very happy with them. The lens has some notable shortcomings in the amount it vignettes (although nothing like as much as a Holga 120 or something like that), and also the drop off in sharpness at the edges of the frame. Both these things could also be said to add charm to the resulting images though. In the centre of the frame the lens is plenty sharp enough and equals some more advanced and fully featured point-and-shoot cameras I’ve used. It’s the 22mm focal length that is the big draw here though. Coupled with the f/11 aperture and deep depth of field, it can allow interesting compositional choices to be made and I expect that I will continue to use it for this reason.
Beyond the build quality there are a couple of other downsides to be aware of however. The first is the viewfinder. While it’s bright and easy to use, even for a spectacles wearer like myself, its coverage does not represent the full field of view of the lens, meaning that it’s very easy to get unwanted elements creeping into the edge of your compositions. This includes fingers! The lens is also very prone to flare apparently, although I deliberately chose my shots to try and minimise this. I have also found that the first roll of film I had developed had scratches on a number of frames but, giving the benefit of the doubt, I’ll wait to see if it’s repeated on the next roll before laying the blame on the camera for this. The scratches were rectified easily enough in Photoshop.

Is the camera worth buying? Again that’s a very subjective question. If you live for crisp, sharp, high quality results with a range of controls and features to aid your photography, then probably not. If you enjoy the simple creative options that ‘toy’ cameras such as this offer, then you’ll be fully in your element. At £30 it’s relatively cheap to buy (although that doesn’t mean it’s actually worth that amount) and problably more affordable than the older Vivitar version which seemed to have been fetching much higher prices due to its popularity. I’m so far happy with mine and glad I bought it.

There are undoubtedly a lot of reviews and first impressions of this little camera popping up online, but here are a couple from my fellow bloggers Jim Grey and adventurepdx that are worth reading.
Reto Ultrawide & Slim & Agfa Vista Plus 200. Lab developed.
Taken in March 2022
It’s the last day of the year, so time for a roundup of my favourite photos from each month.
January
I remember on the day we got this snow that I felt the urge to go out and make photographs, but also feeling quite cosy inside our warm home. My wife had a letter that needed to be posted though, so I went out. I wasn’t sure what camera to take, especially given the large, heavy flakes of wet snow that were falling, so in the end decided on the Holga. It’s plastic body and lack of any delicate components was a pretty safe choice given the conditions, but more than that, it’s cheap plastic lens once more produced a set of images that had a distinctive look that I felt really suited the day.

February
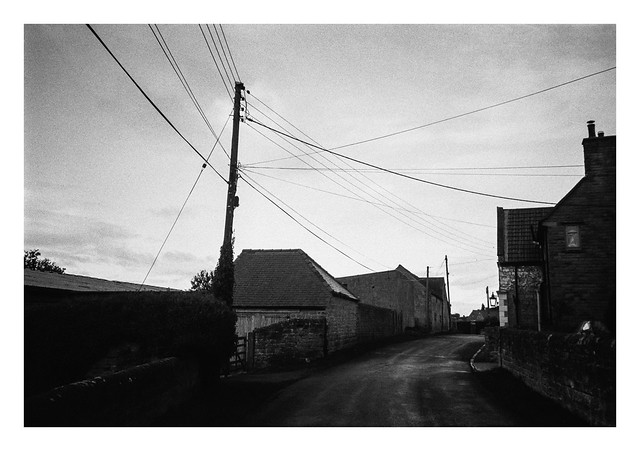
Back in mid-february on a cold and frosty day. remnants of snow still on the ground in many places, I went for a good long walk. I shot two-and-a-half rolls of film that day with the Yashica Mat 124G and my Canon Sure Shot Telemax. There are several that I like, but this one is my favourite – the power-lines, wonky fence, and potholed farm-track adding character to the scene.

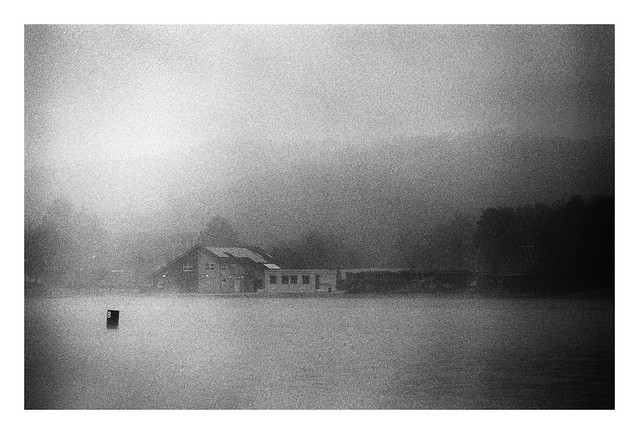
March
March is a hard month to choose a photo from as there are several that I really like – I must’ve gotten out with the camera quite a lot that month (and I think it was when the winter Covid restrictions were lifted, allowing me to travel further afield again). The shot I’ve chosen is packed full of atmosphere, but the grainyness was unintentional. Most of the frames on the roll show far less grain but a couple – mainly shots with a lot of low-contrast fog – really emphasise it. I’m not sure if it’s a factor of the scanning or post-processing or a combination of things, but in this image I think it really benefits the picture.
April
In April the Covid restrictions were loosened to allow people to meet up outddors, so I went out for walks with my dad on a number of occasions, mostly taking a long looping path near to where he lives that traverses what used to be Orgreave pit and coking plant – the one that gained infamy as the site of the “Battle of Orgreave” during the miner’s strike in 1984. The area is now an area of parkland, gradually taking on natural growth as the years pass by, but the area to the north-west is now the site of the Waverley housing estate. This estage has been developing over the past decade or more now and is pretty big – effectively a district in itself, and new homes are still being constructed. This photo shows some of the work that was ongoing back in the spring, and I liked the “New Topographics” feel of the scene.

May
The firs half of 2021 was definitely top-loaded with photographs – my Lightroom catalogue has 232 images from May alone – a volume of output which would slip later in the year – but more on that when we get there…
Again, there are many photo’s I could have picked from this month, but this one reminds me of the day it was taken most of all. You can read the full story here, but to say it was a relief when I got to the point when this picture was made cannot be understated.

June
The image here was made at the country park at Pleasley. As with Orgreave (mentioned above) this is another former coal mining area reclaimed to nature and outdoor pursuits. In this case though the mine workings have also been preserved as a museum. While I didn’t have time to visit the museum, I wandered around the park and made a number of photographs, including this one.

July
While I mostly shoot film, I do still have my old Nikon D3200 DSLR and a few lenses knocking around. One of the lenses is the 35mm f/1.8 DX. This is designed for use on crop-sensor cameras, but I’d read that it would also work on full-frame cameras with some mild-ish vignetting if the aperture is opened up. As the lens is small, light, and very sharp, I decided to give it a go with my Nikon F80 film camera. The vignetting was noticeable, but not distracting and actually gave a nice feel to a lot of the images. The main downside was that the auto-focus was very slow on the F80 for some reason, meaning a few shots were a little soft. This was my favorite image from the set.

August
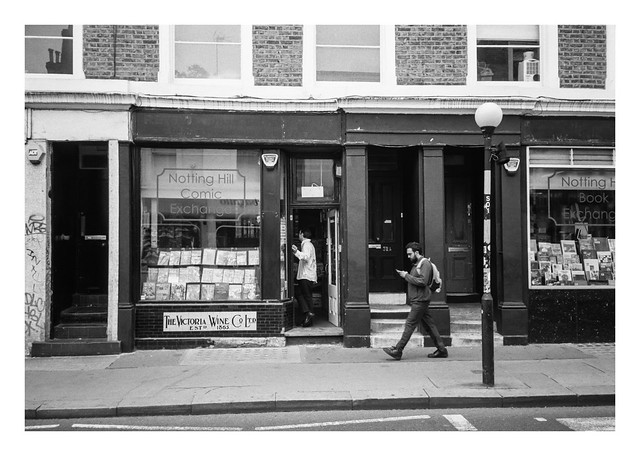
August’s film photographs are mostly from three trips – one to a steam-rally in Cheshire, one to Bakewell in the Peak District with my wife, and another trip with my wife to London. Looking at the photos in Lightroom against the ones on Flickr there are loads of shots that I never uploaded. This one I did though, and it’s here as a reminder of the day we visited Notting Hill to see the Portobello Road market. The market was notable by the fact that it was very underpopulated on the day in question – this is what you get for visiting during a pandemic I suppose.
September
Again, the only film photos from this month are from a couple of day trips, this time to Mablethorpe and to another steam rally in Cheshire (I visited both these steam rallies as the ones close to home had been cancelled this year, but also because a bunch of folks from an online photography forum I’m a maber of were atending too). This shot was from my annual day-trip to Mablethorpe though. The ice cream wasn’t intended to be offset, but I forgot about parallax when focussing on close objects (it was held at arm’s length). In the end it was a happy accident though as I quite like the way it is framed.

October
So, we reach October and the first month where I made no film photographs at all. The reason was that we had a new kitchen fitted in September and them moved straight into having the whole upstairs of the house re-decorated and re-carpeted. This meant that not only were most of my cameras boxed up while we shifted furniture in and out of rooms, but that when I did have the opportunity to go out and do some photography, I was too tired to make the effort. I did not enjoy October very much.
November
And if October was bad, November was the worst. On the 13th our young cat, Stan, was hit by a car and lost his life. Most of my posts in November following this sad event were about my grief over his loss and were the first time that I posted digital photos on here. I found that speaking about how I felt – literally pouting out what was on my mind – was helpful and therapeutic.
I did take a few film photos at the start and very end of the month though and the one below is the one I like best. Perhaps its somewhat melancholy air suits the month in which it was made.
December
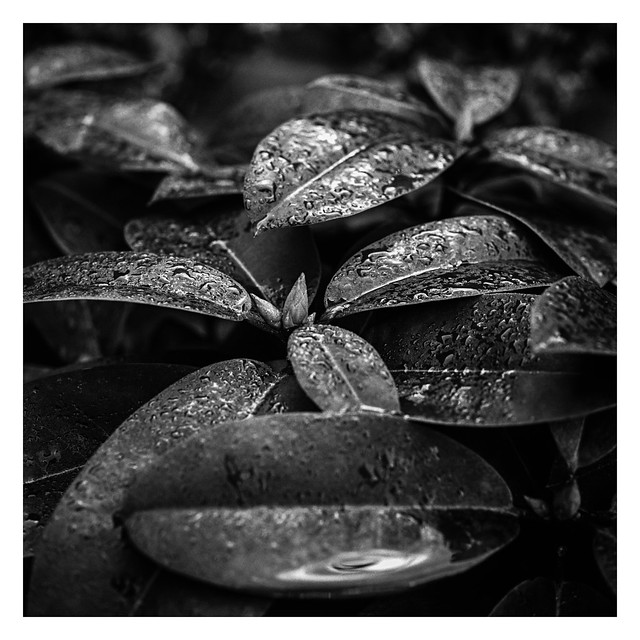
And so we reach the final month of 2021. Again, not many photographs were made this month and, of the ones that were, I still have a lot of them to either upload or even develop yet, so they won’t see the light of the blog until 2022. Of the ones I did upload though, this shot of a wet rhododendron bush in the back garden is the one I like best.
Well that’s the roundup done for another year. I hope that 2022 brings better times for the world and that we can start to come out of the pandemic. Whatever may happen though, I wish you all a very happy new year. See you in 2022!
It’s that time of year again when my feed becomes full of everyones review of the year-type posts, and it’s interesting and inspiring to see the work that people have produced as well as their thoughts on the past twelve months.
I’m not going to warble on too much here about the shape of the past year – you’ve all lived through it and know the name-of-the-game, plus, if I’m honest, I’ve left writing this post to the eleventh hour and am running out of time. That’s me – Mister Organised! 🙂
But suffice to say, I’ve known better years, and I think the thing to do now is look forward to better times to come. So here’s to a happier and less “interesting” 2021!
Below are my own selction of favourite photos made this year. If I were to pick again another day, in another mood, these might mostly change to something else, but as a snapshot of my favourites as of today, here they are…
January – I’ve often commented on my blog how much I love a misty, foggy day for photography, and so my first image from 2020 falls right into this bracket. Early morning at Rother Valley Country Park, a short walk from where I live but somewhere I don’t visit all that often because it feels like I’ve seen it all before. Shots like this one serve as a reminder that even the most familiar locations can still throw a beautiful image our waty if we take care to look for it and make the most of the conditions.

Nikon F80, Nikkor 28-80mm f/3.5-5.6 AF & Ilford HP5+. Lab developed. Taken on 22 January 2020
February – A gloomy, rainy day walking around Sheffield city centre with my F80 led to me making a few images of people partially obscured by the condensation covered windows of buses. I’d planned on making more images in the same vein but, so far at least, I haven’t managed it yet.
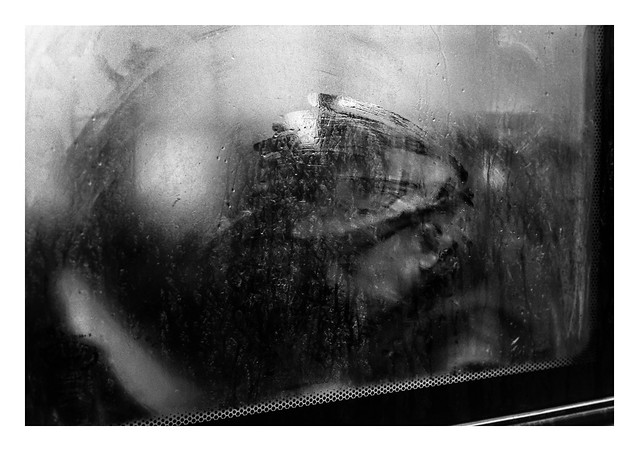
Nikon F80, Nikkor 50mm f/1.8 AF-D & Ilford HP5+. Lab developed. Taken on 16 February 2020
March – Regular readers of my blog will know that I have an affinity for power lines and electricity pylons as photographic subjects. Not as record shots – I don’t find them that interesting – but because I find there is something appealing and evocative in the way they cross the countryside, leading to some far destination – perhaps to power a TV, or boil a kettle for some unknown person’s cup of tea. This was from my final pre-lockdown roll of film and was developed by the lab the day before it closed for a few months. From this point on, almost all of my black and white film was developed by myself.

Yashica Mat 124G & Kodak Plus-X (expired 2008). Lab developed. Taken on 22 March 2020
April – While this is supposed to be a selection of favourite photos from the year, this one is chosen more as being indicative of the situation we found ourselves in during most of spring. The UK was under a national lockdown, non-essential retail was closed as were schools. There were shortages of hand-sanitiser, latex gloves, pasta, and even toilet-rolls. The freedom to roam was largely removed except for work (where it wasn’t possible to do so from home), shopping for food and other essentials, to provide care for the vulnerable, and for exercise. The latter option was when most of my photography took place, carrying a camera when I went for local walks, grabbing opportunistic images where possible. As I write this, I’m pretty sure we may be headed back into a similar set of restrictions soon as the second wave – predicted (but perhaps not properly planned for) – takes hold.

Canon Sure Shot Telemax & Ilford Delta 400. Ilfotec DD-X 1+4 9mins @ 20°. Taken on 11 April 2020
May – It was the month of my ill-fated initial foray into 6×9 medium format with a Zeiss folder that had an unfortunate alignment problem that caused the images to be soft at the edges. It was also, at the end of the month, release from the lockdown, granting freedom to travel a little further afield for photography. The image I’ve chosen is a definite favourite from the month and one that perhaps symbolises the new found sense of freedom and promise that I felt.

Yashica Mat 124G & Shanghai GP3 (expired). Ilfotec DD-X 1+9 10mins @ 24°. Taken on 22 March 2020
June – I’d had this roll of expired Ektachrome knocking around for a while and decided to take it alon on a walk around Dale Dyke reservoir. My main camera on the day was the Yashica Mat, but I took along the Zeiss Mess-Ikonta to shoot the slide film. I didn’t really have high hopes for it based on my previous roll of expired E6, but the roll came out pretty nicely. On it was thsi picture of what looks like a tiny palm tree, but is just some bracken. I’m still not sure if it was just stuffed there by a passerby, or if it had taken root atop this piece of wood. I’m erring to the former though – those rocks look distictly “placed”.

Zeiss Mess-Ikonta 524/16 & Kodak Ektachrome E200S (expired 2003). Lab developed. Taken on 22 June 2020
July – I took a drive out to North Leverton windmill, a location I’d not visited before and which (until I did a search for “windmills” online) I didn’t know existed despite having driven a road only a mile or two away on multiple occasions. I took a number of close shots of the building, but this one from a neighbouring field is my favourite, I think.

Canon Sure Shot Supreme & Ilford HP5+. Ilfotec DD-X 1+4 7mins 45 secs @ 22.5°. Taken on 25 July 2020
August – This replica of the classic Ford Gran Torino from 70s TV classic, Starsky & Hutch, was parked in the market square of Chesterfield when I went for a wander around back in august. I’d just started using the Grain2Pixel plug-in to convert my colour negatives at this time, and it made a great job of this Kodak Gold.

Canon Sure Shot Z135 & Kodak Gold 200. Lab developed. Taken on 31 August 2020
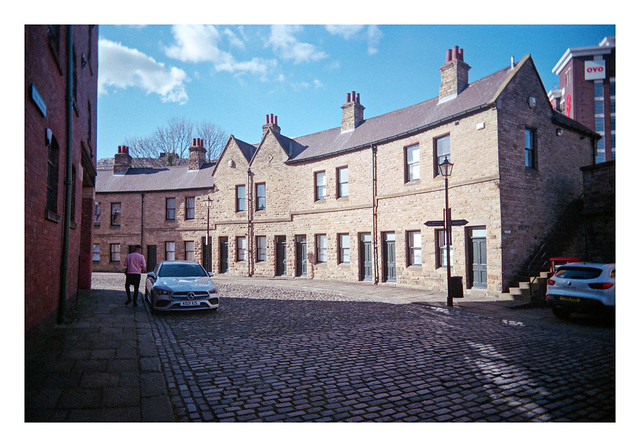
September – Another month, another roll of expired slide film. Ektachrome again, but a different emulsion this time. I was enamoured by the colours I got from this roll – a subtle, pastel, Portra-like set of tones. It’s often said that flat blue skies do a photo no favours, but in this case I like the look very much. There’s a subtle graduation that works well against the light brown bricks of the building.

Yashica Mat 124G & Kodak Ektachrome 100 EPN (expired 2008). Lab developed. Taken on 14 September 2020
October – Yet more expired film – you might think it was all I shot! I made quite a lot of autumnal shots this year but this stands out as a strong favourite. It was made in the Limb Valley on the outskirts of Sheffield on a day where I was testing both the expired film AND my recently acquired 50mm f/2.8 MC Zenzanon lens. Both performed at and above expectations. I nearly didn’t go out on the day either. I’m glad I did!

Bronica ETRSi & Fujifilm Superia 100 (expired 2008). Lab developed. Taken on 28 October 2020
November – A beautiful foggy morning in early november saw me out with the Bronica and the 50mm lens again. I pushed the HP5+ a couple of stops to give me some extra versatility in the dim light and was very happy with the results. I made several photos of trees in a small plantation (immediately behind me in this shot), but this frame showing the river disappearing into the mist with a stand of teazels in the foreground is the one I’ve picked.
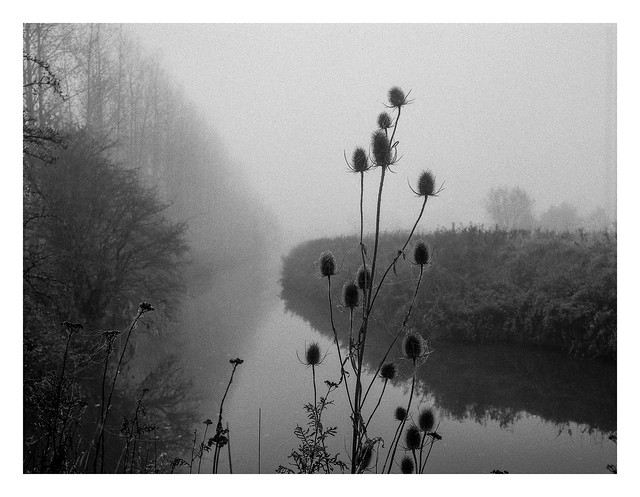
Bronica ETRSi & Ilford HP5+ (@1600asa). Ilfotec DD-X 1+9 13mins @ 20°. Taken on 7 November 2020
December – The biggest surprise of the year, photographically, was the set of results I got from this little Fuji point-and-shoot. I’ve mentioned this before, but it was a car-boot sale find and cost me just £1. The roll of film from which this frame is taken was already in the camera when I bought it. I wondered if it might be partially exposed, but it turned out to be unused apart from a few fogged frames at the beginning, and this shot was made on a beautifully lit morning early this month at Rother Valley Country Park. Who needs expensive cameras!

Fujifil DL-270 Zoom Super & Kodak Colorplus. Lab developed. Taken on 4 December 2020
So there you go. Twelve favourite shots from each month of 2020. I wish a very Happy New Year to you all!
This is the first review of a camera I’ve ever written for this blog (or, indeed, anywhere else for that matter). I’m not a professional gear reviewer and there are doubtless more thorough reviews available where it comes to technical specifics, camera history and so on, so this is mostly going to be my own personal opinion of the camera based on my experiences to date.
The Holga was designed in China back in 1982. Because 120 roll film was the most widely available type of film available in the country back then, the camera was designed around this format and it was intended as an affordable mass-market camera for the home market. Unfortunately, the growth in adoption of 35mm film and the wide availability of imported 35mm cameras and film into China soon resulted in 120 film use being all but eliminated there.

Holga’s manufacturer thus sought new markets outside China. Despite its very basic design and featureset, some photographers became attracted to the results the camera produced, placing value on the somewhat surrealistic, low-fi photographs it could produce and it gained a place for itself. The camera continued to fill a space in the market for a number of years, especially as a new-found appreciation of film photography took hold. The camera did end production in 2015, but demand has led to manufacturing recommencing and new Holgas can still be bought to this day.
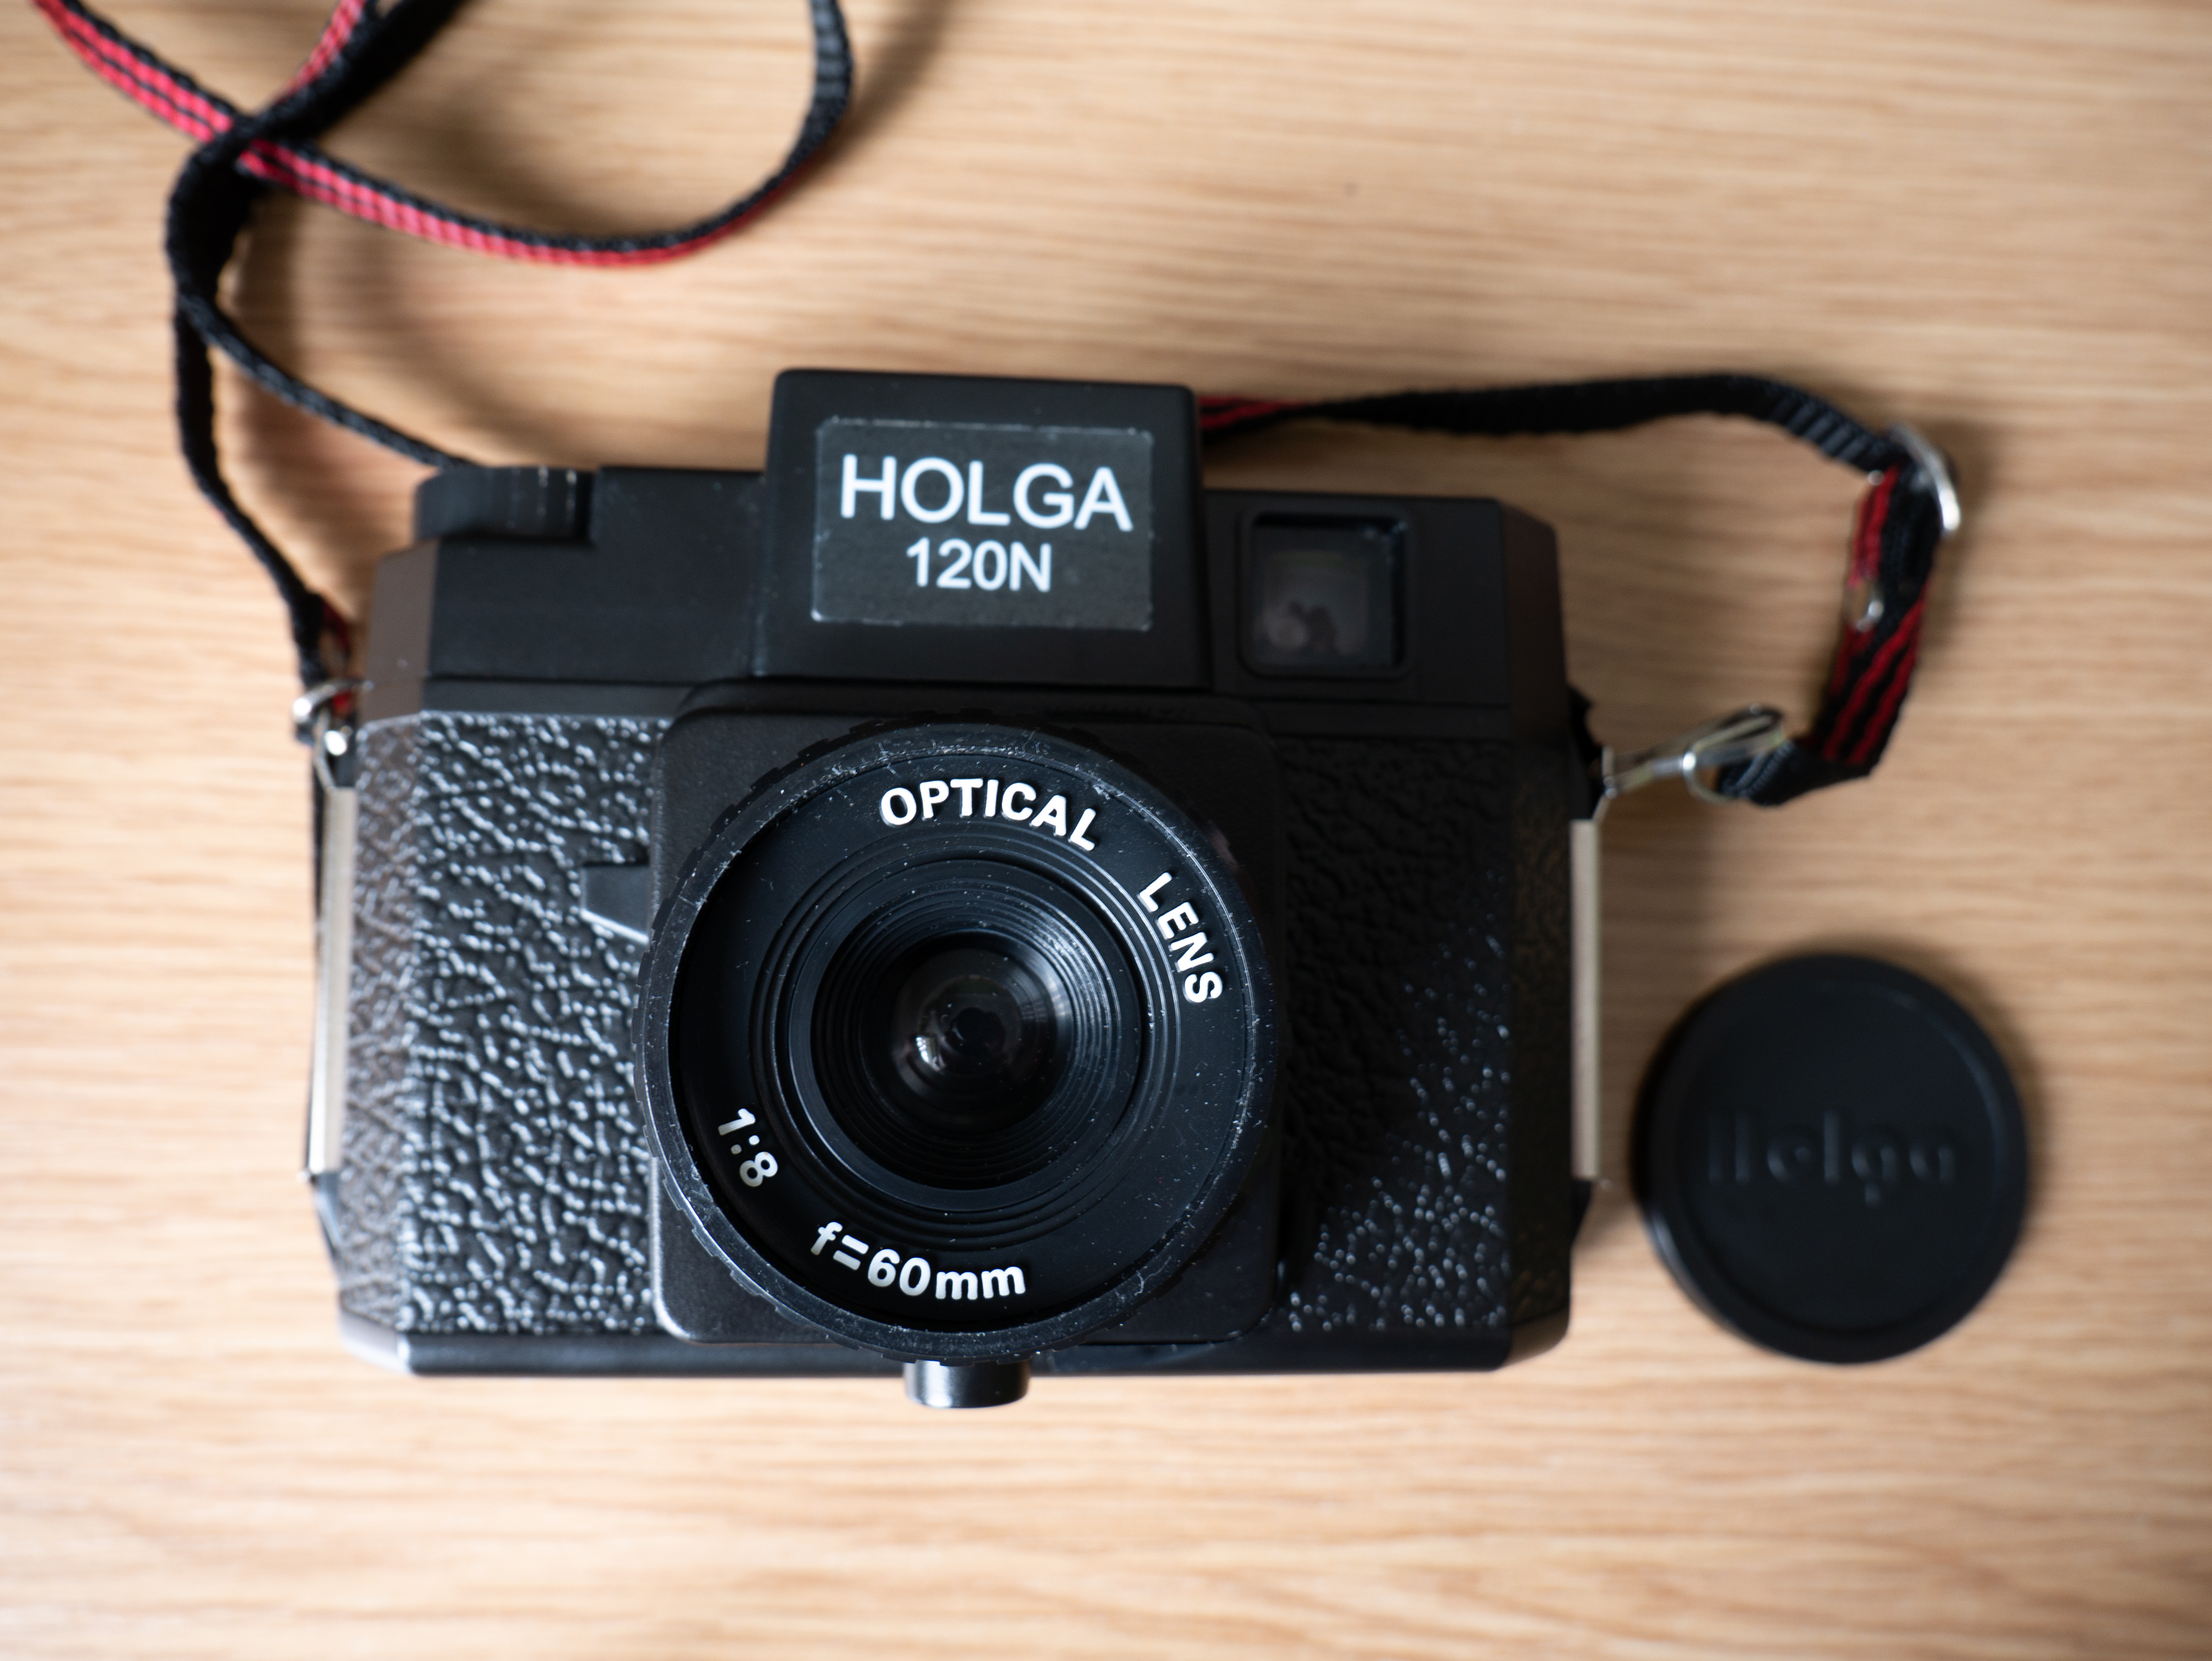
This review is of the Holga 120N – the most basic model currently available (although still an upgrade from the earlier 120S model). There are a variety of other models offering various upgrades such as built-in flash, coloured flash gels, glass lenses etc. There are also 35mm, pinhole and TLR varieties too. Perhaps inspired by the success of Instax cameras, a range of colours is now also available to complement the original black.
The camera body is almost entirely made of plastic. Not expensive, high-grade, impact resistant plastic or anything fancy like that though. It has the feel of a cheap children’s toy (it is, after all, often described as a “toy camera”). The only metal parts that are present are, as far as I’m aware: the clips that hold the back to the camera (and to which the strap can be afixed); a small, basic spring that triggers the shutter blades (although I’m not sure about the shutter blades themselves – they could be metal too); a flash cold-shoe atop the camera; and a tripod adapter. Everything else is plastic, including (on this model) the lens.
The camera allows photographs to be shot in 6×6 or 6×4.5 aspect ratio, giving 12 or 16 shots respectively. This is controlled by fitting one of the two plastic masks supplied with the camera as required. These slot into the camera before the film is loaded and can’t be changed between shots on the same roll.
The lens is a simple uncoated meniscus design with a focal length of 60mm which is around 33mm in full-frame terms. Focussing is managed by a simple zone-focus system with a series of icons on the lens barrel denoting subject distance. There are four icons representing distances of 1 metre (3 feet), 2 metres (6 feet), 6 metres (18 feet), and 10 metres (30 feet) to infinity. The lens vignettes significantly, and has very noticeable drop-off in sharpness as you move away from the centre. The centre is reasonably sharp, but no match for an even halfway-decent lens.
The camera has two aperture settings, controlled by a switch atop the lens. f/8 – denoted by a sunny symbol, and f/11 – denoted by a cloudy symbol. On earlier models this switch did absolutely nothing, both apertures being identical. Mine, however, does work, although I’m not going to bet my life on the accuracy of the settings.
The shutter has a couple of speed settings, controlled by a small (and in my camera’s case, loose) sliding switch beneath the lens:
The shutter release is a simple lever to the right of the lens.
Film advance is controlled by a ratchetted dial on the top-right of the camera. There is no multiple-exposure prevention on the camera, so it’s possible to expose the same frame as many times as you like (or by accident!).
Film advancement is also governed by a red window on the rear of the camera. This has a sliding switch which should be set to 12 or 16, depending on the aspect ratio you have chosen, revealing the correct set of frame numbers on the backing paper.
To load the camera with film, the back is removed by releasing the two sliding metal clips at either side. Before loading the film, you can choose to change the frame mask if required, which are held in place by a simple plastic clip at either side and are pretty easy to change. The fresh roll of film is fitted in the left compartment of the camera. The mechanics are simple – a small plastic peg to slot the top of the reel onto. There is no peg at the bottom of the reel and tension is maintained by a piece of foam rubber at the back of the compartment. The film is then attached to the take-up spool at the other side of the compartment (which has a similar single-peg / foam rubber arrangement – the only difference is that this peg is shaped to allow the film to be wound). After attaching the film, wind it on to check it is fitted correctly and then re-attach the back of the camera. You can now wind the film on until the first frame (1) is visible in the red window. It’s important that the slider on the red window is in the correct position or you will end up with a lot of wasted film or overlapping frames depending on the mask you have fitted (I speak from experience here!).
Once the film is loaded and you’re ready to take your shot, you should check that the shutter and aperture settings are correctly set. You can then focus using the distance markers on the lens. The shutter is triggered by pressing the lever. If you’re using bulb mode, you will need to manually hold the lever down until the exposure is finished.
Once the shot is taken, wind the advance wheel until the next frame number appears in the window on the back of the camera.
When all shots have been taken, wind the film on fully until you can no longer see the paper through the window. You can now remove the camera back and take out the exposed film.
Personal observations on use
Loading film is a little tricky. Although the process is a simple one, the flimsy plastic construction means that it can be difficult to get the reels of film in or out of the camera and there’s a definite fear that you could easily break something if you’re not careful.
Making sure the camera doesn’t let in light (or fall apart!) is also important. While I did make a test photo when I first got the camera to see if it leaked light, and it seemed fine, I still don’t trust it. As a result I use black electrical tape to cover the seams where the back of the camera fits to the body. This tape also covers the clips at either side of the camera, giving protection against the back accidentally opening in use. I also use a piece of tape to cover the red film-counter window, only lifting it when I advance the film. Some people really like light leaks (and might even buy a Holga for this reason), in which case you can probably dispense with the tape – although I’d still advise some to hold the back on securely. There’s a difference between artistic light leaks and an entire roll of ruined film!
It’s also important to check that your aperture and shutter speed switches are set correctly. While getting the aperture wrong might not ruin your results, the overexposure and camera shake that can result from being in bulb mode by accident (as I managed to do for three whole rolls! – see here and here) are more significant. I’ve now taped my shutter speed switch into the N position to avoid further accidental long exposures.
Focusing the camera is straight forward enough. As long as you can estimate the distances within a reasonable margin of error then your shots should be fine. Like with any zone-focus camera, because you’re looking through a basic viewfinder, it IS easy to forget to do this and take a whole bunch of shots with the camera set to the wrong focal distance. Likewise, and while I’ve not done this myself (yet), it’s also a simple thing to forget to remove the lens cap and shoot blank frames.
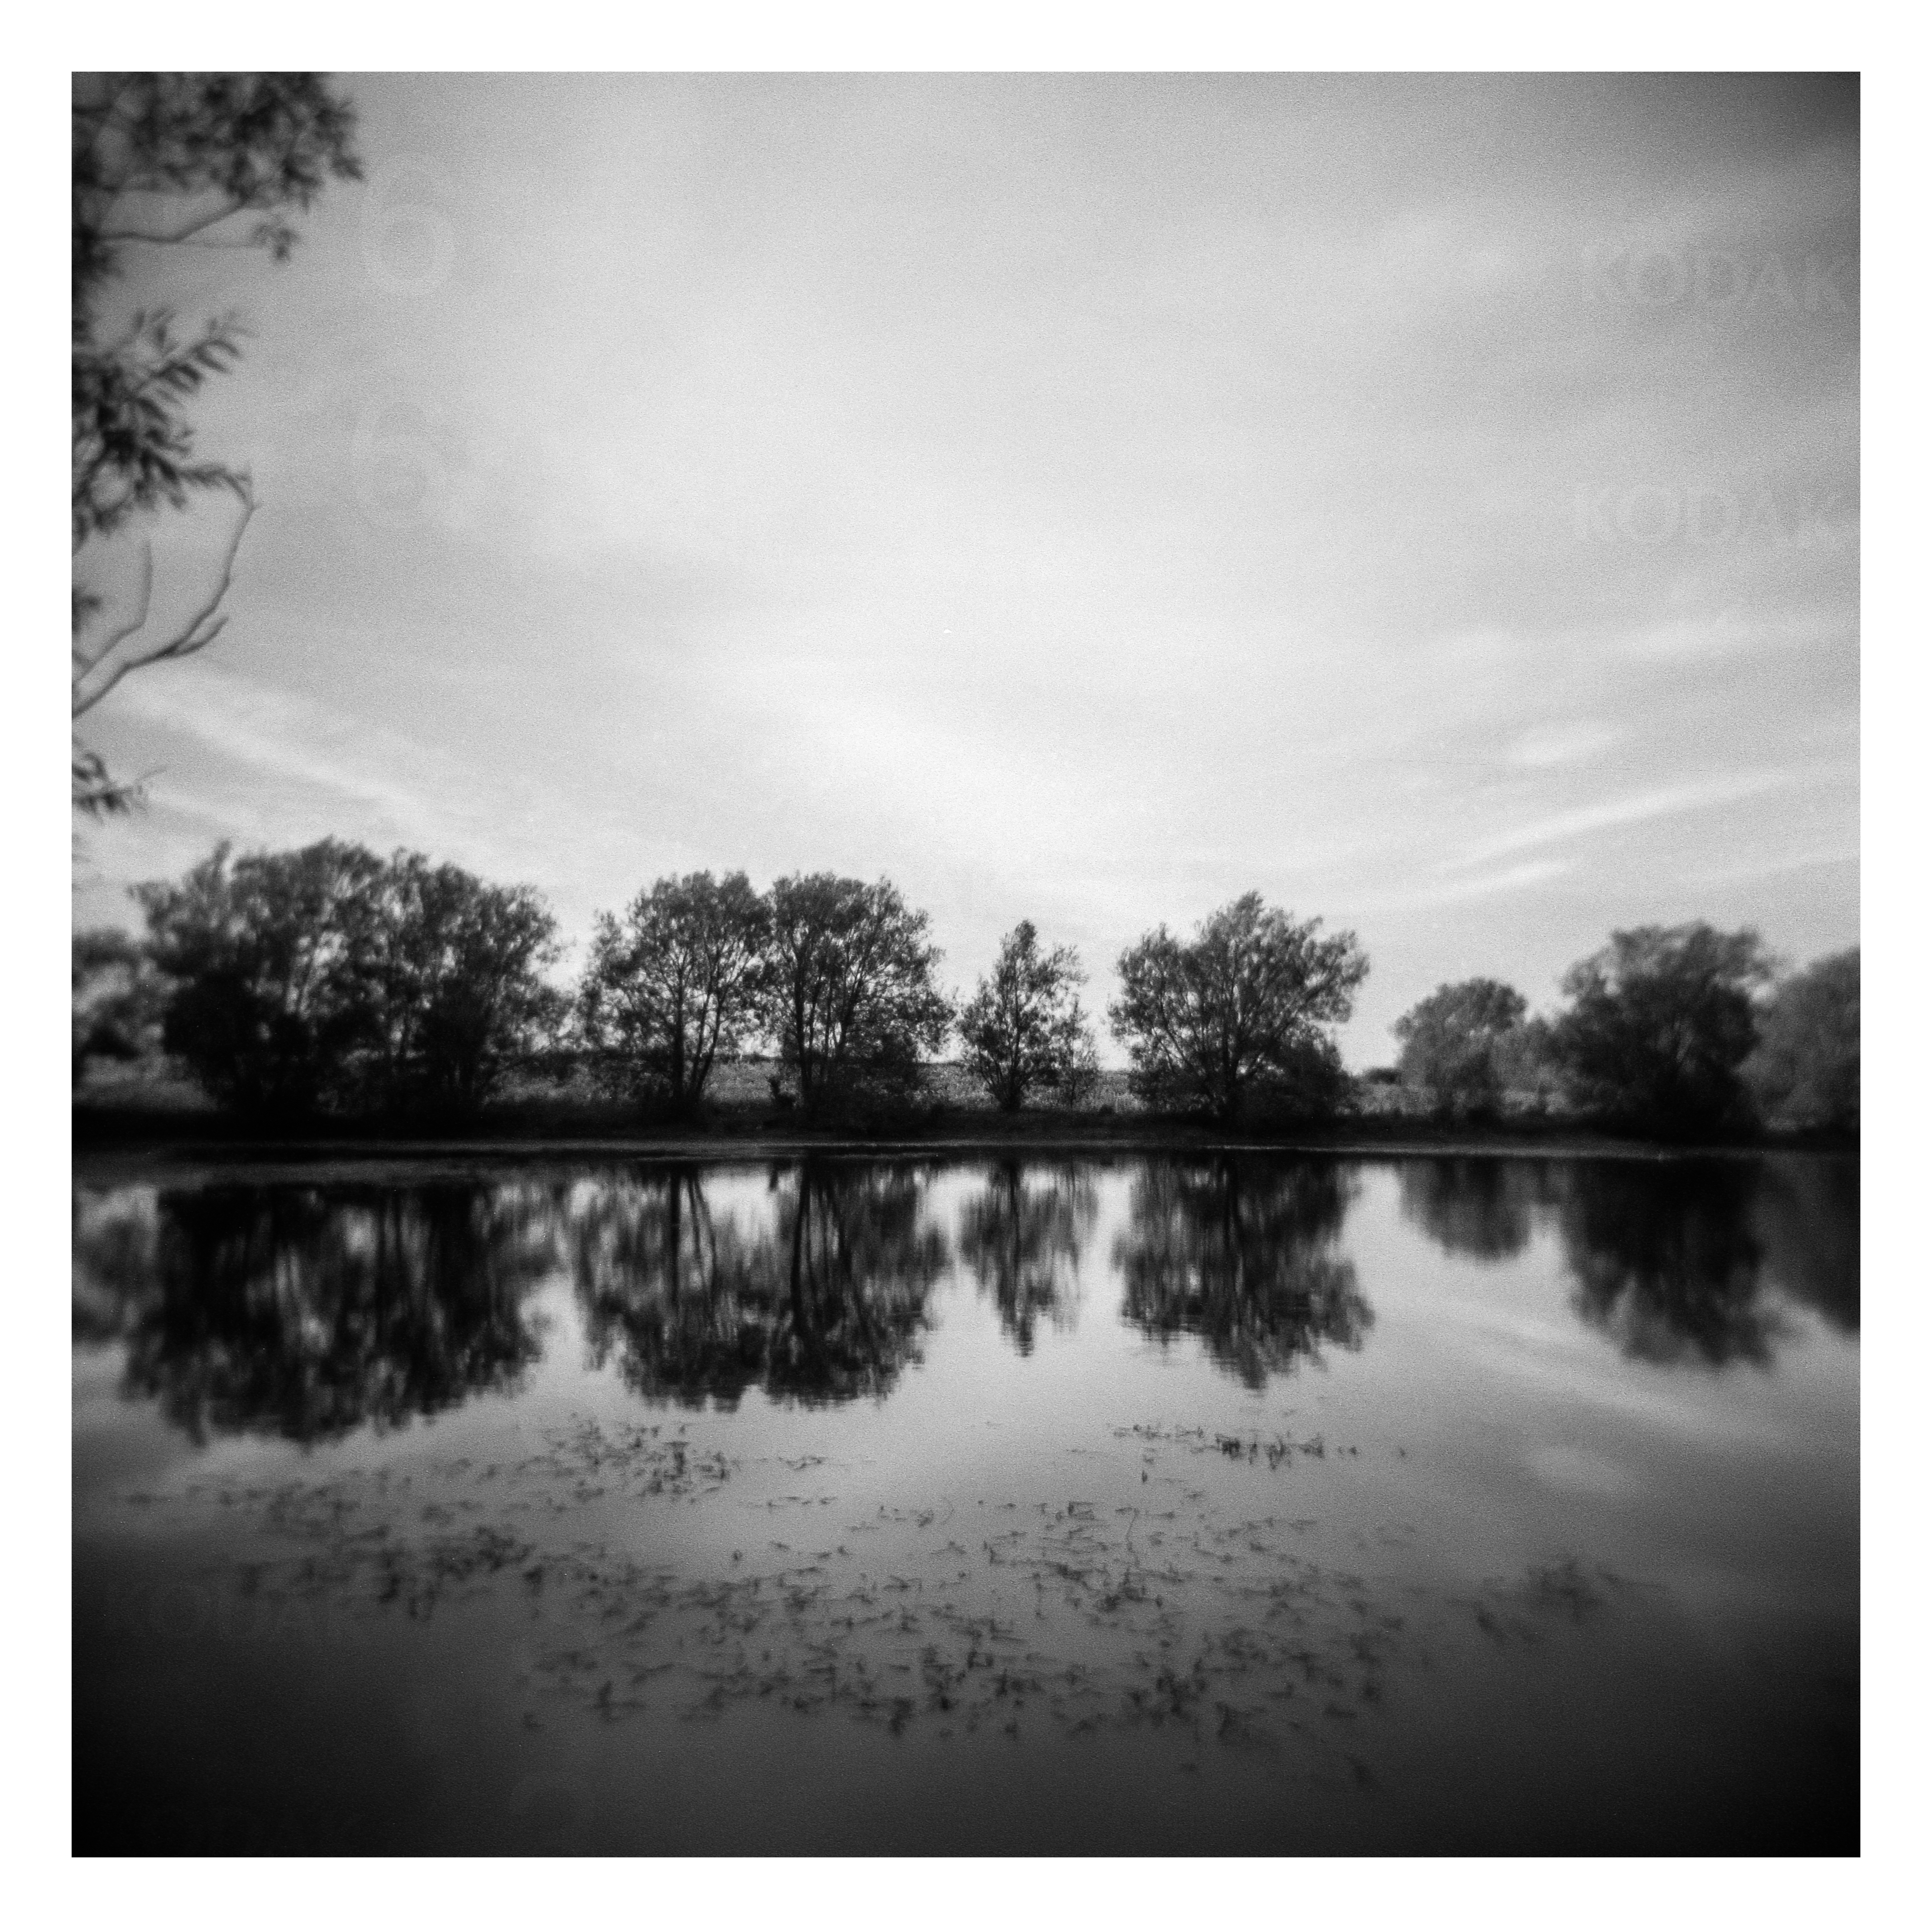
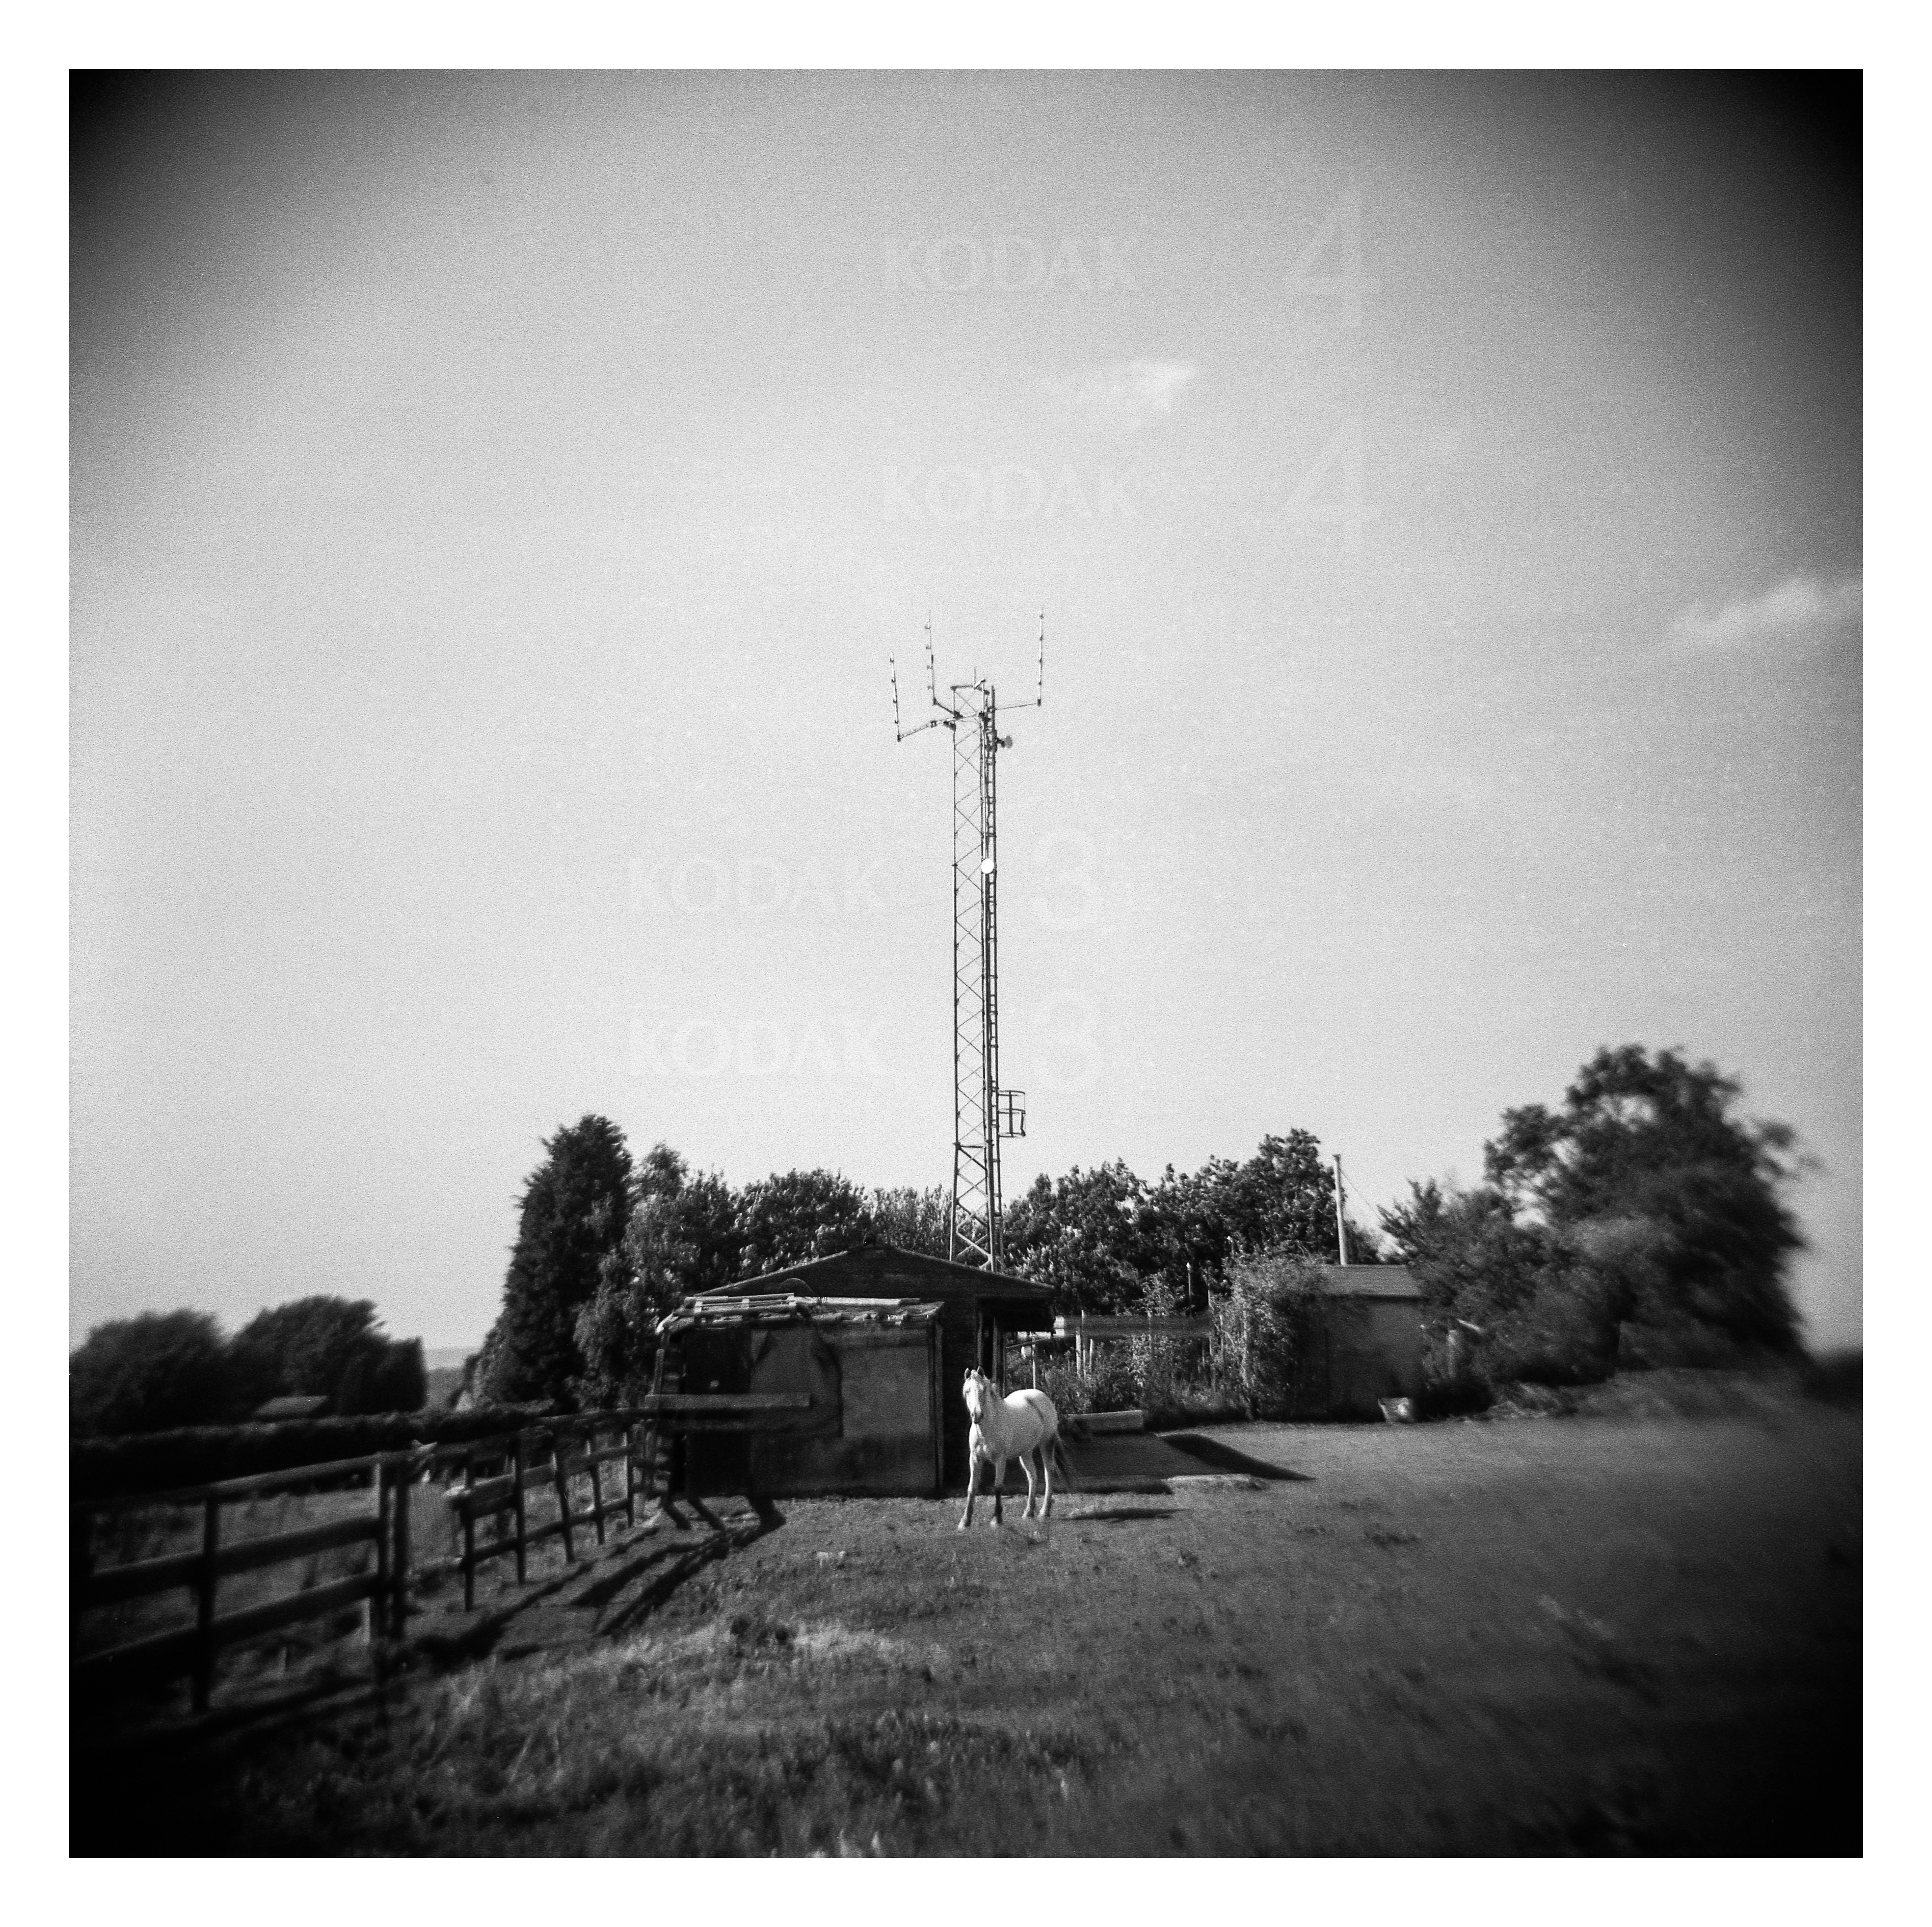
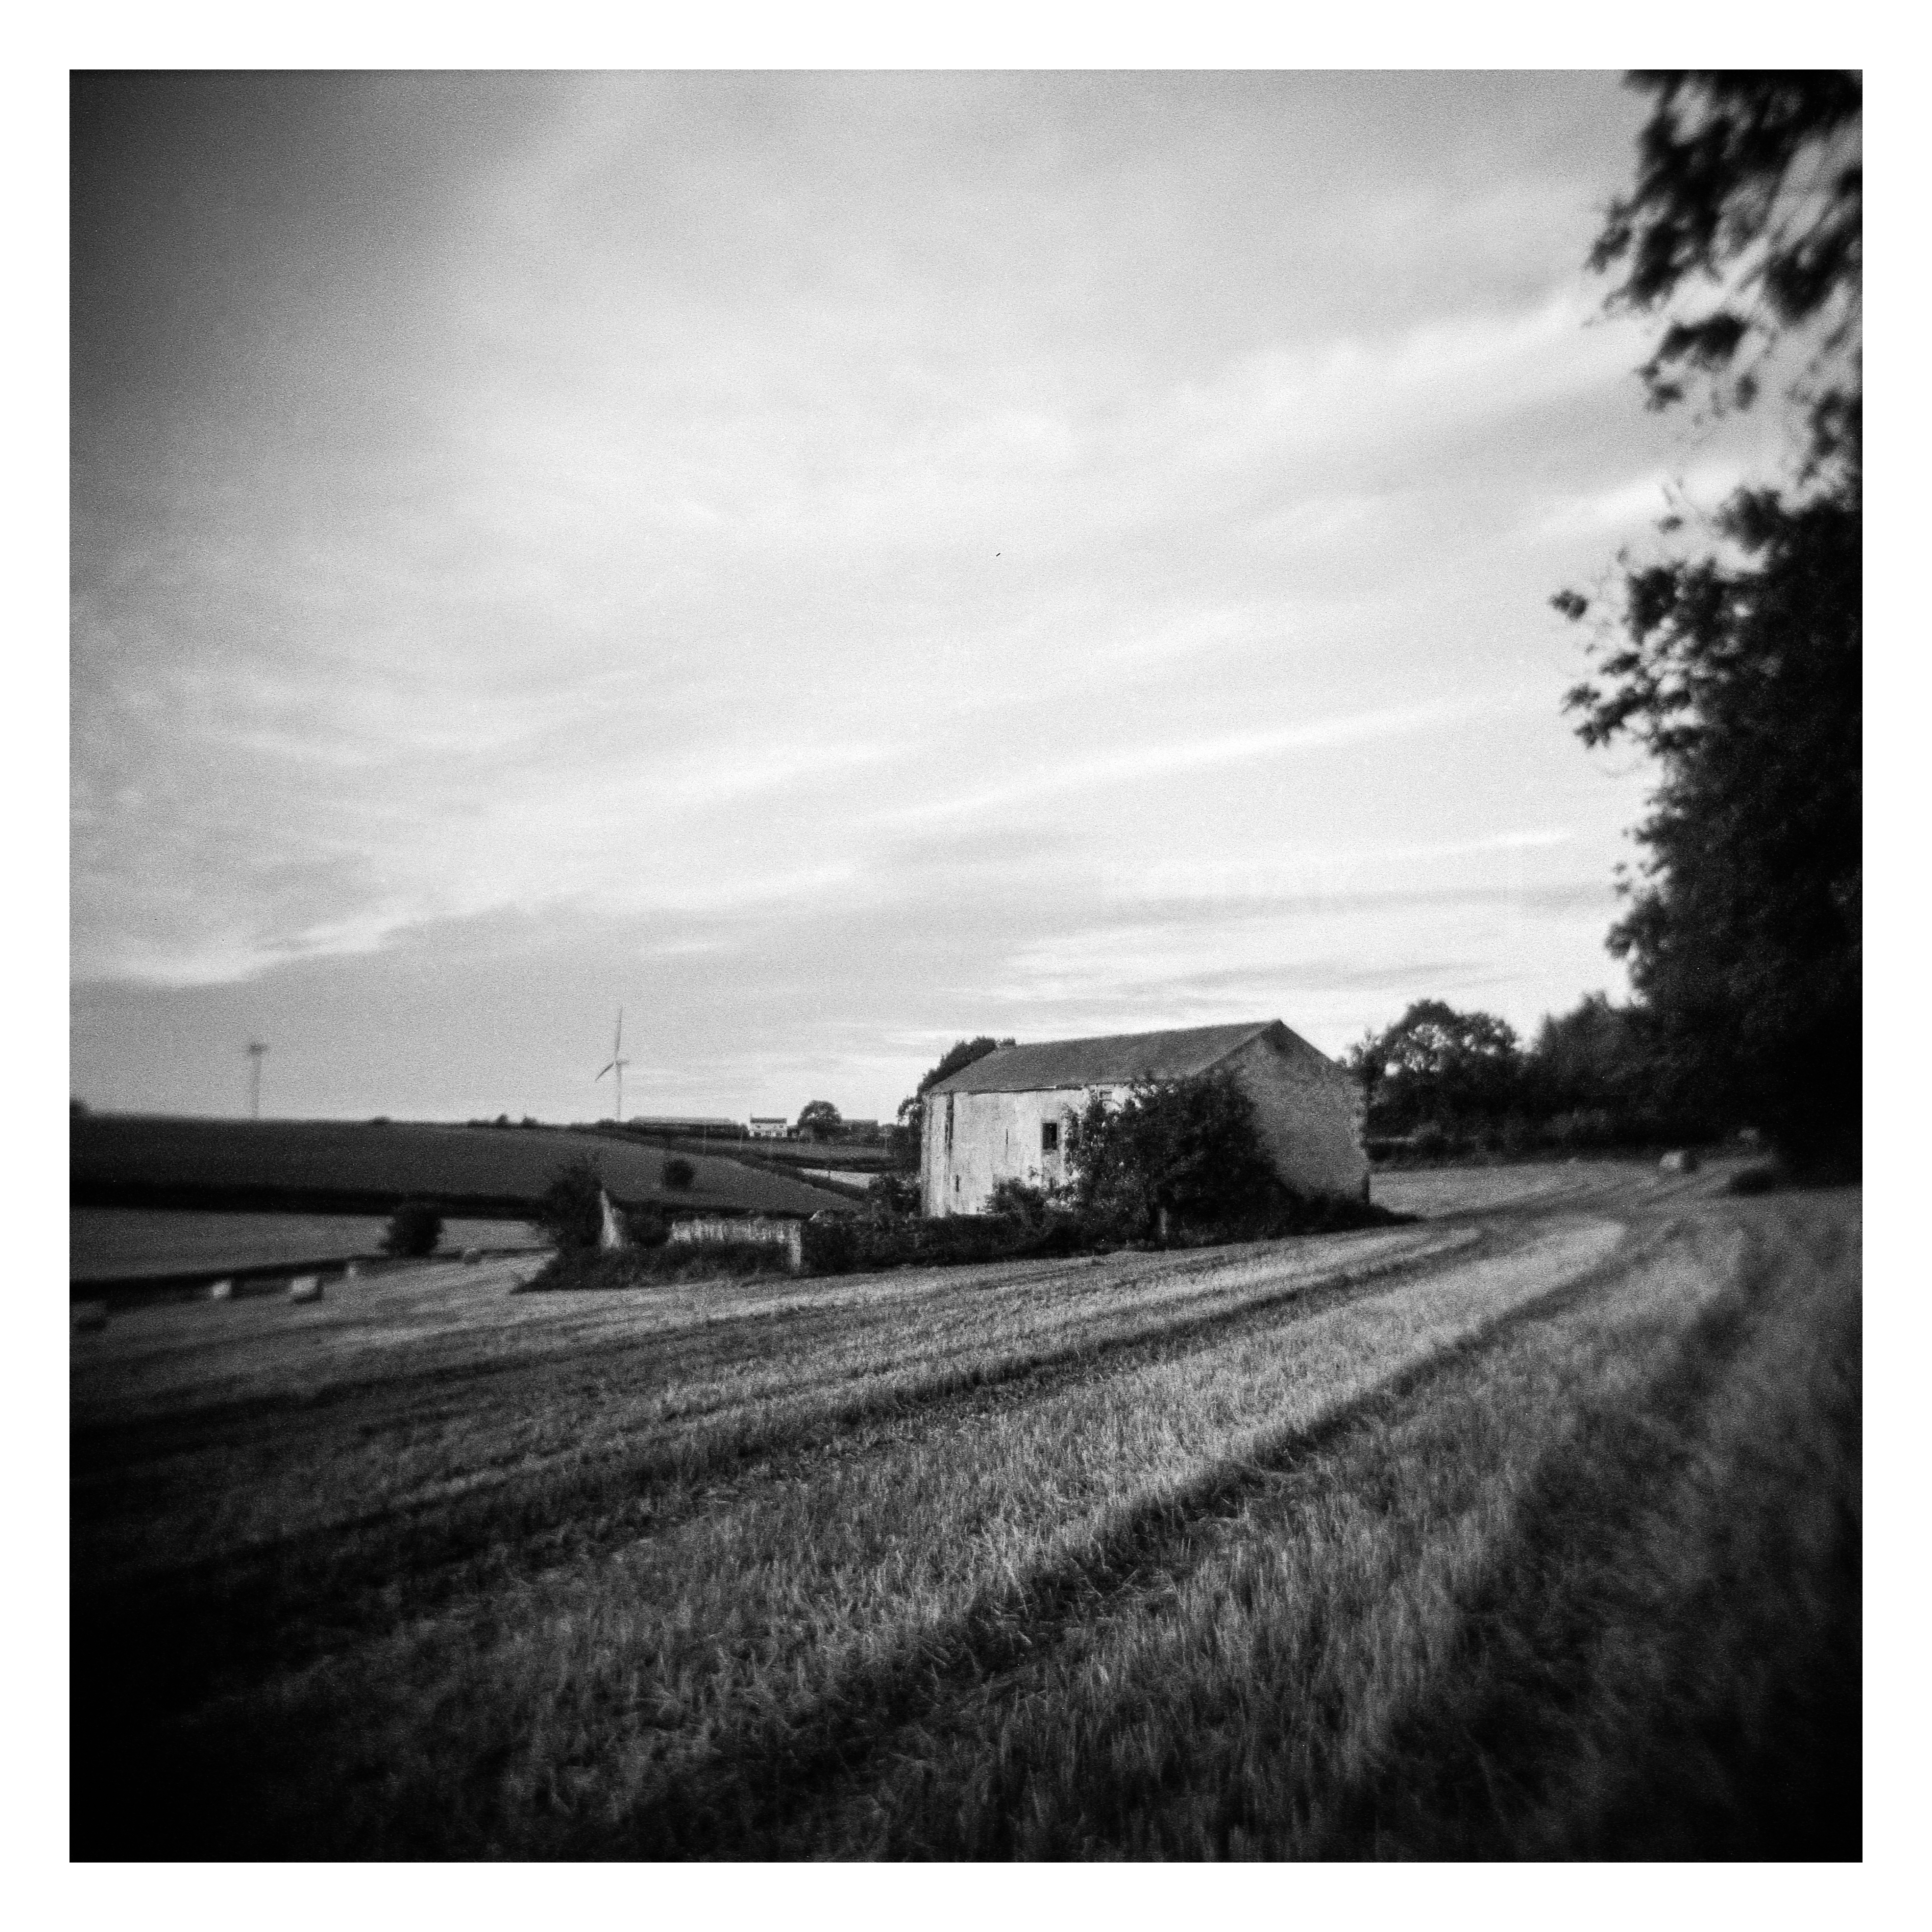
From a technical perspective, the Holga produces terrible photographs. They are heavily vignetted and only the centre part of the frame is sharp, and even then probably only “acceptably” so. From an artistic point of view, on the other hand, the Holga’s results can be beautiful. Their flaws can provide a sense of surrealism. The soft focus around the frame edges can give things an almost impressionistic air, with these elements taking on a soft, smudged, nostalgic look. The camera favours subjects being placed centrally, the eye being drawn to them due to the image imperfections.
Unless completely new to the Holga, I think most people buy into the “experience” that these cameras provide. The joy is to be found within the imperfections, not despite them, and learning how to make the camera shine is both challenging and rewarding. If you’re the sort of photographer who places a premium on image sharpness and equipment features / quality at all times then this camera might not be for you. If, on the other hand you can accept the camera for what it is, find beauty in imperfection, be prepared for the odd accident (or several!), and enjoy the hunt for subjects that the Holga can do it’s own brand of justice to, then it’s a pleasure to use.
All photos: Holga 120N & Kodak Tri-X (expired).
Taken during September 2019
