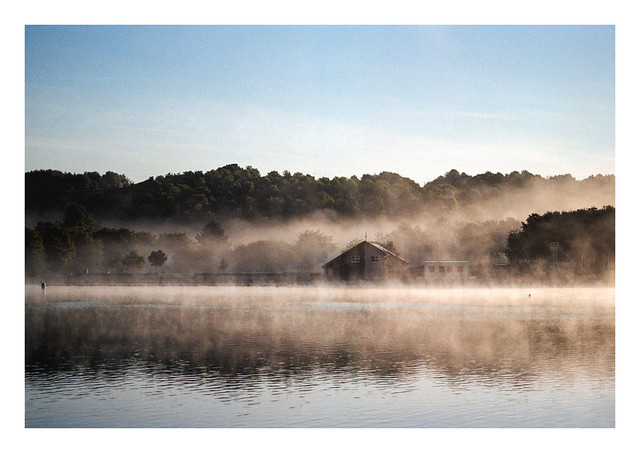
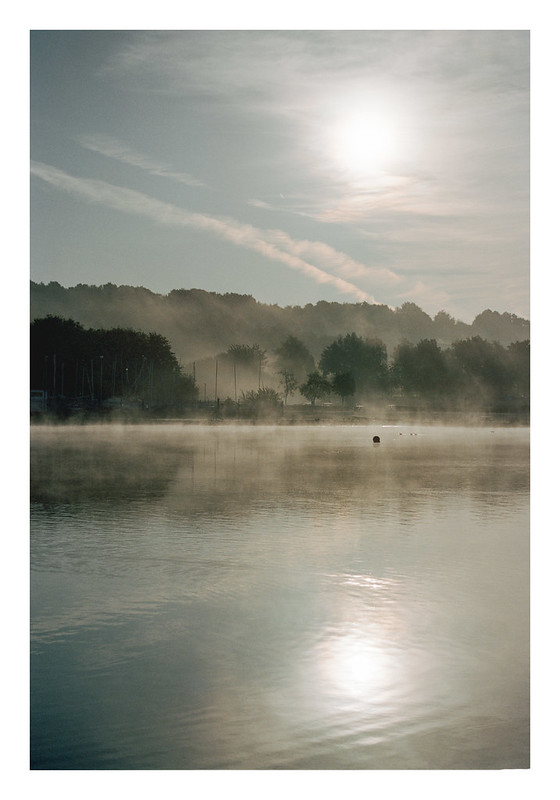
A few weeks ago I decided to walk to the nearby country park and was greeted by the never-disappointing sight of early morning mist on the surface of the lake.
Nikon F80, Nikkor 28-80mm f/3.5-5.6 D & Kodak Portra 160. Lab developed, home scanned, & converted with Negative Lab Pro.
This singular football goal stands on the north beach at Mablethorpe. I think the sand and blue skies are a nice contrast and make for a nice photo. I decided to use if for my competition entry for the “cloudscapes” theme.
Nikon F80, Nikkor 28-80 f/3.5-5.6 D & Kodak Portra 160. Lab developed, home scanned, & converted with Negative Lab Pro.
One of my biggest issues with colour film is, well… the colour. Getting the darned stuff to look “right” is a test for my patience and also my sanity it can seem. Even when I get it looking right, a later glance reveals that I was completely incorrect and it looks terrible. How much of this is down to the actual results of my efforts (or the lab’s) and how much is down to the obsessive perfectionism that my brain likes to lay on me from time to time is up for debate.
I’ve gone through a number of iterations when it comes to scanning colour film negatives over the past five or six years. When I first began scanning my own film, my only option was my Epson V550 and the Espsonscan software that came with it. This gave passable results but not ones I was ever truly happy with. Colours would look “off” sometimes, with odd colour casts which would differ from film to film. I tried using ColorPerfect as a Photoshop plugin, which addmitedly helped (a bit) but also seemed to render shadow areas full of horrible looking noise.
Later, when I got my Plustek 35mm scanner, it came with a copy of Silverfast, so I tried that with it’s built-in film profiles. While I was able to get better results – and in some cases ones I was quite happy with – they still didn’t look right, no matter how I played with the settings.
So then I tried Vuescan. Again, never quite right (although it does a great job on 35mm slides).
I then decided to start getting my colour film developed by a lab that provided scans at a reasonable price. There was an additional cost for posting my film off, and a delay while I waited for the results, but on the whole the scans were nice, if perhaps a little warm looking (the lab would have changed that had I asked though). For a while I was happy, but the thing that put me off in the end was the resolution of the scans. While 35mm was acceptable, they used the same “x pixels on the short side” ratio whether it was a 35mm or medium format negative, leading to the frustrating situation where a 6×6 120 film negative would come back with a smaller scan than a 35mm image. So I went back to using my local lab and scanning them myself again. This decision was made mostly when I discovered Grain2Pixel.
Grain2Pixel – a free Photoshop Plugin – converts linear scans to positives. Here, at last, I thought I had found THE solution. It gave me the best results I’d seen so far… most of the time anyway. Some films, unfortunately, it struggled with (for me at least), particularly Kodak Portra, always giving the images a blue cast that was difficult for me to remove satisfactorily. With a lot of faffing about in Lightroom I could get them close to where I wanted, but I was still unsatisfied, and there would always be a few problem negatives that seemed to actively reject giving anything close to accurate colours.
Negative Lab Pro (NLP) has probably been the go-to solution for scanning colour film negatives for a few years now. I’d played with the trial vesion before but not been any more satisfied with the results than from Grain2Pixel, so never paid for the license. Last week though, I decided to have another go. This time I spent much more time understanding how it worked and, lo-and-behold, after RTFM’ing I got much better results. After playing with the 12 free conversions that you get with the trial version, I decided to bite the bullet and put my hand in my pocket for the full version.
This week I’ve been scanning a variety of negatives, using Vuescan to create a RAW DNG file of the images, and then converting them in Negative Lab Pro. I’ve mostly been happy with the results – particularly some Portra 400 negatives that I’m very pleased with (see examples below).
This is a Noritsu lab scan of a 35mm Portra 400 negative.And this is my Plustek 8100 scan, converted in Negative Lab Pro (with a few minor lightroom tweaks to add a touch more contrast). It has considerably higher resolution than the lab scan.And, for the sake of completeness, this is the unedited scan straight from Negative Lab Pro (althougth I obviously made tweaks during the actual conversion process).
However, I’ve spent most of my time playing with a set of Portra 160 negatives that were exposed about a year ago and which I had been unable to get results that I was truly convinced by. Grain2Pixel didn’t give me the results I wanted, nor did Vuescan, and it was my old friend EpsonScan that had given me the best result (although still not good results). So. I’ve re-scanned the negs, got the RAW DNGs, and been messing with them in NLP. The good thing about NLP is that it’s non-destructive. I can un-convert the original file back to a negative and re-convert it using different settings. This gives a lot of scope for experimentation to get a look I’m happy with. I’m still not sure I’m there with this roll of film yet, but I’m happier than I was before.
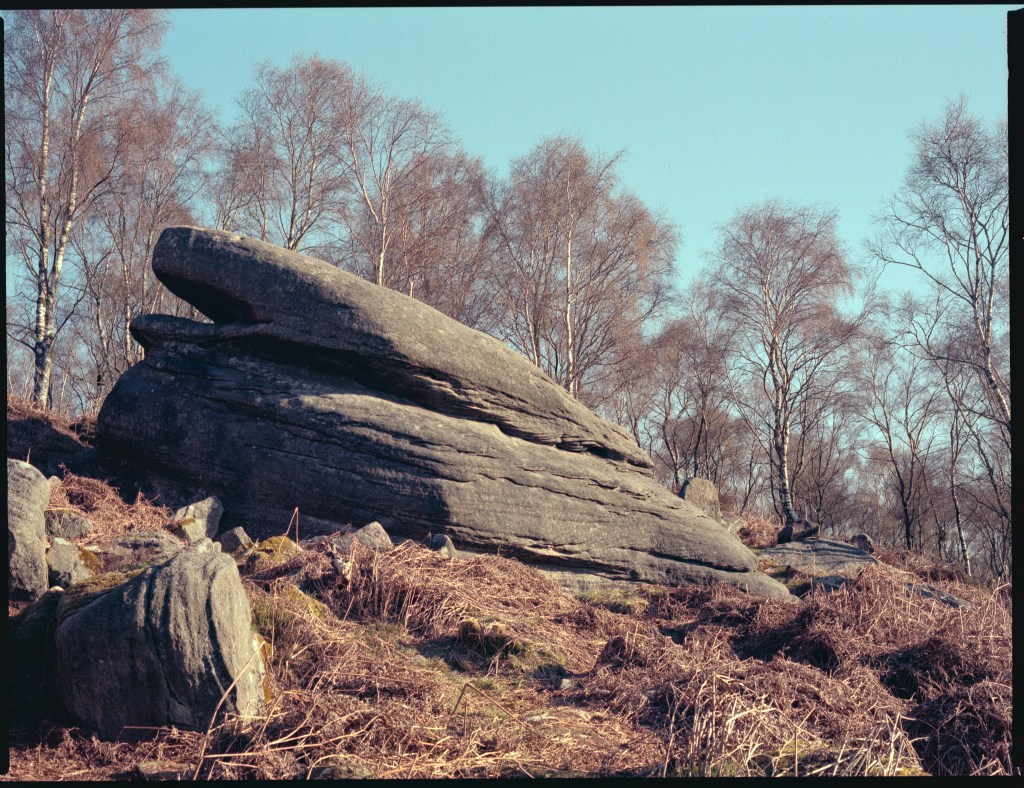
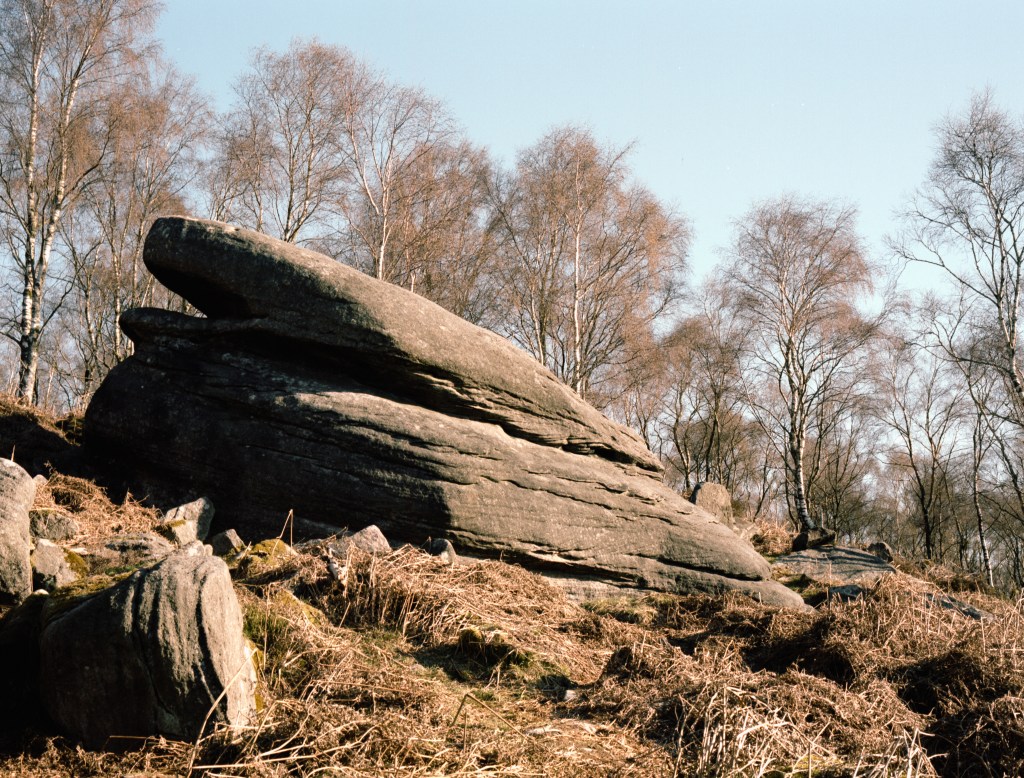
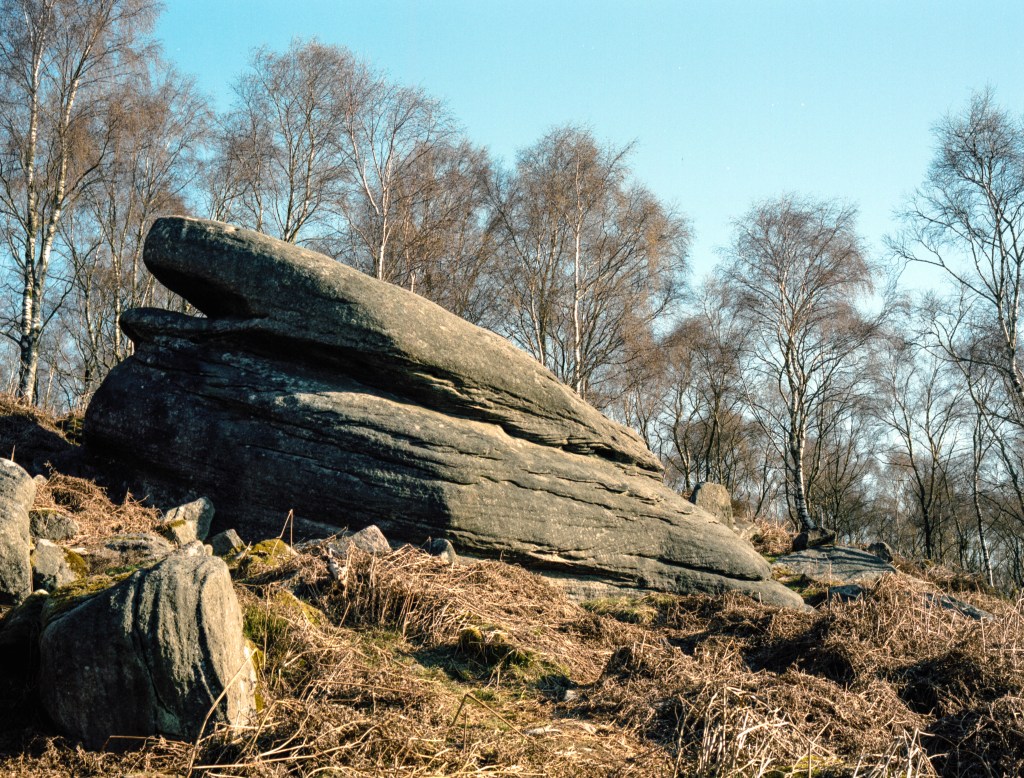
The first shot on the roll was the one that gave me the most headaches – a photograph of a large gritstone boulder in front of some silver birch trees, lit my bright early morning light. The Epsonscan result looked wrong – all cyan and brown, but not in a subtle way. The first NLP version looked better intitially, although maybe still not right. My second attempt with NLP using a different scanner profile and different tweaks was much better though. Here are the three versions (so far!):
My initial Epsonscan attempt. It looks off. Admitedly, more tweaking in Epsonscan might fix this, but it was beyond my talents and patience.The first Negative Lab Pro attempt. Better, but still not right.My latest Negative Lab Pro attempt. I’m not saying it’s perfect, but this one feels much more natural to me.
I think, at the end of the day, I’m never going to get a “perfect” set of colours. There are too many variables at stake. What I need to do is nail a workflow that allows me to get colours that I like on a consistent basis. I think that this is the most difficult part of all, but the journey continues. Now I plan on re-scanning a bunch of different film stocks to see how NLP compares with my earlier scans. Maybe another post at some point…
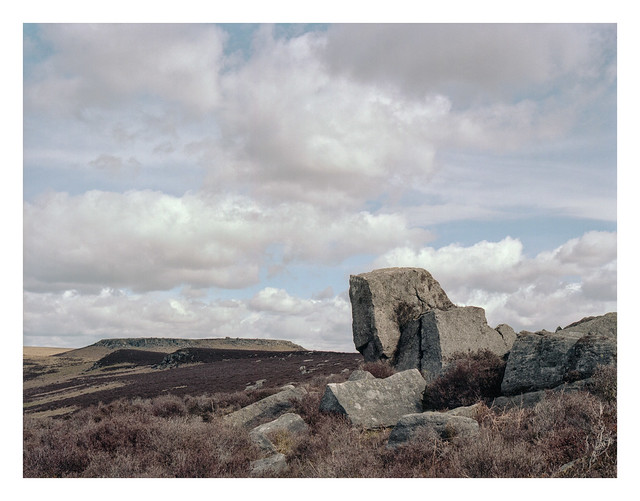
I crunched through the dry, brown heather to get this cluster of rocks in the right place to frame this landscape photo of the moors looking over to Higger Tor, which can be seen in the distance at centre-left. It was approaching lunchtime when I made this picture – long after the golden-hour had passed – but there’s something to be said for capturing images at this time of day. It’s often the time and light when people are out and about and so depicts scenes as many of us will usually see them
Tumbled and jumbled Boulders litter the landscape On Peak District moors
Bronica ETRSi, Zenzanon 75mm f/2.8 PE & Kodak Portra 160.
A blossom laden tree and stone built house make for an attractive scene. Although 6×4.5 is pretty small where medium format film sizes are concerned, I’m always happy with the quality of the photographs produced by the Bronica ETRSi.
Blossom on the trees Soon to fall in white cascades Herald of summer
Bronica ETRSi, Zenzanon 75mm f/2.8 PE & Kodak Portra 160.
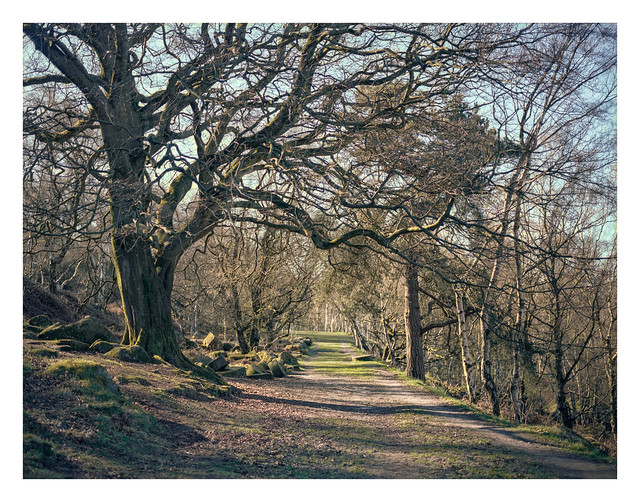
This is the track that leads to Bolehills Quarry. On the left, just beyond the tree, you can see a stockpile of abandoned millstones. Presumably this is where they were stored before being transported elsewhere, and here they remain since the market fell away, gathering coats of moss and lichen and providing something nice to look at as you pass by.
Abandoned millstones Lining the route to Bolehills In the spring sunshine
Bronica ETRSi, Zenzanon 75mm f/2.8 PE & Kodak Portra 160.
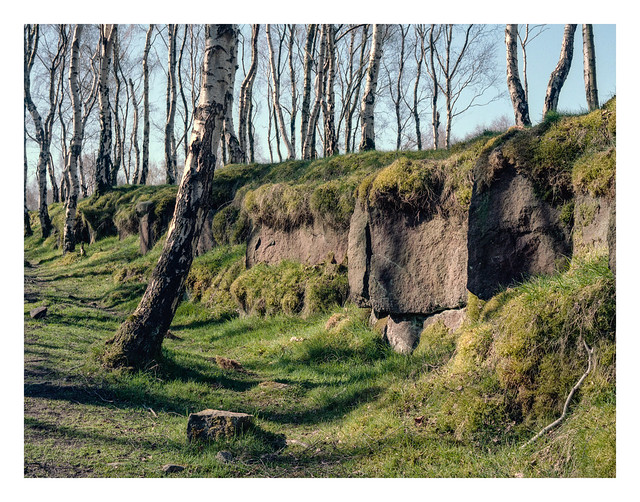
Bolehills Quarry, up above Padley Gorge, is carpeted with lush grass and beautiful silver birch trees. It’s a location that likely suits pretty much any type of conditions. The trees cast stark shadows in bright light and look mysterious in mist. These two shots were made around 9-10am while the sun was still striking long shadows.
I scanned these using EpsonScan, which is not something I normally do with colour photos as I’ve been less than successful at getting nice colours from the results in the past. This time though, I think it’s worked very well. Maybe not perfect – I doubt I’ll ever be sure a colour scan is “perfect” – but still a result I’m very happy with.
The Bolehills birch trees White trunks cast shadows on green In the morning sun
Bronica ETRSi, Zenzanon 75mm f/2.8 PE & Kodak Portra 160.
This morning I decided to get up early and go make some photographs. A lot of trees are starting to turn and there are some gorgeous colours to be seen in their foliage – colours that would look extra nice in the light of an early morning sun. The weather forecasts over the past few days – right up to when I went to bed last night in fact – had stated that it would be cloudless first thing today, with duller weather coming later, and the dew point indicated a chance of mist. When I woke up, I took a look out the window to see how it looked and, sure enough, the skies were free of cloud to a degree, although there was still quite a lot about. So I got dressed, grabbed my camera and tripod, and had a quick breakfast. When I stepped out of the front door twenty minutes later the sky was covered with cloud from horizon to horizon.
I briefly considered just going back inside, getting undressed again, and getting back into the warm bed. But I didn’t. In for a penny, in for a pound as the saying goes and, even without the clear skies, I still thought there might be a chance of mist in the river valley where I planned to go.
There was no mist.
I have several weather apps on my phone. None of them seems to be any better at correctly forecasting the weather than a pine-cone or bit of dry seaweed hung outside the door. One of them once told me that the location where I was experiencing pouring rain at that very moment was actually in full sunshine. If they can’t tell you what the weather is doing in the present, what hope do they have at predicting the future? Anyway, rant over.
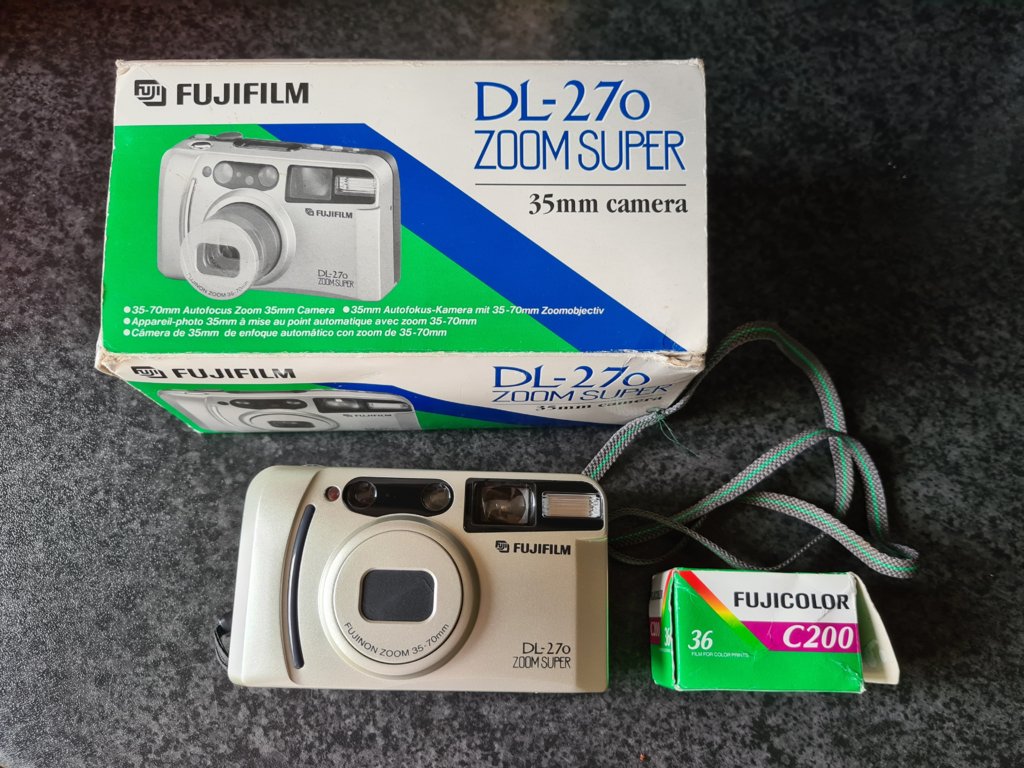
Deciding against making any photos in the dull, unflattering light – no point wasting film – I decided instead to drive to a nearby car-boot sale. It would be the first time I’ve visited a boot sale this year. Partly due to lockdown, but also because I’ve just had other things to do at weekends. I always have a slight frisson of expectation when I visit these places. The dream of picking up a Leica or a Hassleblad for next to nothing, that sort of thing. The dream didn’t come true today, sadly, but I did find another film camera, the only one I saw on all the stalls. It looked in nice condition – boxed with the manual – and the seller only wanted £1 for it, so I decided to rescue it.
It’s not a camera I wanted or needed at all – it’s a fairly nondescript 35mm compact – a Fujifilm DL-270 Zoom Super (catchy name, eh?), with a 35-70mm zoom that starts at a slow-ish f/5.6 and goes downhill from there as you zoom in, granting f/11.2 at the long end. It look s like the sort of camera that someone who wanted to take pictures but lacked any interest in photography would have bought in the 90s. But, for the low price, I’ll give it a go and see how it performs (maybe on a bright day though!). The last camera of this ilk that I used, a Samsung Fino, made surprisingly sharp pictures. Hopefully Fujifilm stuck a decent (if slow) lens inside.
As a bonus, there was a boxed roll of Fuji C200 in a box on the same stall, and the seller kindly threw it in with the camera. I expected it to be expired by fifteen years or something, but it only expired in July this year. Even if the camera is a bust, I still got a bargain roll of pretty fresh film! On top of that, there’s also a roll already in the camera. When I stuck a battery in when I got home (the included battery being dead), it powered up and showed frame 1 on the LCD. This probably means one of three things:
The roll of film is completely unused. Bonus!
The roll is partly used, but the counter has reset due to an elapsed battery. I’m not sure if this would happen though.
At some point someone has opened the back of the camera while it had the film inside, resetting the counter and probably ruining the film. This is the option I think is most likely (although the other, fresh, roll of film I got with it might indicate otherwise). I believe the camera is one of thosa that unloads the entire film when inserted and then rewinds each exposed shot back into the cannister though, so any shots already on the roll might be safe (whatever they might be), but the unexposed remainder might be toast.
Whatever the case, I’ll shoot the roll that’s inside and then, depending how I feel, maybe another. After that, unless it stuns me with the results, I’ll likely pass it on to someone else. But at least it will live on.
And finally, nothing to do with the rest of the post, here’s a nice colourful photo I made with the Yashica Mat the other week…
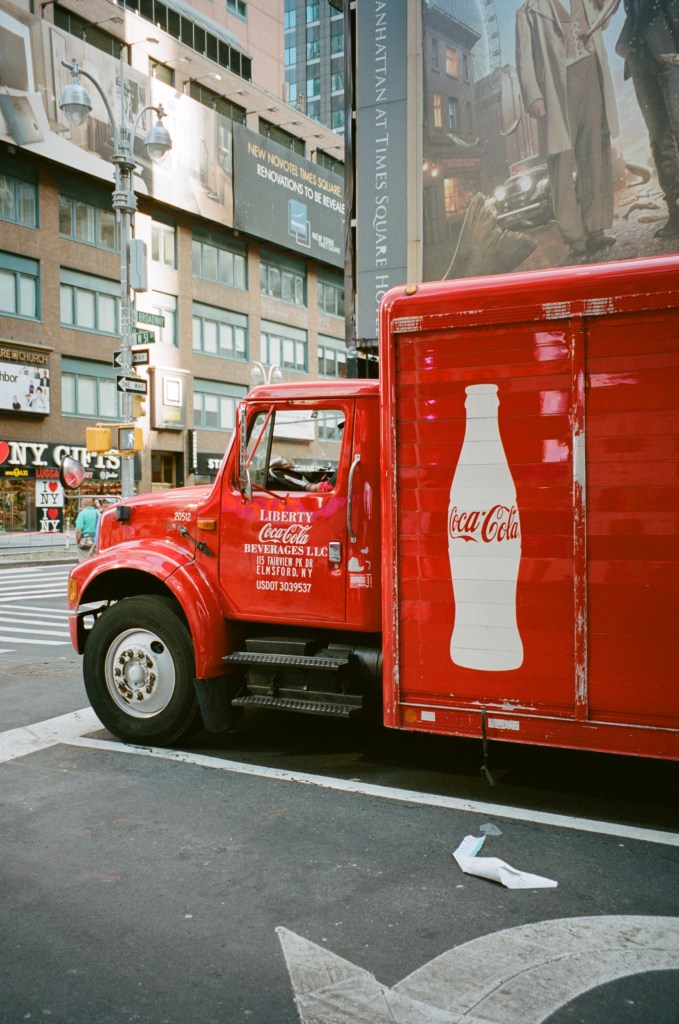
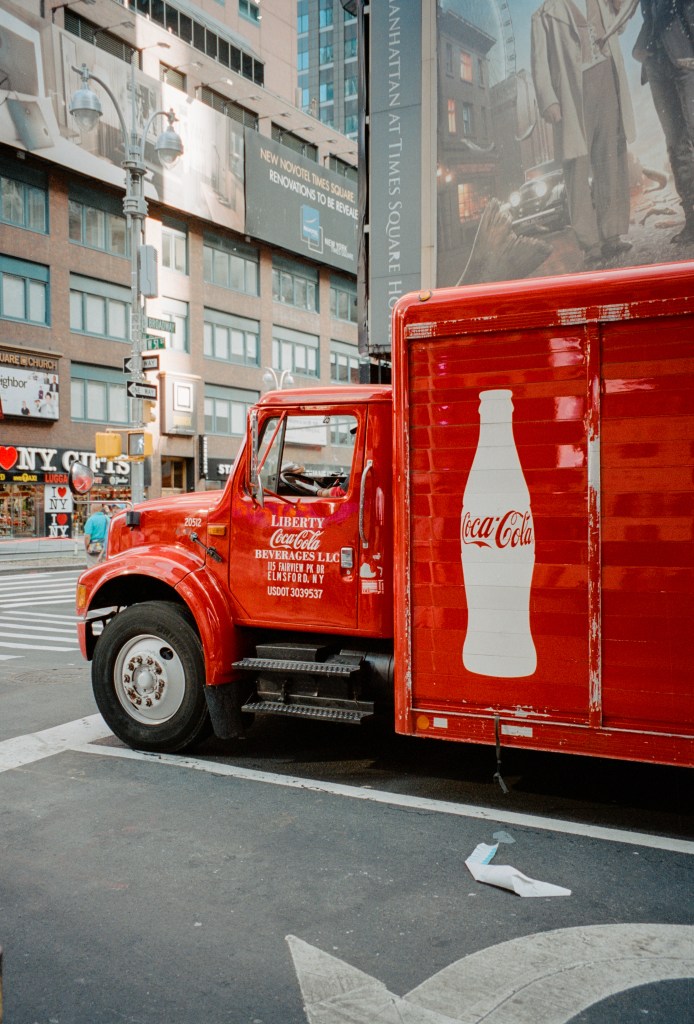
A couple of photographs taken within 50-feet or so of one another, looking in different directions (roughly north-east and north-west), but quite similar in look and feel thanks to the tall buildings in this part of town and the way they have reflected the clear blue of the sky. They both share the theme of reflections too.
I’m jumping back in time a little today with a photo from 2017. The main reason being that I decided yesterday to re-scan this roll of negs. My original scans were performed on my Epson V550 flatbed using the Epson Scan software, which is what I used to use for all my scans, but is now only really used for black and white medium format stuff.
All my B&W 35mm negatives are now scanned with my Plustek scanner, which gives far superior results, while I send all my colour films off to a pro lab for dev and scan (mostly because I know the colours will look how I would expect them to). I still scan medium format slides on the V550 though – mostly because it will cost me an arm and a leg to get lab scans (the place that processes and scans my C41 film for a very reasonable price don’t process E6 unfortunately). The Epson doesn’t fare too badly with medium format scans, although that’s only really down to the fact that the larger image size means that any loss in scanning quality is less easy to spot on screen – comparing like-with-like with a 35mm scan shows the quality is exactly the same.
So, while all my C41 film has been lab scanned over the past year, I still have a lot of stuff that has only ever been scanned on the Epson (both colour AND B&W), so every now and then I’ll re-scan those rolls on the Plustek to get better results. Today’s photo is from one such roll – shot during a trip to Camden in London that my wife and I took a couple of years ago. While I can’t vouch for the accuracy of the Portra 160 colours that the Plustek and Silverfast have given me, they’re a whole heap better than the slightly muddy, greenish cast scans that I had from my Epson Scan attempts. The resloution is light-years ahead too, with details now much more finely resolved than before.
Today’s photo is one that has really benefited from the re-scan I think.