
While watching YouTube videos the other day, I came across a video by linusandhiscamera, which I’ve embedded at the bottom of this post. The video, entitled “Your film scans SUCK“, shows how colour scans can be considerably improved in some cases by tweaking the colour curves in your editing software.
I know, curves, right? Who the hell understands how to use those things? It’s practically mathematics!
But not in this case. The technique is very simple to implement and you can see quite dramatic improvements to your scans straight away. I’ve tried it on lab scans and some of my own – pre-Negative Lab Pro – home scans, and am very pleased by the results. It seems to do especally well at removing colour casts from reversal film too. I’ve included some examples below – both my own photographs, and also some old slides that I’ve collected.
I’ve used Adobe Lightroom to do this, but the Camera Raw Filter in PhotoShop should work too, or – I presume – any other editing software that allows modification of colour curves.
Here are some examples:
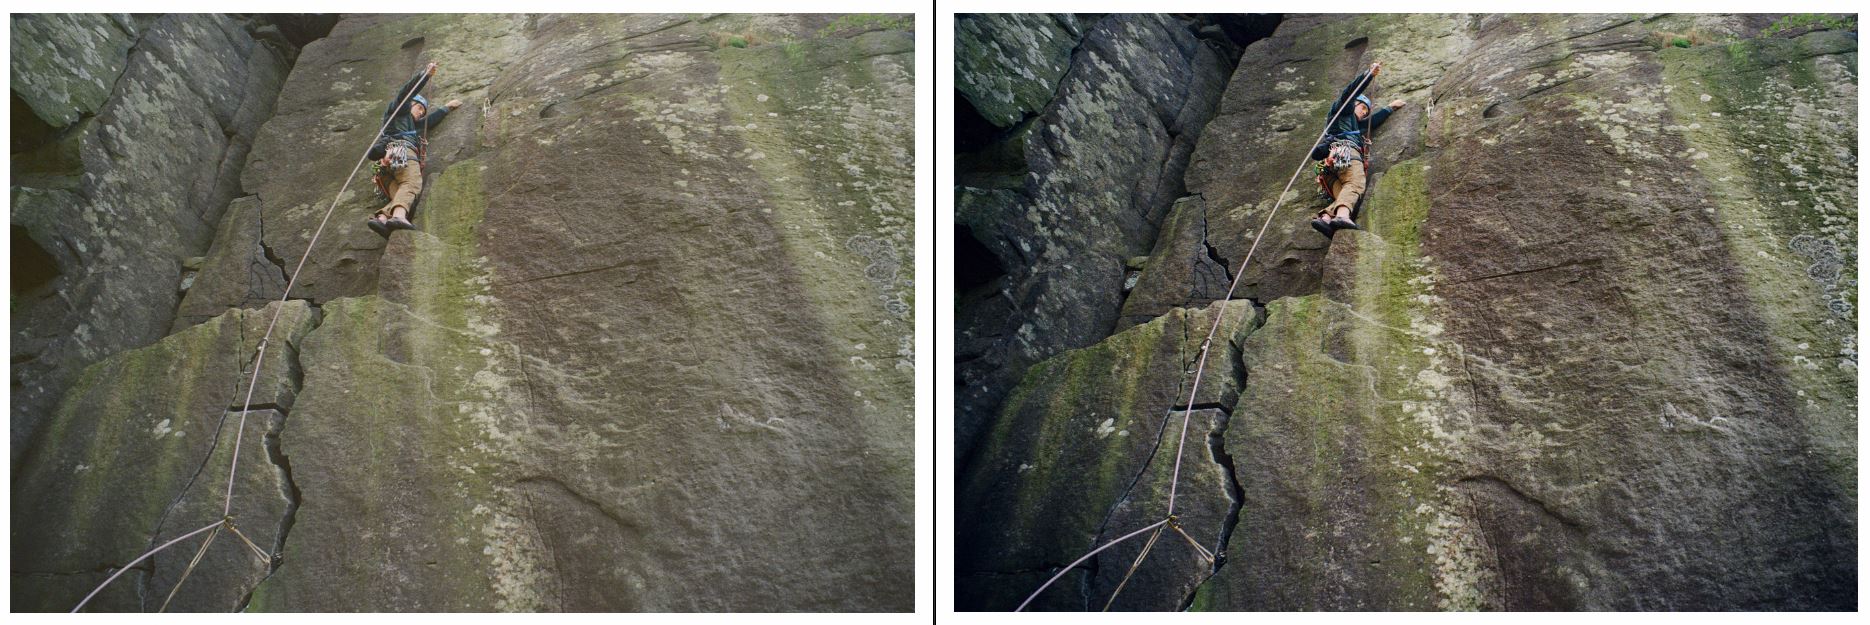
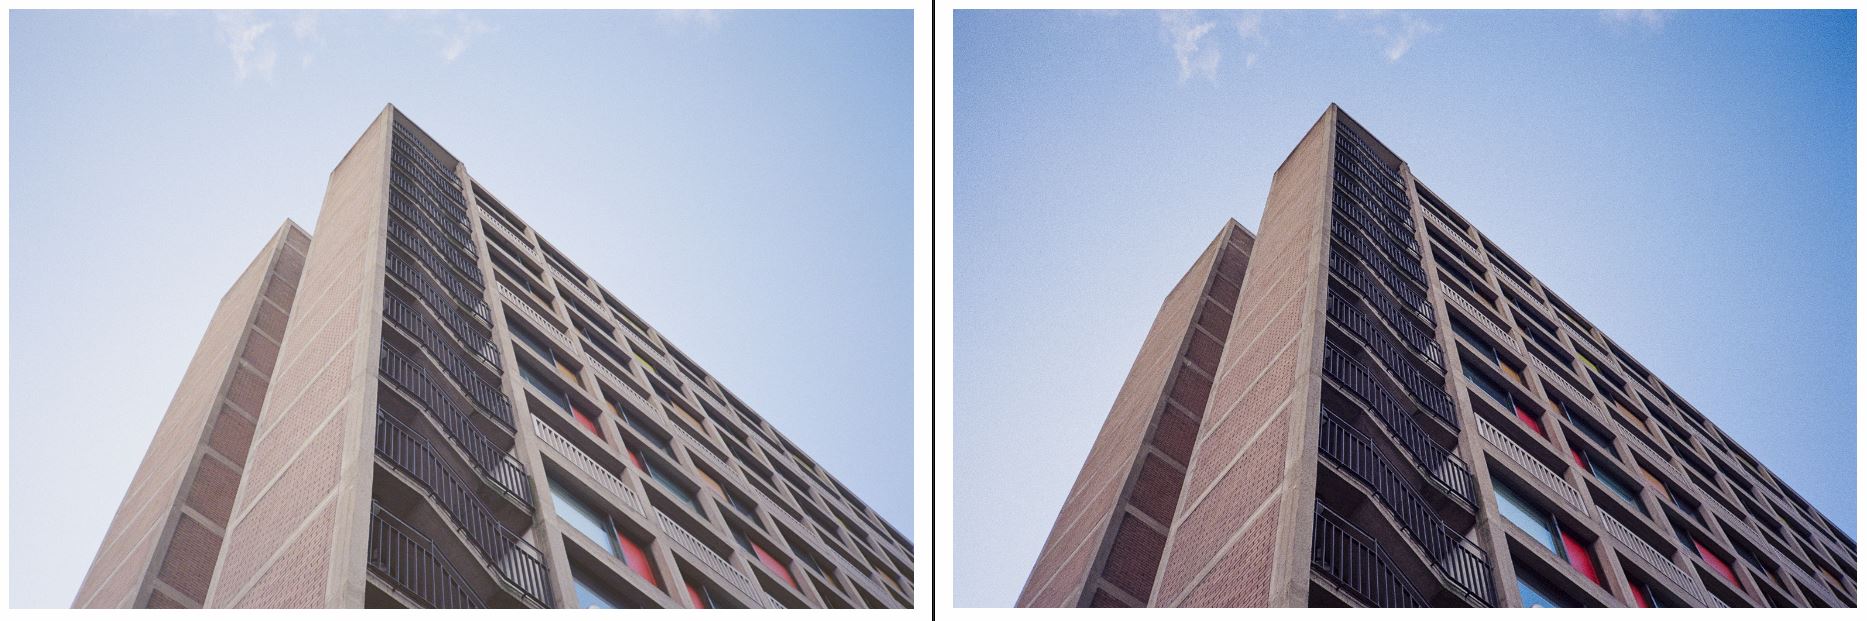
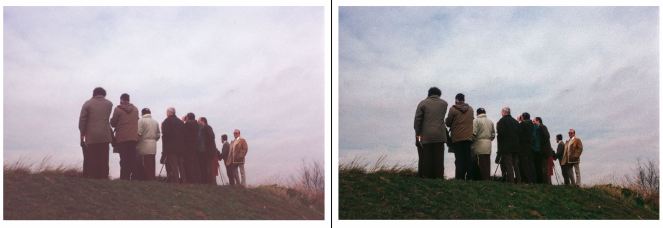
The first three are lab scans. I thought the first two looked ok in their original format, but the tweak has improved them noticeably.
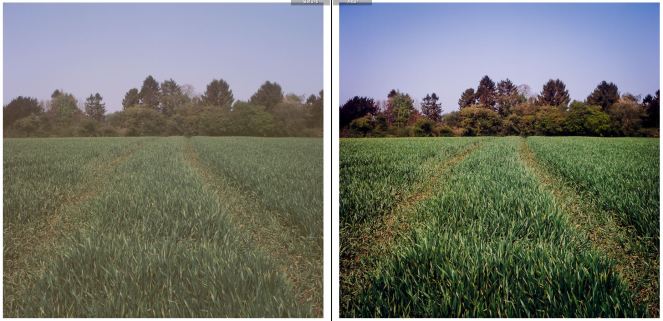
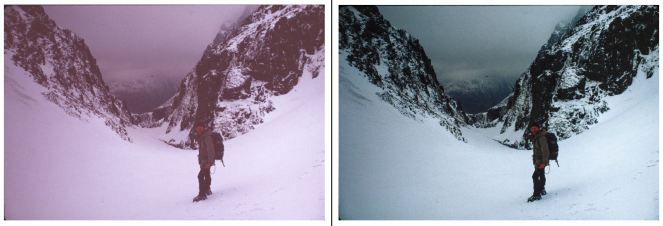
This next one was from a roll of Ektar that I’d accidentally underexposed. There’s a dramatic difference after editing the curves.
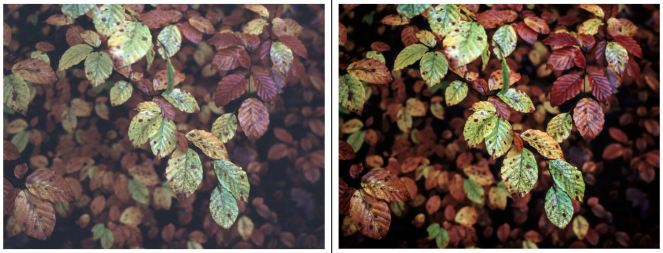
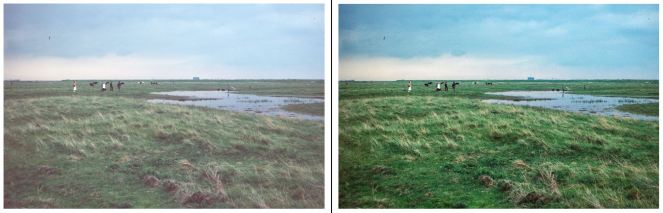
This next one is an Epson V550 scan of some Velvia 50. The tweak has really made the colours pop.
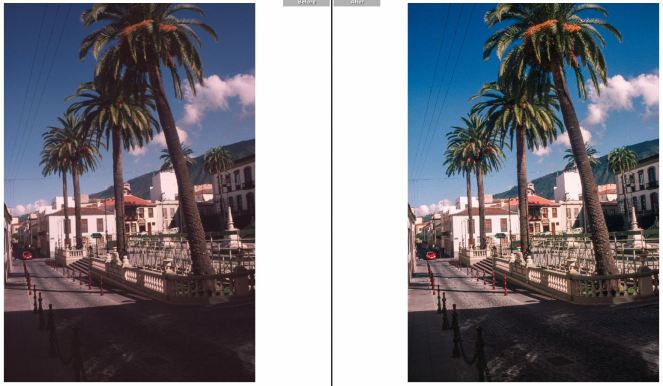
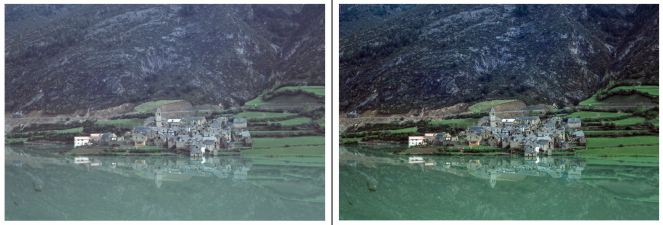
All the other examples below are old slides from my collection. Some of these have significant improvements visible.

This is a great and straightforward technique, and I hope others find it as useful as I have.
Here’s linusandhiscamera’s YouTube video, which explains how it works.
