Another large format attempt. This one is possibly my favourite so far that I’ve shot with my Chroma. But it’s still not as good as I want it to be.
There are two main issues with this picture. One, not visible in the image you see, is that I think I put too little developer in the tank as this picture and another developed at the same time both had a thin strip of underdeveloped negative along one of the short edges. I was sure that I’d used 475mm of solution are required by the tank I was using, but clearly not. This resulted in my having to crop the image. The second issue is the focus at the left side of the frame, which is soft. I think I must have had a little bit of swing taking place and it only seems to take an imperceptable amount to knock the focus out. I am going to have to take much better care over this in future.
Apart from the above-mentioned issues though, the image is very sharp and I’m quite happy with it.
Yesterday didn’t work out how I’d hoped. My plan was to go out in the afternoon and make some photographs, and that’s what I did. However it was a disappointing experience. Firstly, because the weather was rainy and gloomy in the morning, I had to wait until the afternoon before I could go out (well, I suppose I could have gone out and took some rainy-day pictures in the morning, but that wasn’t what I wanted to do). The weather forecast for the afternoon showed it would be a mixture of sunshine and sunny spells but the reality was that it was largely overcast, with the sun only being visible as a vague disk behind the cloud cover most of the time. This annoyed me – I have a dim view of weather forecasting apps, most of which can’t even seem to show the current weather correctly, much less what it’s going to be like later on or the following day. The untrustworthiness of them is frustrating. However, the weather was what it was and I would have to make the best of it.
I took my Yashicamat 124G, but I was hoping to shoot some more pictures using the Chroma 4×5. I decided to head out to Shireoaks and maybe take a picture of Steetley Chapel before driving to Shireoaks and walking along the Chesterfield Canal to Turnerwood.
I visited the chapel first and spend time setting up my large format gear. I was careful to check the exposure, setting up the correct aperture, shutter speed, making sure the focus was correct, and then checking the shutter was firing as expected before taking the shot. I removed the dark slide, took the picture, and then packed everything up, got in the car and drove to Shireoaks. After parking the car, I set off towards the canal, grumbling under my breath about the poor light that was filtering through the clouds. On top of this a breeze had gotten up, placing ripples ont the surface of the water to kill any reflections and also jeopardising any longer exposures with the big large format camera, whose bellows are great for catching the wind.
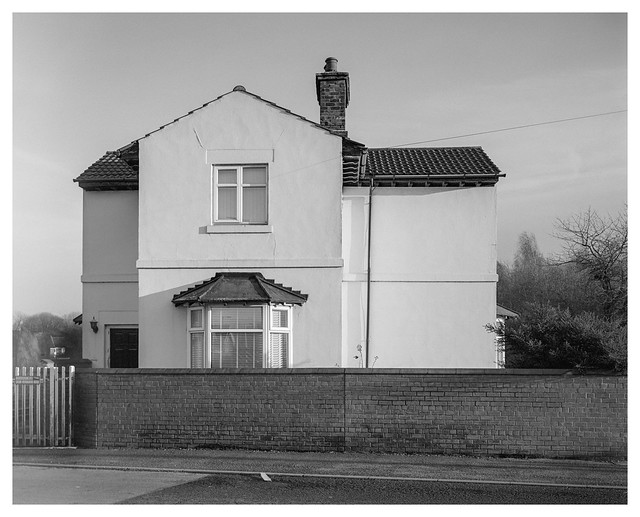
When I arrived at Turnerwood I set the camera up for a picture of the lock keepers cottages that sit beside the water there. It’s an attractive location, but the conditions were dull and not particularly flattering. Nevertheless, I got everything ready for the picture. And then I realised something unfortunate…
I became uncomfortably aware that when I’d made the first shot back at Steetley Chapel that, after taking great care to get everything set up properly, I’d then gone and removed the wrong darkslide from the film holder, effectively exposing the sheet of film through the ground glass on the back of the camera rather than through the lens. I could even remember seeing the dark slide moving behind the ground glass as I removed it ferchrissakes! This didn’t help my already low mood, but I decided to take the second shot anyway, making sure that I was using the unexposed sheet of film. I took the shot and then tried to reinsert the dark slide.
It wouldn’t go in.
Instead of sliding true it instead hit some resistance which I’m pretty sure was the sheet of film. After several attempts I came to the realisation that there was nothing else to do but remove the film holder, thereby ruining a second sheet. Great going eh?
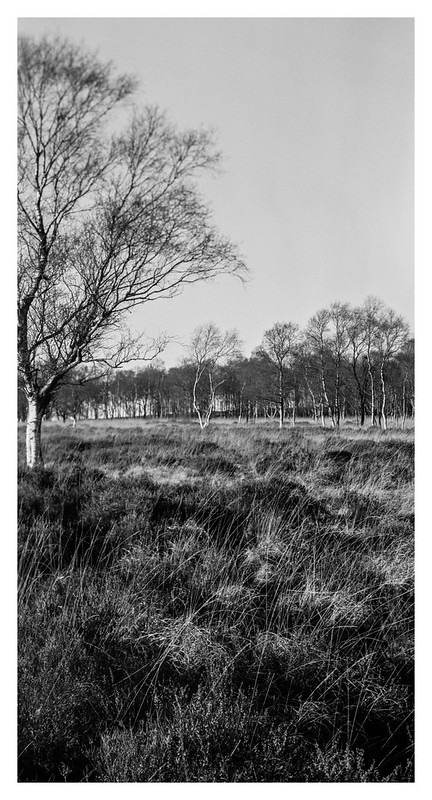
I decided to have another attempt at the shot, this time using a remaining sheet of Fomapan 100 that was in another film holder (the other shot on there was of a silver birch tree I photographed in the Peak District a couple of weeks ago). This time all seemed to go well and I was able to reinsert the dark slide correctly and then pack everything away. I took a shot of the scene on the Yashicamat too while I was there, just in case.
I shot another couple of sheets of HP5+ back in Shireoaks and these seemed to work ok with no obvious problems. I’ve not developed these yet though, so who knows?
As I drove home the sun emerged from the clouds and bathed everything in perfect light. Sigh.
I’ve developed the Fomapan sheets today with somewhat mixed results. The Silver Birch picture was largely a write off, having a massive light leak that took out around a third of the image. I’ve attempted a crop, but it’s not great. Partially because it wasn’t what I wanted from the picture and also, from a technical point of view, because I’ve got some unwanted camera movements in there which has done odd things with the plane of focus.
The shot made at Turnerwood was much better, but the light wasn’t great, so it’s a little flat looking. It also has some issues with camera movements – this time some front swing that means the left and right edges have some softness. I’m going to have to pay close attention to these things in future to avoid them creeping into my pictures again.
I also loaded my first sheets of film into the holders today. The camera came with four film holders already loaded with film, so I’ve had to shoot those before getting the chance to load some myself. This also seemed to got well though, thankfully.
More large format cock-ups to come soon no doubt. 🙂
I’ve been thinking about potentially having a go at large format photography for a while now, probably for a couple of years, although more seriously in the last twelve months. Having seen imaged made with large format cameras, I was attracted to the look that they could convey as a result of the large negative sizes and, importantly, the camera movements available and envisioned the pictures I could make.
However, moving to large format would require some investment. Firstly, the format isn’t really interchangeable with 135 of medium format photography and I would have to buy most of what I would need from scratch. A camera. A lens. Film backs. Film. A loupe. And, while I already develop black and white photographs at home, even here I would need new equipment to allow me to process such large negatives.
And then there’s the issue of getting the images from the negatives to some final output. In my case, given I don’t make wet prints, this would require a scanner capable of handling 4×5 film, something my Epson V550 flatbed can’t handle. I did have a few attempts at scanning a large format negative that someone gave to me using the V550 to scan it in two halves and then stitch them together in Photoshop, but the results were unsatisfactory.
So, before I could start with large format, I needed to get some money together in order to purchase the equipment I would need to get started. For a long time I was in the position where I could afford either the camera and associated gear OR a large-format capable scanner, but not both, so it looked like it might take a while before I could really begin. But then a very kind person came to my aid, offering me a used Epson V700 flatbed scanner for the cost of shipping and a donation to a charity. I accepted this with graet grattitude and at long last was in the position to purchase a camera.
I’d largely got my mind set on an Intrepid 4×5. They are affordable and available and would meet my needs perfectly. But then I received some more good fortune. I came upon someone selling a used Chroma 4×5 camera along with lens, film holders, film, darkcloth and even a backpack for it all to fit inside for a very good price. It even came with several boxes of film – some unopened. So I jumped at the chance.
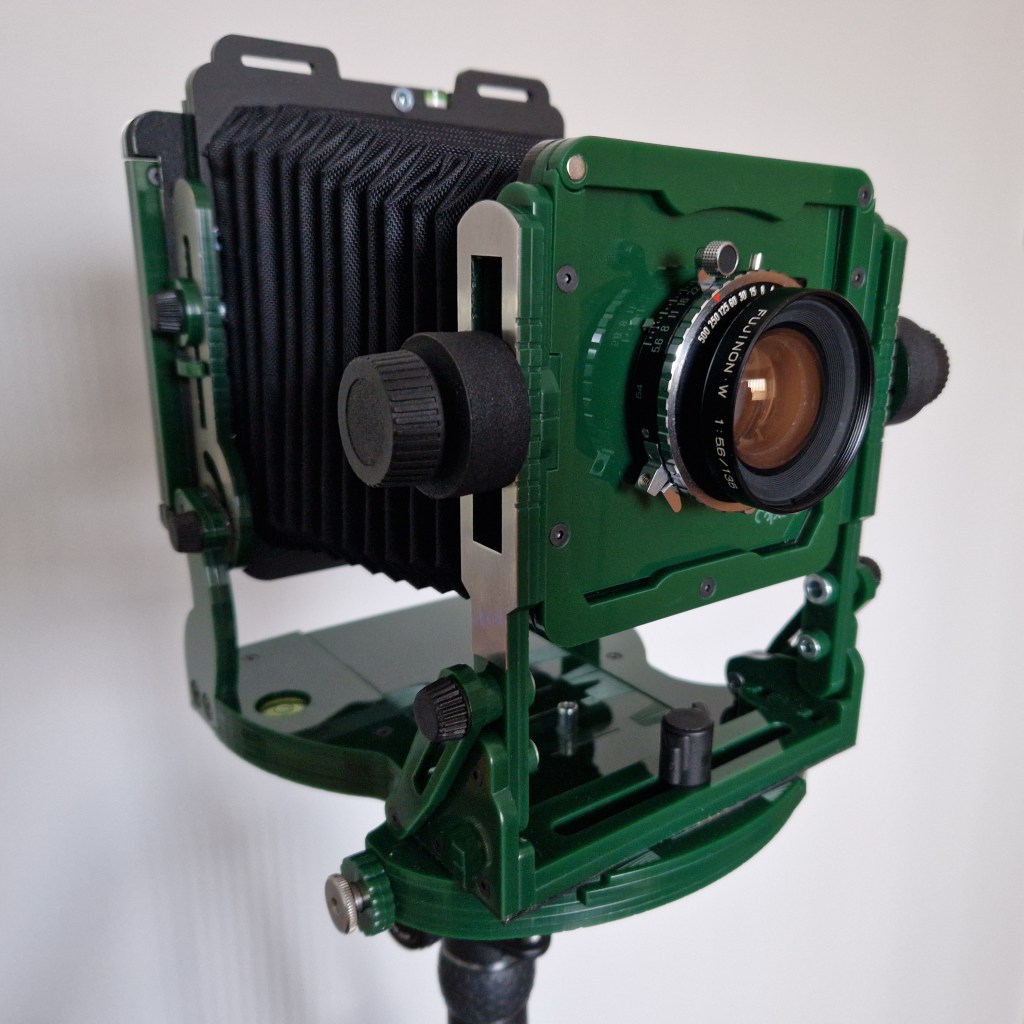
The Chroma is a modern 4×5 technical camera manufactured from acrylic. It was available in a wide range of colours when launched and the one I bought is in a fetching forest green shade.
I bought the camera at the start of December and it was posted to me promptly. And then it became stuck in the UK postal system which was suffering heavy backlogs due to industrial action. In the end my next-working-day parcel took three weeks to arrive, being delivered just two days before Christmas. As Christmas was then upon us, I didn’t have time to do more than peek inside the package until a few days later.
The first time I unpacked the camera it was purely to start understanding how it worked. Wile a large format camera is in many ways a very simple device – literally some bellows in a frame to a large extent – the process of unfolding it and understanding what the multiple screws and knobs do was a little overwhelming at first. I had some instructions though and was able to get everything in its right place, fit the lens, and peer through the ground glass. It’s probably because I was indoors on a very dull and dark December day, but it was quite difficult to see much on the focus screen. Pointing it out the window let me see more, but anything inside was very hard to make out, even when cloaked beneath the large darkcloth.
The next day I decided I was going to attempt to take a photograph. I wanted to do this in the house purely for the reason that travelling further afield to use an unfamiliar camera and process seemed like a fools errand and likely to end in disappointment. So I set up a simple shot of an advent calendar stood on the kitchen table. At this stage I didn’t have a loupe so was making do with a 50mm lends from a Pentax 35mm SLR as a standi-in magnifyer. This worked, but was awkward as I couldn’t press it against the ground glass easily and the focus kept wobbling in and out as a result. Still, after some faffing around I got things how I wanted them and took the picture you can see below.
Although Santa’s face is pretty sharp, it looks like I hadn’t locked the camera uprights in the vertical properly and so a bit of tilt had taken place. If you look closely, you can see that focus drops off through Santa’s body before snapping back in on the patterned tablecloth in front of him. I might have avoided this had I stopped down the lens from it’s widest f/5.6 aperture, but deliberately left it so to maximise my shutter speed. However, despite this mistake, I’m still quite happy with it as the result of my first ever large format photograph. It was only ever intended as a test, rather than a piece of fine art, so the result is good.
A couple of days later I received a 4x loupe in the post which I had ordered online. Setting the camera up again showed that the loupe was a great aid in correct focusing and, because it was in contact with the ground glass, also allowed me to more easily see parts of the image. I also found that using a black t-shirt instead of the included darkcloth was more effective, blocking out more straylight and making the focusing screen appear brighter.
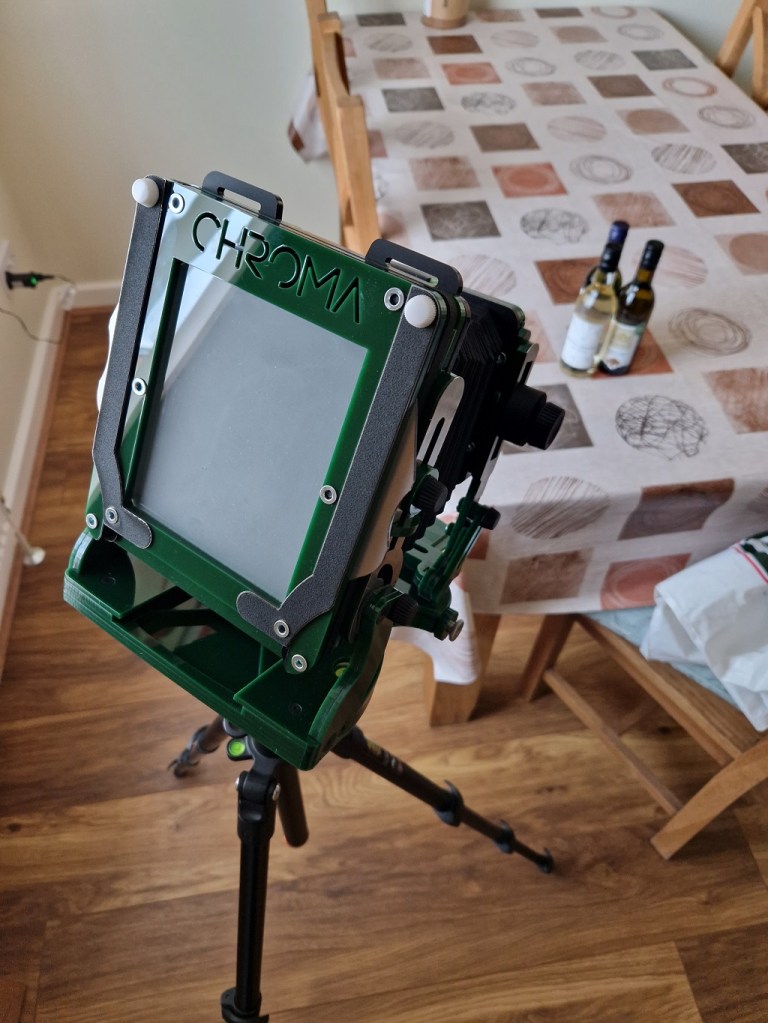
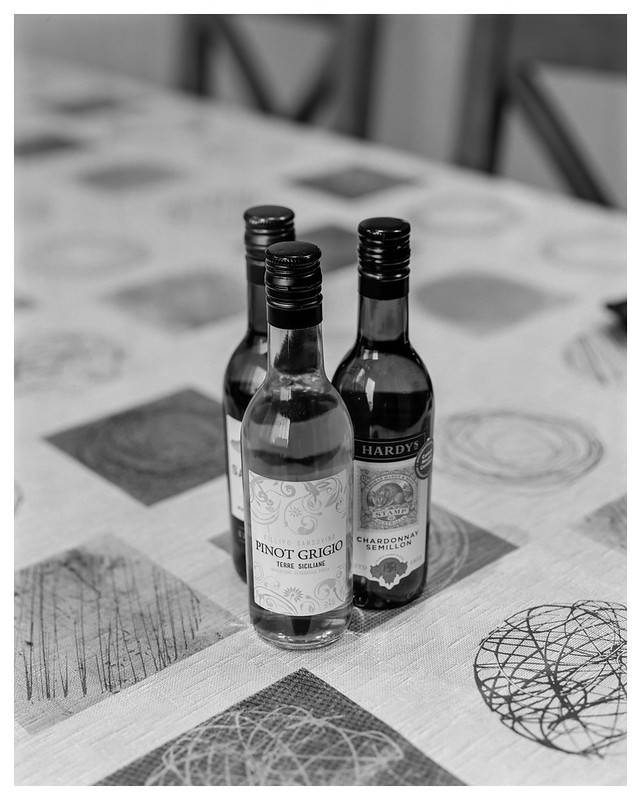
I decided to take a second photograph, this time of some small bottles of wine I received for Christmas.
While only my second shot, I was somewhat more ambitious with this one. Firstly, because the bottles of wine were quite close to the camera I needed to extend the bellows further to achieve focus and this meant I needed to account for the bellows-extension-factor which reduces the ammount of light falling on the film. I have an app on my phone to help with this and was able to determine that, after measuring the bellows with a tape, that I needed to add around a stop of extra exposure. Also, because of the composition, I decided to use a little front tilt to get the whole of the front wine bottle in sharp focus. Amazingly, I managed to make a pretty good job of this!
While, again, it’s not going to win any prizes for composition, this shot came out better than I could have hoped and I’m really pleased with the result.
The whole experience of developing the film was completely new too and required further research and parctice to figure out how to remove the film from the holders and get it into the developing tank (I’ve borrowed a Stearman Press tank for now) all in the confines of my changing bag. Thankfully, this all went really smoothly and I couldn’t be happier with the final developed negatives. The Epson V700 did a vey good job with the scans too – both scanned at 2400dpi. The full size scans can be seen on Flickr if you click through the images.
I’ve got one more photo currently exposed, but will wait until I use the other sheet in the film holder before I develop it. This shot (and hopefully the next) was made outdoors, and I’m looking forward to seeing how it turns out.