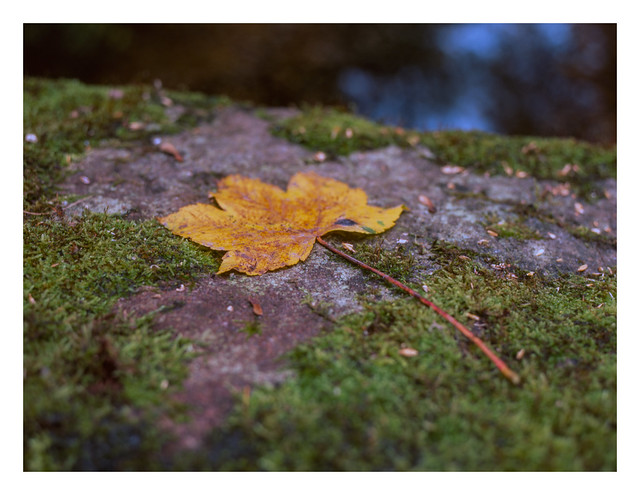
Just a few days ago I said that I was at the end of my autumn colour images for this year. Well. turns out I’m not – I forgot about this roll of Velvia 50 that I shot on a walk along the Chesterfield Canal near Thorpe Salvin a few weeks ago.
The roll was tricky to meter with confidence. Given that I don’t have a spot meter (just a reflective setting that’s has a pretty wide angle and no meand to accurately point it) I almost always use incident readings instead. Incident metering usually serves me very well, but a canal withich has irregular tree cover along it’s banks makes it difficult to match the light falling on the meter with the subject unless it’s pretty close by, or you’re sure it’s in the same levels of light.
As a result, quite a few of the images on this roll are poorly exposed, and the ones here are probably the best from the canal-side walk.
Of the four, the sycamore leaf below is the best I think (even if it did keep attempting to blow away in the light but irregular breeze!).
Bronica ETRSi, Zenzanon 75mm f/2.8 PE & Fujichrome Velvia 50.
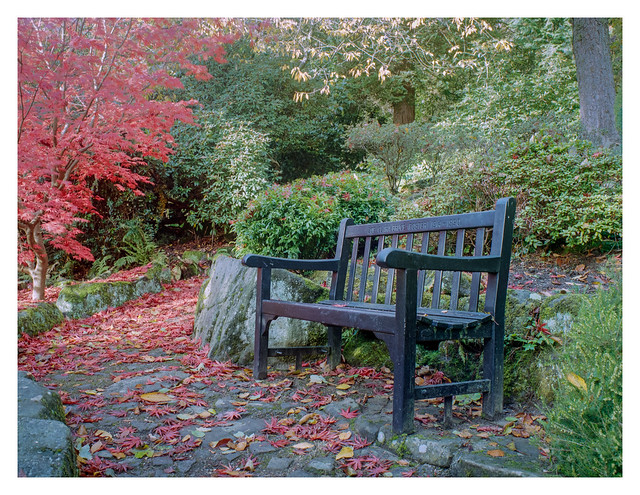
On my walk up the Limb Valley last week, the first place I came across was Whirlowbrook Hall. A grand-looking manor house that was built back in 1906. Originally a family home, its grounds were opened to public access in 1951.
The building is now used as a venue for weddings, conferences, and other events.
I’m not sure why, but for some reason yesterday’s post didn’t appear in the WordPress Reader feed. So if you’re interested is seeing some autumnal woodland photographs, you can find them here.
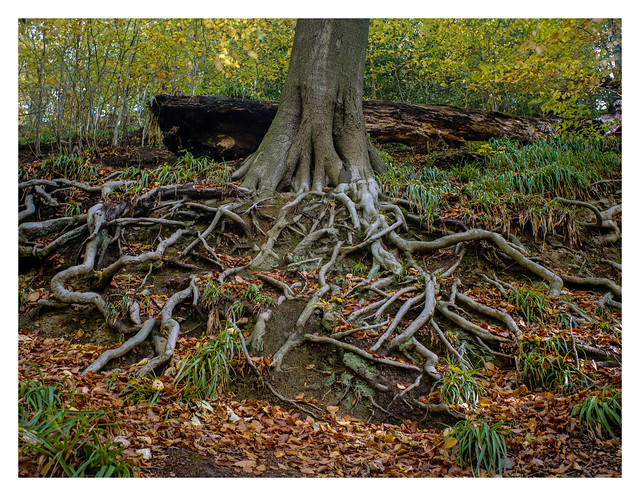
Today’s post will be shorter, with just a single photo taken from the same roll as yesterdays shots – the last frame on the roll in fact. This tangle of exposed roots beside the footpath caught my eye as I walked back to where I’d parked the car. I think it’s one that would have worked well in black and white too.
I took some leave last week in the hope that I would be able to get out an about capturing some autumn colour before the leaves fell, but this was hampered by the pincer movement of a Tier 3 Covid-19 restriction being placed on our county and my old friend, bad weather. The Tier 3 restrictions prevented me leaving the borders of South Yorkshire, but there are still many, many other places I can go make photos within the boundary. It was the dull, rainy weather that was the main anchor on my activities. While I subscribe to the saying: “There’s no such thing as bad weather, only unsuitable clothing”, my cameras are sadly not weather sealed so, no matter how suitable my atire may be, the use of vulnerable camera gear forms an Achilles heel.
So, when there was a break in the weather on the Wednesday morning, I decided to make the most of it and set off for the Limb Valley, a wooded area to the south-east of the city that rises into the hills at Ringinglow at the edge of the Peak District. I’ve never walked the valley before and only realised it was ther because I saw some photographs a colleague of my wife had posted. Not having any better plans, it seemed a good place to visit.
I decided that I would use the opportunity to test the newly acquired Zenzanon 50mm f/2.8 MC lens that I’d bought to use with my Bronica ETRSi. I had been looking for a wider-angle lens on and off for a while to complement the 75mm f/2.8 that came with the camera. I missed out on one a few weeks ago when I was outbid at the last moment, so when I saw this one with a buy-it-now option for half the price of the one I missed out on I got in there fast.
The lens was described as having had a lot of use, with some loss of paint on the barrel. It also said that there was some slight haze in the centre of the glass. I examined the photos that were shown on the auction and felt happy with the cosmetic condition – as long as it works properly, I don’t mind a few scrapes here and there. The haze wasn’t very apparent in the photos so I decided to take a chance and clicked the button to make the purchase.
Upos arrival, I can’t really find anything to complain about. The cosmetic wear is nothing serious, and I can’t see any sign of the haze at all, and it hasn’t (that I can see, at least) made its presence felt in the photos I’ve made so far.
I also decided to use the outing to try out some more expired film that I’ve recently picked up – a few rolls of Superia 100 in 120 format. It’s a consumer grade film, but there are precious few options for non-professional colour film for medium format now, so I decided I would take a chance on it. The scans from the negatives tended towards a green cast slightly, but I’ve beebn able to sort that out in Photoshop without any real issues and I’m generally happy with the results for the film.
On the whole I’m really happy with the results from this outing. So much so that I moved them up my pile of stuff to scan and publish (I normally do this in a pretty strict chronological order – blame mild OCD or something:)). It means that they get published pretty close to the period of autumn in which ther were produced.
A photograph of a woodland road today, taken on one of the rolls of Fomapan 100 that I’ve been having problems with. As I’ve mentioned in previous posts (such as this one) I’ve been having issues with white speckles of debris when using this film. I ruled out my development process and chemicals – both worked fine when developing other film stocks. I also tried omitting a chemical stop-bath, replacing it with water, and also adding a pre-wash of the film before developing. Nothing seemed to work and the speckles still stubbornly appeared when I developed each roll of Fomapan 100.
Then, a month or so back, I came across a post on the Photrio forum which seemed to detail someone having the same problem. It turned out that other people suffering the same difficulties all had film form the same production batch. One person in a linked post had contacted Foma themselves and been advised that the cause was a harder than usual anti-halation layer on that run of film and that a specific development process might help. I tried the process myself, but still ended up with the smae spots on the negatives, albeit possibly slightly less pronounced than before.
I decided to contact Foma myself and they replied with some similar instructions, although this time I noticed an additional stage that involved a wash of the developed film in an ethanol / water mixture before the final wetting agent stage. I’ve not tried this process as yet and, I suspect, probably won’t – mostly because ethanol seems quite hard to come by, at least at a price that isn’t prohibitively high. It would likely be cheaper to buy some fresh, unproblematic film, than attempt the ethanol rinse process.
I’m grateful for Foma’s response though, plus they sent me a few rolls of film as a goodwill gesture – two rolls of Fomapan 400, plus a roll of Retropan 320. I’ve never shot Retropan 320 before, so I’m quite looking forward to giving that one a go.
Should anyone else be suffering a similar issue when developing Fomapan 100, the instructions provided to me by Foma are as follows:
In case of your already exposed & processed negatives we recommend to you the following procedure to remove the residues of remaining anti-halo layer:
1) Prepare working solution in minimum with 40% of ethanol (optimally 70%). 2) Put carefully the films into spiral´s developing tank or a spiral with the film into similar transparent container with enough ethanol solution, with emulsion layer inside of the cylinder tank/container. 3) Keep the negatives in this solution approximately 45 minutes and make moderate movement each 4-5 minutes. 4) Wash sheets of the negatives in running water from tap for 2-3 minutes. 5) Make standard drying including wetting agent (FOTONAL).
If you may decide to use also other films from the same emulsion number, we advise you to follow this procedure of processing:
1) Exposed films put inside of the spiral´s developing tank. 2) Pour distilled water or water without minerals into this developing tank and keep the films in this solution for 20-30 minutes. Occasional inversion is convenient. This solution, ca. 600 ml, is possible to use in maximum for 2 rolls. 3) Immediately after pouring the water out you can fill the tank by developing working solution keeping standard conditions of developing, best using more alkaline developer, e.g. FOMADON R09. 4) After developing we recommend to stop process just by water bath, best running filtered water, in minimum for the time of 30 seconds in water´s temperature 12-18° C. Using acidic stop bath like FOMACITRO and others is not convenient in this case, because there are needed alkaline baths to help with dissolving the hardened anti-halo layer. 5) Standard fixing. 6) Wash the strips of the negatives in running water for 20-30 minutes (according to higher or lower temperature). 7) Use ethanol solution and other steps (1-5) as described in previous paragraph.
There’s a set of power-lines tucked away in here if you look for them…
Back when I was a boy, horse chestnut trees such as the one pictured here, would have been bracing themselves for the soon-to-arrive annual attack of schoolboys desperate to harvest their fruit of conkers. Here in the UK (and maybe elsewhere, I don’t know), conkers was THE sport of the school playground come autumn-time.
For those unfamiliar with the activity, a conker is a hard, nut-like seed produced by the horse chestnut tree. They fall from the branches around October time. Or, as used to be the case, they would be knocked violently from the branches by thrown sticks and stones or pulled from branches climbed by brave individuals. Each conker would be safely cocooned in a heavy, spiky outer shell that, when ripe, would split to reveal the brown, polished, wood-like ovoid within. If you were lucky you would find a previously undiscovered tree that had dropped it’s fruit on the floor. Such rarity! Such treasures!
The game is played by making a hole through the centre of the conker and threading it with a length of thread – often a shoelace – and securing it at the bottom with a knot. Two opponents would then face off and take in turns to swing their conker with force, bracing the thread tautly across the top of the back of their hand, with the intent of shattering their opponents conker.
Dedicated proponents of the sport would engage a variety of techniques to harden their “team” of conkers to maximum hardness. Baking them in an oven, or pickling them in vinegar were both methods reputed to give a conker a shell that would challenge a diamond on the moh scale. Champion conkers would be given names and attain legendary status in the schoolyard.
These days the horse chestnut is in reprieve, the sport of conkers largely consigned to history by the youngsters of today. Part of this was down to a series of bans issued by schools fearful of children with conker fractured knuckles or missing front teeth, although nowadays it’s probably mostly because of videogames and the internet. Isn’t everything?
Eight birds sat on some power lines. When I first arrived at this location there were a lot more of them, and they reminded me of musical notation. Sadly, they flew away before I could get a picture – I think I spooked them setting the camera up – so I moved on to make photos of other things. When I got back some of them had returned, so I got this shot.
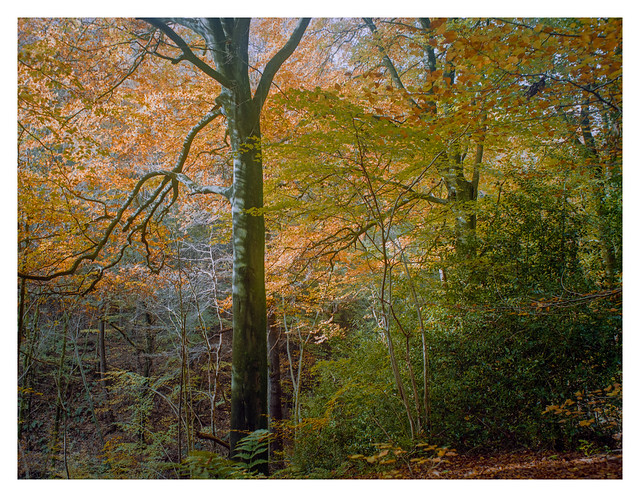
A quick post today with another shot from the Bronica on the roll of expired Provia 400. Maybe not the healthiest tree, but the one that attracted my attention.
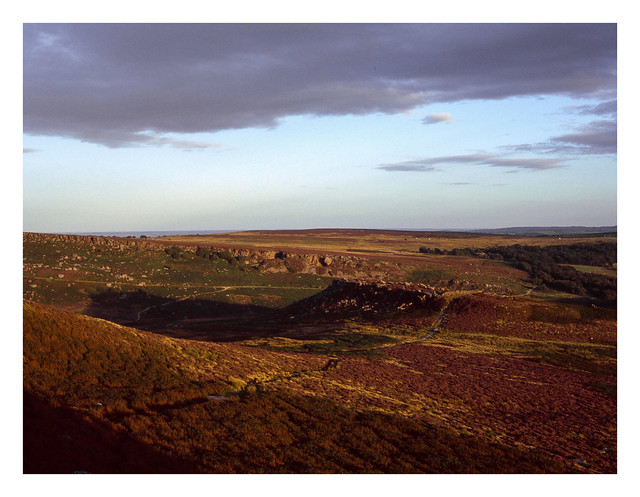
A couple of weeks ago I took an impromtu trip out to the Peak District National Park one evening after work. August is the month when the heather flowers, blanketing the landscape in a cover of purple. For the last couple of years I’ve managed to miss it altogether for one reason or another, or have only caught the end of the season when it’s past its best. So, given the weather looked nice, I decided to take to opportunity. There might even be a sunset!
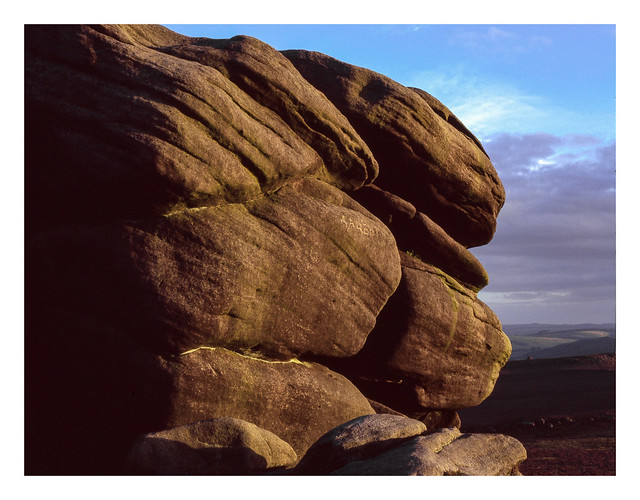
I took my Bronica ETRSi loaded with a roll of slightly expired Provia 400. I’ve not shot the 400 variant before, but was quite hopeful given the decent results I’d had a few weeks earlier with some 2003 vintage Ektachrome. As I got closer to my destination it became apparent that I wasn’t the only person taking advantage of the pleasant eventing and there were a considerable number of other people and cars about. I managed to find a place to park without too much trouble though and climbed atop Higger Tor to make some photos.
Heather amongst the gritstone
I soon noticed a curious issue with my light meter, which was giving slightly odd-looking shutter speeds like 1/128. I wasn’t sure what the problem might be, but the speeds were all close enough to regular shutter settings to not give me undue concern. After a few shots it became moot anyway when the meter’s battery died – even though it had been on two bars the last time I checked – and I had to resort to my light-meter app on my phone. It was only when I got home and fitted a new battery to the light meter and looked at the manual that I realised I’d managed to set it into cine mode! Given reversal film’s intolerance of poor exposure, I resigned myself to a roll of mostly ruined shots. One receipt on my transparencies a few days later however, it seemed that most of them were not too bad at all – somewhat ironically the worst shots were the ones where I’d used the light meter app!
Anyway, I roamed around atop the plateau making a number of photos although, if I’m honest, my enthusiasm wasn’t high – I felt somewhat rushed due to the last-minute nature of the trip, plus people kept wandering into my compositions. There was no sunset either…
Looking down from Higger Tor towards the ancient hillfort of Carl Wark
After a pretty successful session scanning my roll of 135 Velvia 100 previously, I jumped headlong into scanning the Provia 400 when I received the transparencies from the lab. And promptly had the confidence knocked out of me. The settings that had worked so well for me in Vuescan for that earlier roll now served to deliver only disappointment. I know that it’s a different film, and I was also scanning it on my Epson V550 – not the Plustek – as that will scan medium format negatives, but I had hoped that my previous settings would at least serve as a good starting point.
The results were awful. Using the Adobe RGB output setting, that works so well on other scans in Vuescan, here served to produce ugly and blocky purple highligts on some parts of the image. Switching to a different output setting resoleved this, but now the images lost some colour and also seemed to vary in quality by a large degree from frame to frame.
In the end, I resorted to using Epsonscan – an application that has given me less than pleasing results when scanning slides in the past. This time though, it beat the Vuescan files – although it took some considerable faffing in Lightroom & Photoshop before I got something I was mostly happy with and which seemed to reflect what I could actually see on the transparencies.
A shot taken back during full lockdown in April. I’d spotted that this vase of artificial flowers on the windowsill cast a nice shadow on the vertical blinds when one of the lamps was switched on. So, after a few nights of noticing it and thinking there might be a picture to be had, I decided to drag the tripod down into the living room, set up the bronica with a cable release, and make the photograph.
Yashica Mat 124G & Fomapan 100. Ilfotec DD-X 1+4 8 mins @ 20°.