One of multiple footpaths descending (or ascending) the cliffs of Scarborough’s south bay. Again, I had to crop this (to a 6×7 ratio) to get rid of the light leak, so part of the path goes out of shot at mid-left, but I think it still tells the story of its travel.
I’m going to continue to post pictures from my Scarborough trip, but I’m moving onto some black and white photographs now.
These are shots from the two rolls of Ilford Type 517 film I shot on the day which suffered severe light leaks (which I originally posted about here). Not being one to waste anything, especially two rolls of film(!), I’ve managed to rescue quite a lot of the frames through the use of cropping (although there were also several full frames that somehow escaped the light leaks altogether). So, while not the compositions I originally intended and framed in the viewfinder, I think I’ve still managed to get pictures that work pretty well.
The shot below didn’t have any light leaks, but there was some sort of uneven development or film problem going on that made the sky somewhat blotchy, so this is a quite significant crop from the original portrait orientation 35mm frame (although, even when cropped, it’s still over 4,000 pixels on the long edge). It’s smaller than a half-frame negative and the grain is quite prominent as a result, but it think it still works.
Nikon F80 and Nikkor 70-200mm f/4 ED VRon Ilford Type-517. Ilfotec DD-X 1+4 14.5mins @ 20°.
This sculpture, situated on the seafront of Scarborough’s north bay, is titled Freddie Gilroy and the Belsen Stragglers. It was created by sculptor Ray Lonsdale and depicts Freddie Gilroy, an old soldier who helped liberate the Bergen‑Belsen concentration camp during the second world war. Lonsdale created it as a tribute to Gilroy, who was his friend, and as a broader reflection on war and the Holocaust.
It was only meant to be displayed in Scarborough for four weeks in 2011 but a local resident stepped in to buy it so it could stay in the town.
What isn’t apparent from my picture is the scale of the figure, which is twice life size, and dwarfs people as they pass by.
Minolta X-300, Minolta MD 50mm f/1.7 & Kodak Gold. Lab developed. Home scanned and converted with Negative Lab Pro.
This Morgan was parked in front of a big white hotel atop the cliffs of Scarborough’s north bay. I’m not sure what vintage the car is – they were made from the 50s to the turn of the century, with a new version being released more recently.
Minolta X-300, Minolta MD 50mm f/1.7 & Kodak Gold. Lab developed. Home scanned and converted with Negative Lab Pro.
Scarborough’s has had, at one time, five separate funicular railways to transport people up and down from the seafront to the clifftop areas. Two are still in operation today, including the Central Tramway, which is featured in today’s picture. This originally opened in 1881.
The other still-operating funicular is the South Cliff lift, which runs from the spa to the hotels and residential areas above. This is a little older, first running in 1875.
One more still exists and is only a stone’s throw from the Central Tramway. The St Nicholas Cliff Lift was opened in 1929. It operated until 2007 when the local council, who now owned it, could not afford the upgrade costs to meet health and safety standards. Rather than demolish the railway (which had a hefty price tag also), the two cars were both moved to the top of the slope, secured in place, and now operate as seating areas for a cafe. The station at the foot of the tracks is currently an ice-cream parlour.
The other two funiculars no longer exist, at least not in Scarborough. The North Bay Cliff Lift, which opened in 1930, operated until 2007 when it was decided to close and dismantle the structure due to corrosion and mechanical issues. Much of the dismantled railway was donated to the Launceston Civic Society and is currently in storage at the Launceston Steam Railway.
The final of the five was the Queens Parade Cliff Lift, opening in 1878. It was, however beset by misfortune, including on it’s opening day when one of the cars broke loose and crashed, forcing the railway to close until the following year. Then a series of mechanical issues and landslides meant it was deemed untenable to operate and it closed less than a decade later in 1887.
Minolta X-300, Minolta MD 50mm f/1.7 & Kodak Gold. Lab developed. Home scanned and converted with Negative Lab Pro.
Scarborough’s Cliff Bridge (formerly Spa Bridge) was constructed in 1827 and is 414 feet long. Scarborough became famous as a spa town in the 17th century, boosting the number of visitors. While access to the spa was easy from the seafront on the south bay, due to Scarborough’s elevated topography, the bridge was built to make it easier for people to reach the spa from the St. Nicholas’ Cliff area without descending the deep valley. A toll was charged to cross the bridge from shortly after its opening, right up until 1951.
Minolta X-300, Minolta MD 50mm f/1.7 & Kodak Gold. Lab developed. Home scanned and converted with Negative Lab Pro.
Following yesterday’s mini-history of my 35mm film scanning journey to date, it’s time to reveal what I’ve chosen as my upgrade, which is…
The Valoi Easy 35 v2.
After taking the decision to try the DSLR scanning route, there were a number of options to choose from, but perhaps the biggest choice was between a copy-stand system, or something more all-in-one. I’ve seen may people use copy stands but they always presented me with a number of problems to overcome. The most obvious being that I don’t have a copy stand. The second that, even if I got one, I don’t really have anywhere to keep it. Added to that are a number of other issues that I believe copy-stand scanning presents, including the setup and configuration to ensure everything is perfectly level and free from vibration, the risk of stray light being reflected on the negative, and dust. Sure, there are systems that solve some of these issues, but they feel like workarounds and I suspect they would become a chore.
There are a few all-in-one systems I’ve seen, but the Valoi Easy 35 immediately caught my attention when I first saw it, particularly in Kyle McDougall’s YouTube review, which I’ll share below. It seemed like a simple, but robust, option that was both easy to setup, use, and store, and which should also produce results that met my needs. The design is quite simple: Attach a macro lens to your DSLR (or mirrorless) camera; attach the correct number of extension tubes to the lens; and attach the Easy 35 light source to the extension tubes. A film holder slots into the enclosed light source into which a strip of 35mm film is inserted. You can then frame the image in the camera, focus, take the shot, and then pull the film through to the next frame. The holder keeps the film flat and stray light and dust are kept to a minimum by the enclosed design. Vibration is also kept mostly in check by the system effectively being one with the scanning camera, although use of live view or an electronic shutter can help with vibrations caused by mirror slap (on a DSLR).
So I decided to purchase one, but first I would need to make another purchase – a DSLR!
Until a couple of years ago I still had my old Nikon D3200 DSLR but, as I’d not used it in years, I decided to sell it with the DX format lenses I owned. Had I had more foresight, I could have kept it and used it for scanning, saving myself some money in the process, but I didn’t. Spilled milk and all that.
So I had to buy a replacement.
After a bit of research I decided on a pre-owned Nikon D810. This is an older camera, dating from (I think) 2014, but it has a superb 36 megapixel sensor, would work with my macro lens (which I didn’t sell with the D3200 as it works perfectly well on my Nikon F80 film SLR), and as it’s a pro-level body, I can also use it for digital landscape photography (and taking nice pictures of my recently arrived granddaughter!). 36 megapixels is probably overkill for scanning 35mm film, but as Valoi also manufacture an Easy 120 system, I though it might future proof me should I decide on that route at some future point.
After selling a bunch of stuff I no longer use or need on eBay I managed to earn enough to buy both the camera and the Valoi system without denting my savings, which was nice. I got a boxed D810 in great condition with less than 20k shutter actuations but, when I went to purchase the Easy 35 I saw that an updated version was available to pre-order. The version 2 has an improved lighting system and other features and is made from moulded parts, rather than being 3D printed. It was also available at a significant discount if pre-ordered, so I took the plunge on it. There were some slight delays in its manufacture and shipping, so I had to wait over two months for it to arrive, but it was delivered to me last week, meaning I could finally try it out.
The system includes the light source, 35mm film holder (other small format holders can be purchased separately for things like mounted slides, APS film, 110 film, plus a holder that allows film sprockets to be included), a set of machined metal extension tubes suitable for a range of macro lens focal lengths / different sensor sizes, a set of step-up rings to attach the tubes to your lens, a USB charging cable, and a simple (but just about good enough) instruction sheet.
Setting everything up took a few minutes and the light source already had charge, so I was able to scan a few test negatives pretty quickly. One of my concerns had been with regard to ease of focus – my dedicated 35mm scanners will resolve the grain without intervention – and I wasn’t sure how easy it would be to resolve the grain using the D810’s (non flip-up) rear LCD screen, but I needn’t have worried as it was remarkably easy to focus the lens manually to see the grain to pop into clear view when using the zoom on the LCD.
Scanning time is practically instant – as long as the shutter takes to fire – and then it’s just a case of drawing the film strip through the holder and photographing each frame. Even without practice I can easily scan a full roll of 36 cut negatives in under 10 minutes, which is a joy. No more sitting at the computer for hours while the scanner whirs and buzzes for minutes at a time!
The scans look good at the full 36 megapixels but I’m going to resize them down to the same size as I get with my Reflecta, which saves a lot of disk space without losing any noticeable detail (which is on a similar level to the Reflecta).
All-in-all I’m very happy with this new scanning setup. The quality is as good as best I’ve been able to achieve with a dedicated scanner, but with the benefit of no annoying banding issues and the very real advantage of super fast scanning times. If I decide to go back and scan older sheets of negs, I know that it’s a straightforward 10-minute job to do so rather than hours sat at the computer.
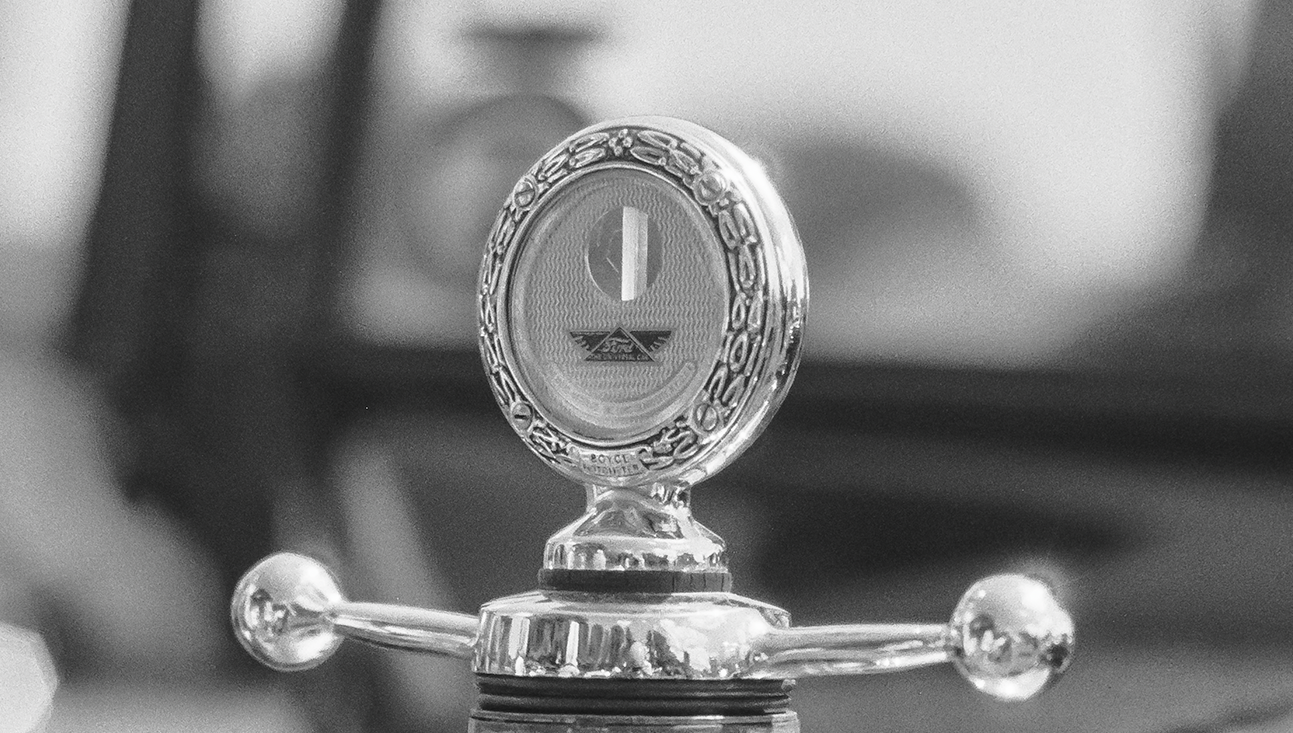
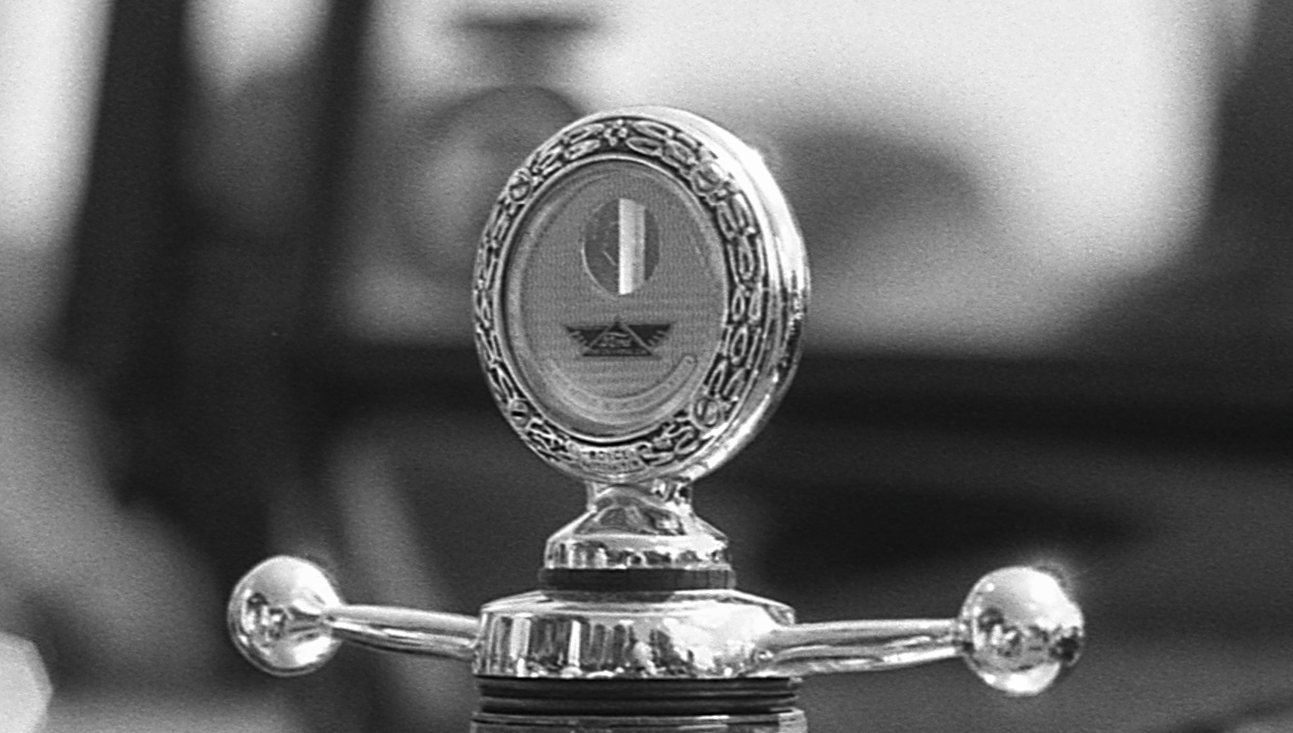
The pictures shared throughout this post are camera scans of a roll of Ilford Pan F which I shot nearly 10 years ago at a classic car show at Brodsworth Hall, but which I’ve only ever previously scanned with my old Epson V550. You can see full versions on Flickr by clicking the pictures. Top tip: If you edit the URL in flickr so that it has “/sizes” at the end of the URL, you can see the upload at a variety of resolutions, e.g., https://www.flickr.com/photos/fishyfish/35452430636/sizes/.
Here’s a comparison between scans from my DSLR setup and the original V550 versions zoomed to 100%. The V550 was scanned at 2400dpi. The DSLR scan has been resized to match the V550 scan resolution (the 36mp original is double the size otherwise). It’s a bit of an unfair comparison but I don’t have any of these shots scanned on both the Valoi,and with the Plustek or Reflecta’s.
DSLR scan on the left. Epson V550 scan on the right.
So what will come next? Well, based on my early impressions of the Valoi Easy 35 v2, I’m certainly drawn to the possibilities of the Easy 120 system. But that’s still the V1, so maybe I’ll wait and see if there’s a better version to come. My V850 will keep me going for now and, if I do upgrade in future, at least I know that re-scanning will be a quick process. 🙂
Nikon F70 & Nikkor 50mm f/1.8 AF-D on Ilford Pan F. Lab developed. Home scanned and converted with Negative Lab Pro.
Taken on 20 June 2017
Here’s the Kyle McDougall video I mentioned up-post. He’s using the version 1, but the principle is the same.



 Steel City Snapper photography