35mm · Film photography · Photography

Typos

One of my pet peeves with writing this blog on WordPress is the number of typos that end up in my posts. It’s kinda embarrassing to see them because, generally speaking, I can spell words correctly. Sure, I might have to look an unusual word up sometimes, but most of the time I’m just fine.

So off I’ll go, clacking away on the keyboard, the words falling onto the screen while, unbeknownst to me, I’m actually sprinkling a load of misspelt crap in there at frequent intervals. What makes things worse is that I often don’t notice this until after I submit the post, sometimes only when I re-read a much earlier post, whereupon I feel duty bound to correct them and hide my shame.

Back when I first started this blog, WordPress had a very handy spellchecker built into the editor which would highlight any errors. But then, for reasons unknown, they removed it. I guess there might still be spellcheckers available as plug-ins, but last time I looked (admittedly quite a long time ago) there were only premium versions available. Maybe I’ll look again.

Anyway, I can only apologise for my lack of editorial care and make some sort of half-hearted promise that I’ll try to do better in this regard.

I have checked this post carefully for typos. 🙂

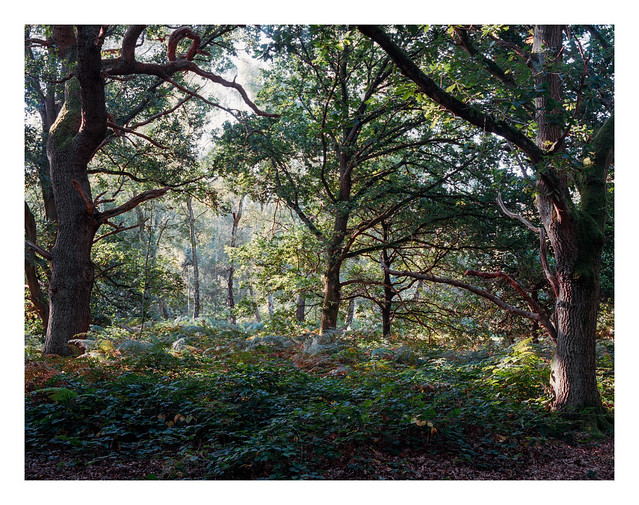
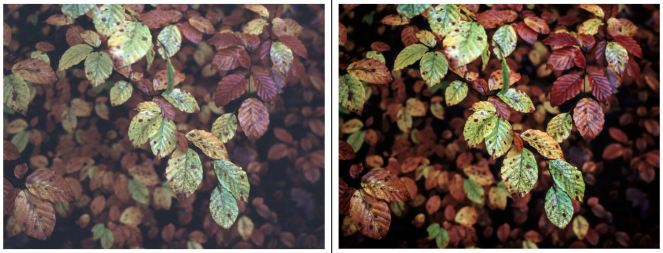
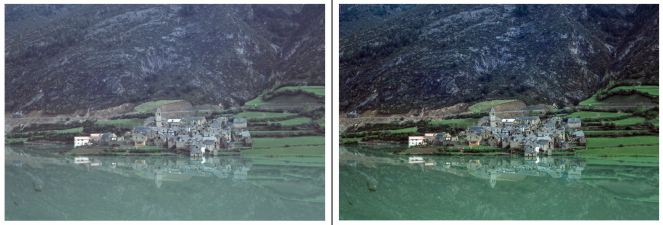
The picture today contains no typos. I like the abstract nature of it.

Abstract

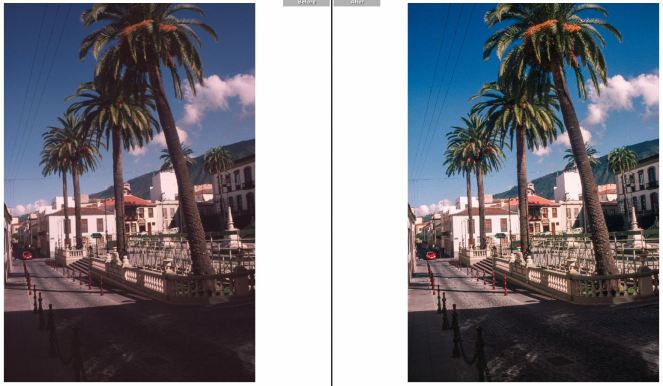
Nikon F80, Nikkor 28-80mm f.3.5-5.6 AF-D & Kodak Gold. Lab developed. Home scanned and converted with Negative Lab Pro

Taken 18 August 2023.

Film photography · Medium Format · Photography

Sherwood Forest Scenes

I’ve never visited Sherwood Forest before, despite it being only half-an-hour’s drive from where I live. I’ve visited Clumber Park and it’s surrounding woodland on many occasions though, and I guess that’s all part of the original much larger area of forest.

The trip I took last month was mostly intended to photograph the Major Oak but, if I’m honest, it’s not all that photogenic and, due to the fences that surround it, the compositions are a bit limited. I’m sure that, under good conditions, there are many good photographs to be had, but I feel that the other trees (including many other ancient oaks) withing the forest are perhaps better subjects.

Today I’ve posted a few other pictures from the trip. I think I might try to return in a few weeks when tthe autumn colour is in full effect.

A forest
Somewhere in Sherwood
A stand of birches
Still standing
Slant
Ferns

Bronica ETRSi, Zenzanon 75mm f/2.8 PE, & Kodak Ektar. Lab developed, home scanned, and converted with Negative Lab Pro.

Taken 23 September 2023.

Film photography · Medium Format · Photography

The Major Oak

The Major Oak is a large and ancient oak tree which resides in Sherwood Forest. It is thought to be in the region of eight-hundred to eleven-hundred years old. It’s trunk is eleven metres in circumference, and it is estimated to weigh twenty-three tonnes. It is named after Major Hayman Rooke (1723-1806), who carried out a survey of trees in the area in 1790.

The tree is perhaps most famous due to its association with Robin Hood who, along with his band of Merry Men, was said to shelter beneath the tree and occasionally hide inside its trunk.

In its old age, not that differently to people, the tree requires some additional support to keep it from taking a fall, and the boughs are supported in multiple places by supports that were first installed in the 1970s, and with chains at the crown of the tree that were placed in the early 20th century.

The tree is quite a tourist attraction and is around fifteen minute’s walk from the Sherwood Forest visitor centre. While the tree itself is fenced off to prevent damage, there are tables and benches in an adjacent clearing where people can sit and admire it. I was there quite early in the day and didn’t see many people apart for the odd dog walker and jogger, but I was quietly amused whe and ice cream van pulled up from one of the service tracks. I guess the tree is a good place to do business even if you’re not an outlaw!

The Major Oak

Bronica ETRSi, Zenzanon 75mm f/2.8 PE and Ilford HP5+. Ilfotec DD-X 1+4 9mins @ 20°.

Taken 23 September 2023.

Film photography · Medium Format · Photography

Dark vs light

I was quite please with this picture of West Burton power station. I like the framing, and I’m a fan of industrial subjects in photographs, but most of all – thanks to the position of the clouds when I took the shot – I like the way that some of the cooling towers and some are light, like some massive game of chess or something.

Dark vs light

Bronica ETRSi, Zenzanon 75mm f/2.8 PE and Ilford HP5+. Ilfotec DD-X 1+4 9mins @ 20°.

Taken 2 September 2023.

Film photography · Medium Format · Photography

Old truck. Older carriage.

I’ve posted a picture of this ice cream truck before, that picture shot with my large format camera on the same day I took this photo, but the carriage in the second shot was only photographed with my Bronica ETRSi.

Waterside Ice Cream

I don’t have a clue which type of carriage it is – I did look online, but backed out of the rabbit-hole of potential sunk time before I lost hours to detective work. It’s difficult to know just how old it might be. It could date back to when such things were a primary mode of transport, or it could also be a more recent vehicle, used for displays or special occasions or something, which has been left to decay. Whatever the case, it was interesting to see it there, albeit behind a metal fence that adds little to the picture.

Fixer-upper

Bronica ETRSi, Zenzanon 75mm f/2.8 PE or Zenzanon 150mm f/3.5 MC, and Ilford HP5+. Ilfotec DD-X 1+4 9mins @ 20°.

Taken 28 August 2023.

Film photography · Medium Format · Photography

Beside the Humber Estuary

Beside the Humber Bridge on the southern bank of the Humber Estuary, there is a car park for visitors. The bank of the estuary here has several benches where visitors can sit and enjoy the scenery, whether that be the spectacle of the suspension bridge, or just the water passing by on its way to the North Sea.

Watching the world go by
Suspension

There is also a cafe, The Viking Way Cafe Bar, so named because it stands at the northern end of The Viking Way, a 147-mile hiking trail running from Oakham in Rutland, to the Humber Bridge. As there is evidence that the Vikings excercised control and influence over the lands through which the trail passes, particularly the Lincolnshire Wolds, so the way got its name.

The Viking Way Cafe Bar

Bronica ETRSi, Zenzanon 75mm f/2.8 PE or Zenzanon 150mm f/3.5 MC, and Ilford HP5+. Ilfotec DD-X 1+4 9mins @ 20°.

Taken 28 August 2023.

Film photography · Photography

An easy way to improve your colour film scans

While watching YouTube videos the other day, I came across a video by linusandhiscamera, which I’ve embedded at the bottom of this post. The video, entitled “Your film scans SUCK“, shows how colour scans can be considerably improved in some cases by tweaking the colour curves in your editing software.

I know, curves, right? Who the hell understands how to use those things? It’s practically mathematics!

But not in this case. The technique is very simple to implement and you can see quite dramatic improvements to your scans straight away. I’ve tried it on lab scans and some of my own – pre-Negative Lab Pro – home scans, and am very pleased by the results. It seems to do especally well at removing colour casts from reversal film too. I’ve included some examples below – both my own photographs, and also some old slides that I’ve collected.

I’ve used Adobe Lightroom to do this, but the Camera Raw Filter in PhotoShop should work too, or – I presume – any other editing software that allows modification of colour curves.

Here are some examples:

The first three are lab scans. I thought the first two looked ok in their original format, but the tweak has improved them noticeably.

This next one was from a roll of Ektar that I’d accidentally underexposed. There’s a dramatic difference after editing the curves.

This next one is an Epson V550 scan of some Velvia 50. The tweak has really made the colours pop.

All the other examples below are old slides from my collection. Some of these have significant improvements visible.

This is a great and straightforward technique, and I hope others find it as useful as I have.

Here’s linusandhiscamera’s YouTube video, which explains how it works.