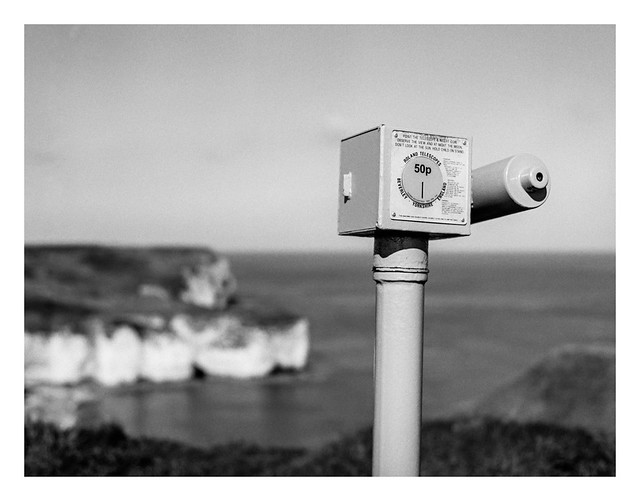
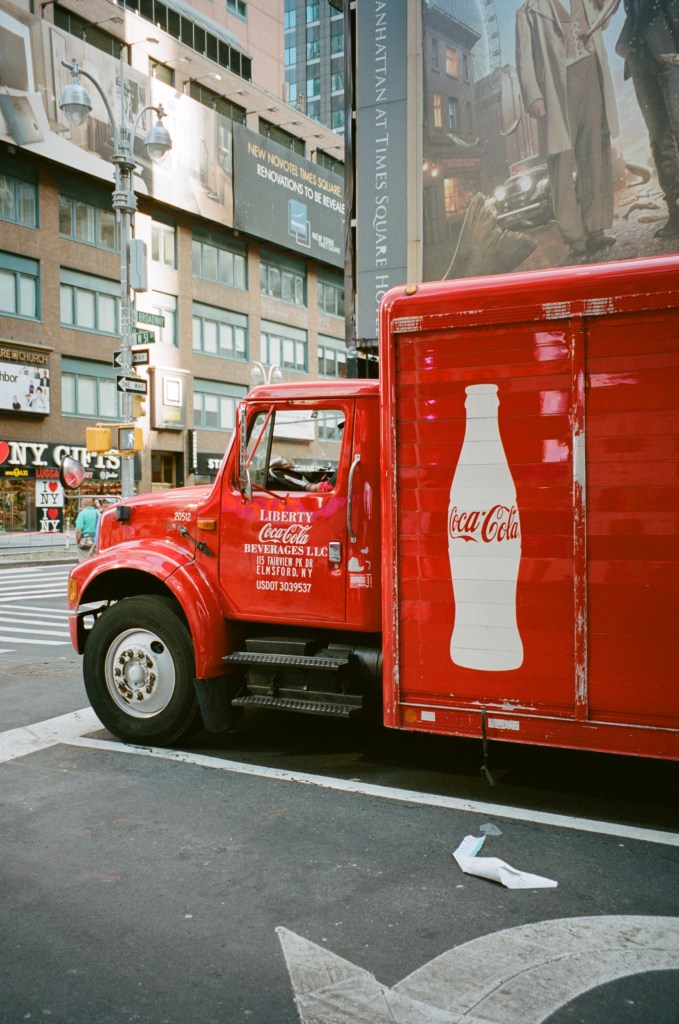
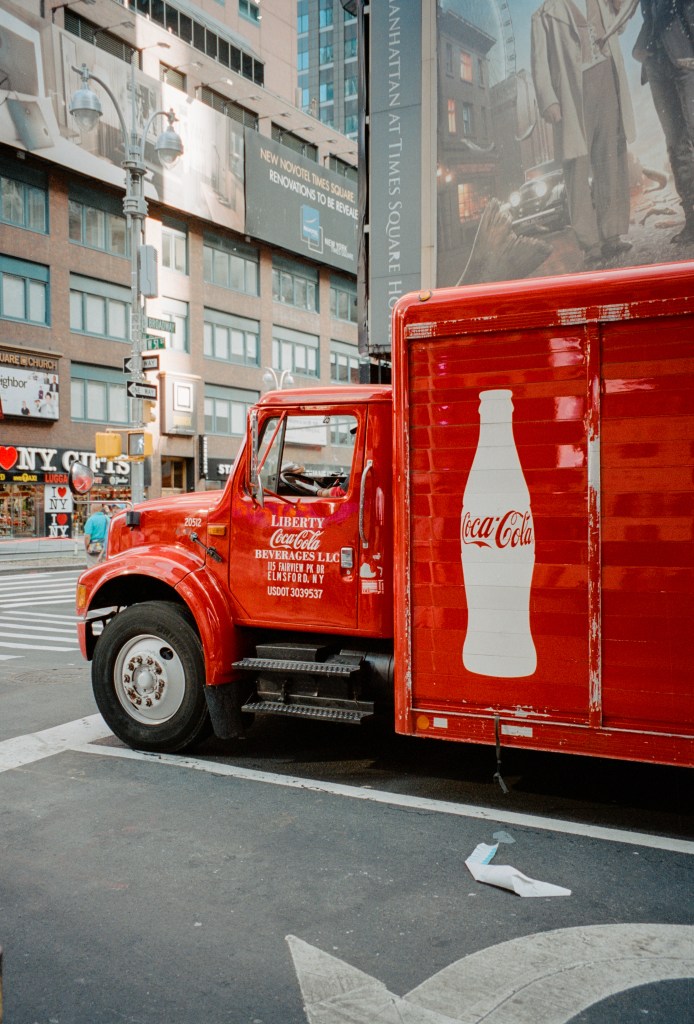
The seaside telescope is a regular sight at resorts across the land (and across other lands too – there were binocular-style telescopes all over the palce when I visited New York a few years ago).
While there is a sense of excitement about using the devices, my own experience has generally been one of disappointment. They are often somewhat unweildy to use, their movement stiff and heavy, and by the time you find something worth looking at the money runs out. If you’re a child, this is compounded by the fact that you have to be lifted uncomfortably by your parents in order to even look through the eyepiece, let alone maneouvre the telescope to point at anything.
And yet I like taking photographs of them, even if I don’t actually look through them.
Bronica ETRSi, Zenzanon 75mm f/2.8 PE & Ilford Pan F Plus. Ilfotec DD-X 1+4 7mins 20°.
There are two lighthouses at Flamborough Head. The original lighthouse was completed in 1674 but never lit. It stands at the edge of a golf course now with a Grade II listing.
The new lighthouse was first lit in December 1806 and remains in use today, although the last keepers left when the light was automated in the 1990s. As with its older sibling, it also has a Grade II listing.
Standing atop the promontory, the light can be seen from numerous places along the coast as well as, obviously, from the sea. Whenever I’ve visited places like Scarborough or, when I was younger, Filey, I would look for the light in the south as evening arrived. There is something evocative and even a little magical about catching that distant flash of illumination as the beam sweeps your position.
I took a number of pictures of the lighthouse on this trip, so don’t be surprised if they turn up here in the coming days. 🙂
Bronica ETRSi, Zenzanon 75mm f/2.8 PE & Lomography Color Negative 100 .
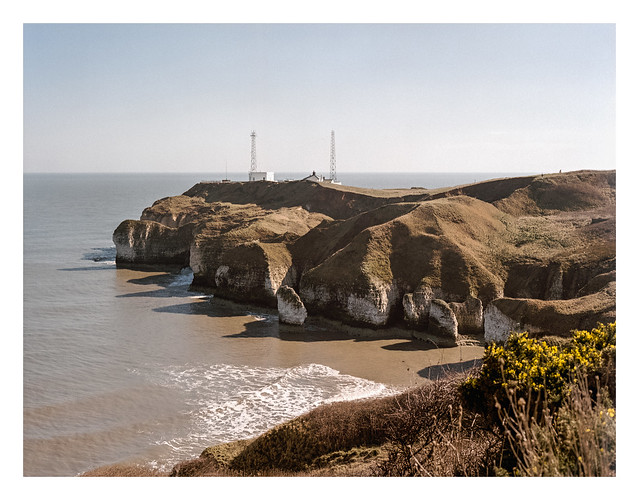
Today’s photograph is of Flamborough Head, a promontary extending several miles into the North Sea from the Yorkshire Coast on eastern side of England. Just the tip is visible in the picture. It is a landscape of chalk cliffs (the only such area in the north of the country), arches, sea-stacks and small sandy coves. Large areas beneath the cliffs can be walked at low tide and there are fossils to be had I believe.
Out at the end of the promontory sits the fog signal station.
Bronica ETRSi, Zenzanon 75mm f/2.8 PE & Lomography Color Negative 100 .
This decaying wooden boat sits high above the waterline up the steep slope that leads down to North Landing at Flamborough.
Not living close to the coast – well, for the UK at least, where I believe nowhere is more than about seventy miles from the coast, although that doesn’t necessarily mean a lovely beach or anything, for some it’ll be a dingy mud-flat – er.. where was I?.. Oh, yes…
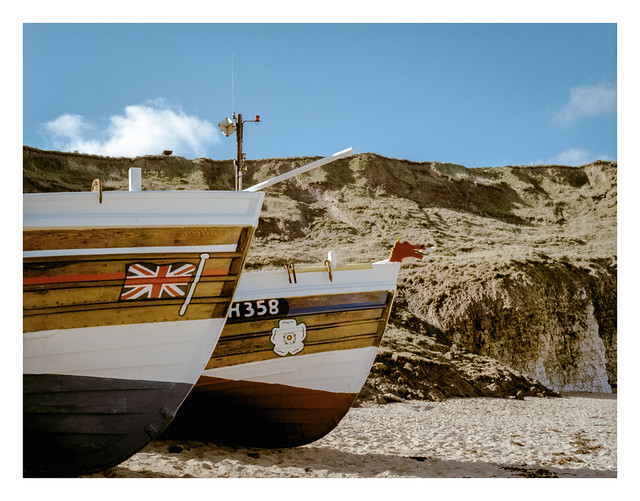
Not living close to the coast, scenes like this are a big draw. While I can quite easily find nice countryside, city centres, or industrial locations withing close reach, beaches, boats, and actual sight of the sea always offer some novelty. I went through two rolls of 120 film, and the best part of a roll of 135 during this trip to Flamborough, something I might have been harder pressed to do in my more frequently visited locales.
Bronica ETRSi, Zenzanon 75mm f/2.8 PE & Lomography Color Negative 100 .
I spent some time trying to get a composition I was happy with here. The jumble of large chalk pebbles on the beach looked nice in the sunlight and I was keen to get a photo, but it took some effort and fiddling with the tripod. I still don’t think it’s the best I could have gotten, but I did like this distinctive looking rock with its bowling-ball type trio of holes on top. I’m not sure even Fred Flintstone would have scored a strike with this mis-shape though.
Bronica ETRSi, Zenzanon 75mm f/2.8 PE & Lomography Color Negative 100 .
I visited the Yorkshire coast a few weeks ago, visiting Flamborough – specifically North Landing and then a walk along the clifftop path to Flamborough Head, where the lighthouse resides.
The two pictures in today’s post are from North Landing. This used to be the launch point for the Flamborough lifeboat and the steep concrete launch slide is a major feature of the walk down to the sand (it is just to the right of the decaying boat in the first photo). The lifeboat has now moved to South Landing and the ramp and boathouse are no longer in use – for their original purposes at least – although the boathouse now serves as a cafe and grille.
The walk down to the beach is quite steep and the sand is very soft, making progress across it away from the firmer ground of the water line quite an energy intensive process. The walk back to the top is pretty good exercise for thigh and calf too!
I’ll be posting a series of shots from this trip over the coming week or so.
This was the first roll of film that I converted with Negative Lab Pro and I’m pretty happy with the results.
Bronica ETRSi, Zenzanon 75mm f/2.8 PE & Lomography Color Negative 100 .
I’m feeling a bit frustrated at present. Nothing to do with my photography, but all to do with my ears. Which are blocked.
I have a problem with blocked ears, and have done for years. Every so often they will get clogged up and I need to put in drops and visit the GP to get them cleared out. This is the case at present. I visited the nurse last week to have them syringed (after a couple of weeks of putting in olive oil drops), and had been really looking forward to getting my hearing back. Unfortunately, my ears were so clogged that the drops had only penetrated part way and the procedure left further wax deeper in my ear. On top of that, after I came out of the GP’s my hearing gradually became worse through the day – my right ear wasn’t too bad at first but in the evening I tried watching some TV programmes on the iPad with headphones – trying to listen to the TV in the living room as fruitless, with all the sound becoming a bit of a mush and any dialogue being very difficult to make out – and while the headphones on the iPad worked ok at first, after a while I felt my right ear gradually close up with whatever was still blocking much of it. So that was that.
I’m now putting drops in several times a day in preparation for round two with the nurse later in the week. Sigh.
That had nothing whatsoever to do with photography, but a photo you shall get nontheless. Not of the inside of my ears thankfully, but some dried grasses that I photographed a few weeks ago.
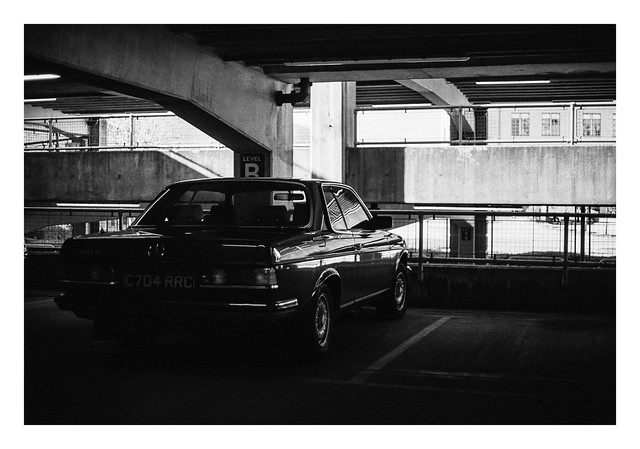
After arriving back at the carpark following a walk the other week, I saw this old Mercedes in one of the other bays. I liked the low key look it had, with subtle reflections from the bright shafts of light coming from the centre of the building, but wasn’t convinced that the picture would turn out ok. I was wrong I think, and it turned out better than I might have hoped given the conditions and slow shutter speed used.
Time seems to have gotten away from me today and I don’t have time to write much. Still, the fires of the blog need to be fed and the fuel today will be these two photographs of canal narrowboats. A lot of the narrowboats at Victoria Quays seem to be permananent fixtures that I’ve never seen move – basically floating homes – and I’m sure that I’ve photographed many of them on more than one occasion.
These two shots came out quite nicely though, I think.
One of my biggest issues with colour film is, well… the colour. Getting the darned stuff to look “right” is a test for my patience and also my sanity it can seem. Even when I get it looking right, a later glance reveals that I was completely incorrect and it looks terrible. How much of this is down to the actual results of my efforts (or the lab’s) and how much is down to the obsessive perfectionism that my brain likes to lay on me from time to time is up for debate.
I’ve gone through a number of iterations when it comes to scanning colour film negatives over the past five or six years. When I first began scanning my own film, my only option was my Epson V550 and the Espsonscan software that came with it. This gave passable results but not ones I was ever truly happy with. Colours would look “off” sometimes, with odd colour casts which would differ from film to film. I tried using ColorPerfect as a Photoshop plugin, which addmitedly helped (a bit) but also seemed to render shadow areas full of horrible looking noise.
Later, when I got my Plustek 35mm scanner, it came with a copy of Silverfast, so I tried that with it’s built-in film profiles. While I was able to get better results – and in some cases ones I was quite happy with – they still didn’t look right, no matter how I played with the settings.
So then I tried Vuescan. Again, never quite right (although it does a great job on 35mm slides).
I then decided to start getting my colour film developed by a lab that provided scans at a reasonable price. There was an additional cost for posting my film off, and a delay while I waited for the results, but on the whole the scans were nice, if perhaps a little warm looking (the lab would have changed that had I asked though). For a while I was happy, but the thing that put me off in the end was the resolution of the scans. While 35mm was acceptable, they used the same “x pixels on the short side” ratio whether it was a 35mm or medium format negative, leading to the frustrating situation where a 6×6 120 film negative would come back with a smaller scan than a 35mm image. So I went back to using my local lab and scanning them myself again. This decision was made mostly when I discovered Grain2Pixel.
Grain2Pixel – a free Photoshop Plugin – converts linear scans to positives. Here, at last, I thought I had found THE solution. It gave me the best results I’d seen so far… most of the time anyway. Some films, unfortunately, it struggled with (for me at least), particularly Kodak Portra, always giving the images a blue cast that was difficult for me to remove satisfactorily. With a lot of faffing about in Lightroom I could get them close to where I wanted, but I was still unsatisfied, and there would always be a few problem negatives that seemed to actively reject giving anything close to accurate colours.
Negative Lab Pro (NLP) has probably been the go-to solution for scanning colour film negatives for a few years now. I’d played with the trial vesion before but not been any more satisfied with the results than from Grain2Pixel, so never paid for the license. Last week though, I decided to have another go. This time I spent much more time understanding how it worked and, lo-and-behold, after RTFM’ing I got much better results. After playing with the 12 free conversions that you get with the trial version, I decided to bite the bullet and put my hand in my pocket for the full version.
This week I’ve been scanning a variety of negatives, using Vuescan to create a RAW DNG file of the images, and then converting them in Negative Lab Pro. I’ve mostly been happy with the results – particularly some Portra 400 negatives that I’m very pleased with (see examples below).
This is a Noritsu lab scan of a 35mm Portra 400 negative.And this is my Plustek 8100 scan, converted in Negative Lab Pro (with a few minor lightroom tweaks to add a touch more contrast). It has considerably higher resolution than the lab scan.And, for the sake of completeness, this is the unedited scan straight from Negative Lab Pro (althougth I obviously made tweaks during the actual conversion process).
However, I’ve spent most of my time playing with a set of Portra 160 negatives that were exposed about a year ago and which I had been unable to get results that I was truly convinced by. Grain2Pixel didn’t give me the results I wanted, nor did Vuescan, and it was my old friend EpsonScan that had given me the best result (although still not good results). So. I’ve re-scanned the negs, got the RAW DNGs, and been messing with them in NLP. The good thing about NLP is that it’s non-destructive. I can un-convert the original file back to a negative and re-convert it using different settings. This gives a lot of scope for experimentation to get a look I’m happy with. I’m still not sure I’m there with this roll of film yet, but I’m happier than I was before.
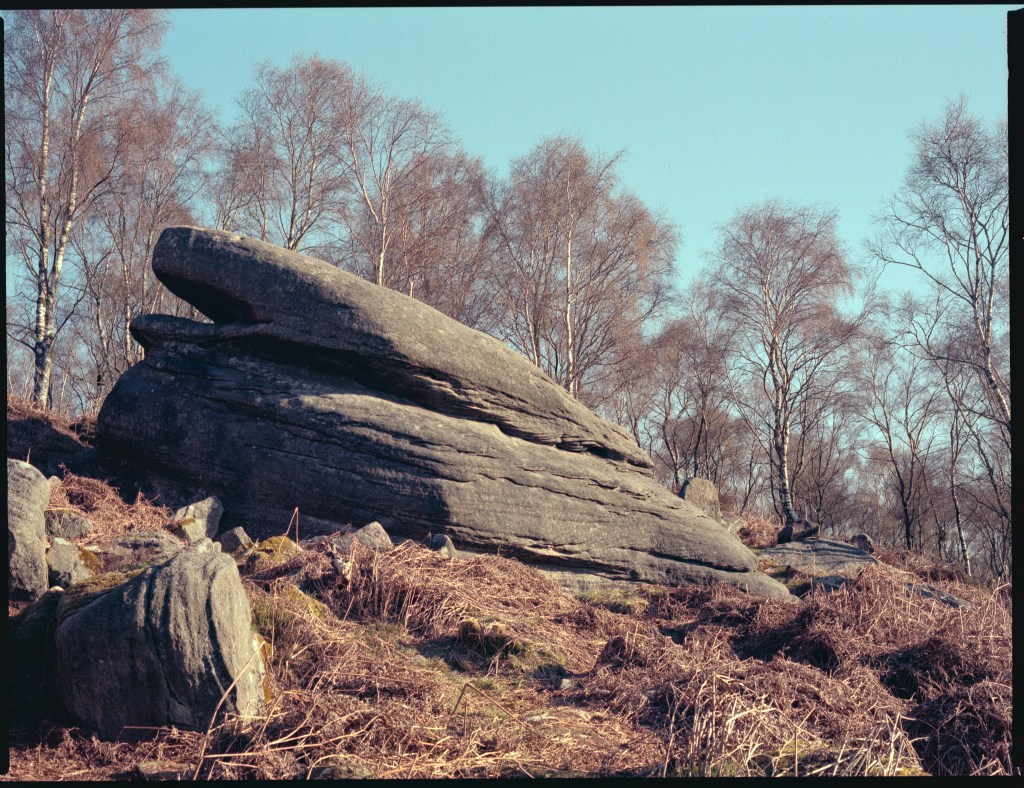
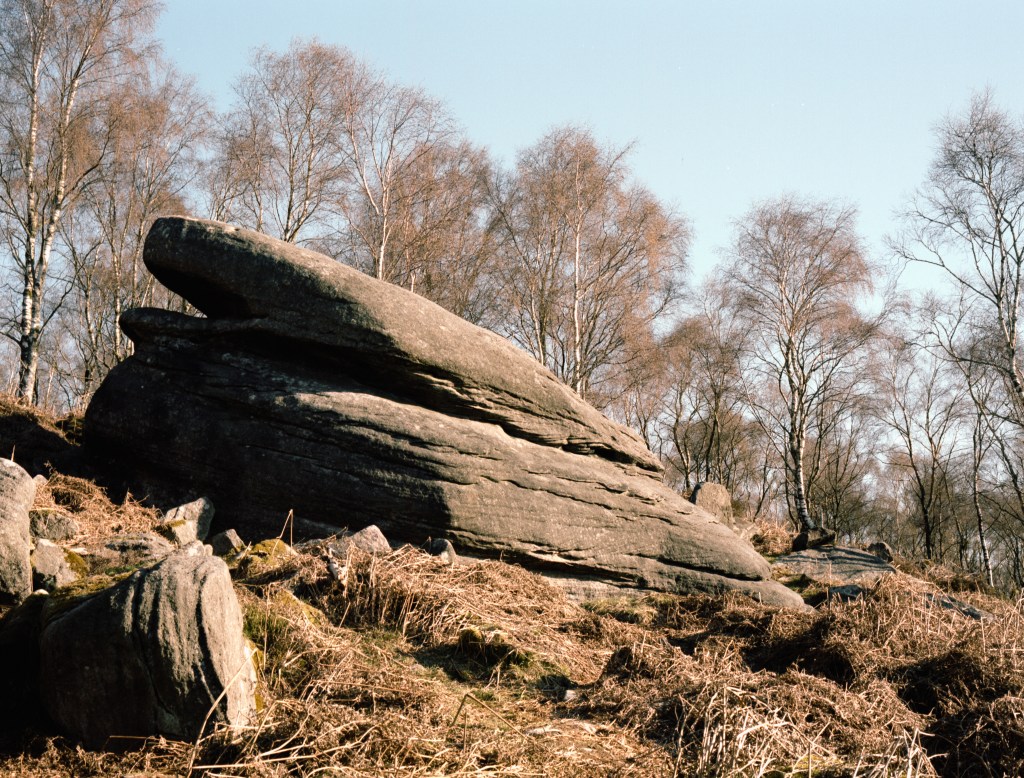
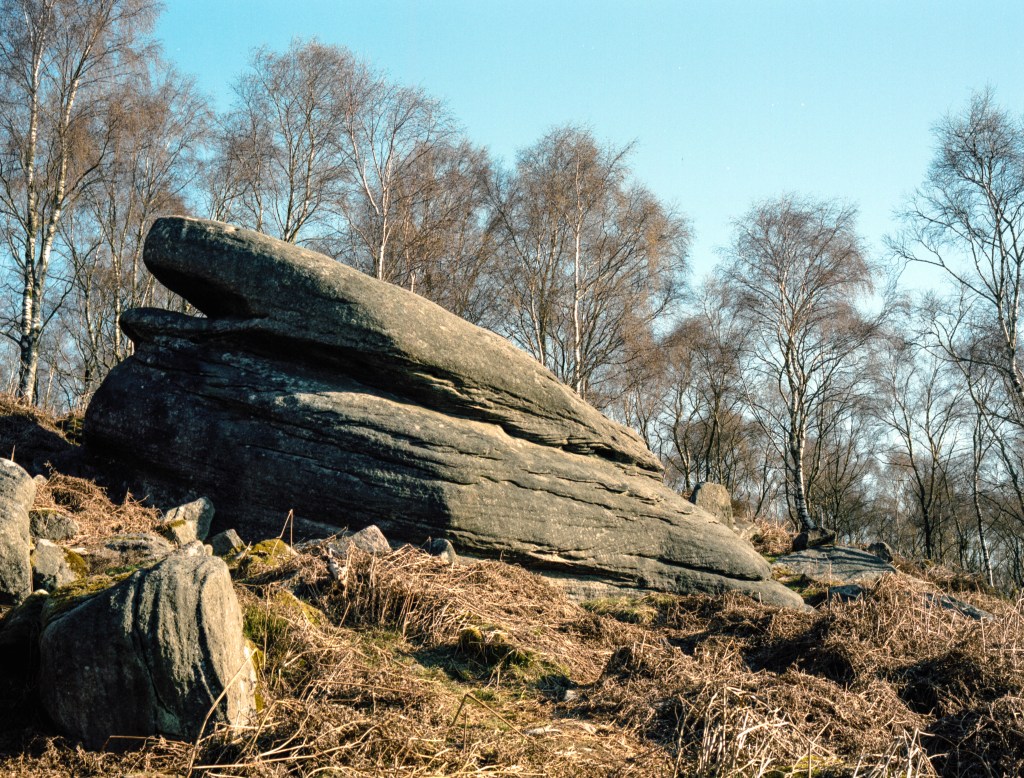
The first shot on the roll was the one that gave me the most headaches – a photograph of a large gritstone boulder in front of some silver birch trees, lit my bright early morning light. The Epsonscan result looked wrong – all cyan and brown, but not in a subtle way. The first NLP version looked better intitially, although maybe still not right. My second attempt with NLP using a different scanner profile and different tweaks was much better though. Here are the three versions (so far!):
My initial Epsonscan attempt. It looks off. Admitedly, more tweaking in Epsonscan might fix this, but it was beyond my talents and patience.The first Negative Lab Pro attempt. Better, but still not right.My latest Negative Lab Pro attempt. I’m not saying it’s perfect, but this one feels much more natural to me.
I think, at the end of the day, I’m never going to get a “perfect” set of colours. There are too many variables at stake. What I need to do is nail a workflow that allows me to get colours that I like on a consistent basis. I think that this is the most difficult part of all, but the journey continues. Now I plan on re-scanning a bunch of different film stocks to see how NLP compares with my earlier scans. Maybe another post at some point…